Mastering Airplane Drawing: Your Ultimate Guide To Soaring Art
Have you ever wanted to draw an airplane, that magnificent machine that defies gravity and soars through the skies? Perhaps you've watched a plane fly overhead, leaving a trail of white against the blue, and felt an urge to capture that moment on paper. Learning how to draw an airplane is a great topic for kids and adults alike, sparking imagination and a sense of accomplishment. It’s easier than ever to learn how to draw an airplane with this comprehensive guide, crafted for anyone who adores drawing and dreams about soaring through the skies.
This guide is designed to transform your tentative scribbles into confident aviation art. Whether you're a complete beginner or looking to refine your skills, we'll embark on a drawing adventure together. I’ll walk you through every step, ensuring we have heaps of fun on our journey. By the close of our tailored tutorials on how to draw an airplane, you’ll have leveled up from tentative scribbles to confident aviation art. So, grab your pencils, paper, and let’s bring these magnificent flying machines to life on your canvas!
Table of Contents
- Why Learn Airplane Drawing?
- Essential Tools for Your Aviation Art
- Getting Started: Basic Principles of Airplane Drawing
- Step-by-Step Guide: Drawing a Simple Passenger Jet
- Advanced Techniques and Details
- Exploring Different Types of Aircraft
- Resources for Aspiring Aviation Artists
- Elevating Your Art: From Beginner to Pro
- Frequently Asked Questions about Airplane Drawing
- Conclusion
Why Learn Airplane Drawing?
Drawing is more than just putting lines on paper; it's a powerful tool for developing creativity, improving motor skills, and fostering patience. When you learn how to draw an airplane, you're not just creating an image; you're engaging with concepts of aerodynamics, engineering, and the sheer wonder of flight. For children, it's an exciting way to connect with the world around them, transforming abstract ideas into tangible art. For adults, it can be a meditative escape, a way to unwind and focus on a satisfying creative pursuit. The joy of seeing a detailed aircraft emerge from simple strokes is incredibly rewarding. It builds confidence and encourages a deeper appreciation for design and mechanics. Moreover, the subject of airplanes offers endless possibilities, from sleek modern jets to vintage biplanes, each presenting its own unique artistic challenge and charm. This artistic journey is about exploration, understanding, and ultimately, bringing your vision of flight to life.
- Marie Temara
- Rik Estrada Larry Wilcox
- Emily Compagno Age
- Aishah Sofey Erome The Rising Star In The Digital Age
- Rhea Ripley
Essential Tools for Your Aviation Art
Before we dive into the specifics of how to draw an airplane, let's talk about the basic tools you'll need. The beauty of drawing is that you don't require an extensive, expensive kit to get started. Simplicity is key, especially for beginners. Here's a rundown of the essentials:
- Pencils: A good set of drawing pencils with varying lead hardness (e.g., HB, 2B, 4B) will allow you to create different line weights and shading. An HB pencil is great for initial sketches, while softer leads like 2B or 4B are perfect for darker lines and shadows.
- Paper: Any standard drawing paper will do. However, if you plan to do more detailed work or use ink, a slightly thicker paper (like Bristol board or cartridge paper) can prevent bleed-through and withstand more erasing.
- Eraser: A good quality kneaded eraser or a plastic eraser is indispensable. Kneaded erasers are fantastic for lifting graphite without damaging the paper, while plastic erasers are excellent for precise corrections.
- Ruler: While freehand drawing is encouraged, a ruler can be very helpful for drawing straight lines, especially for the fuselage and wings, ensuring accuracy in your initial setup.
- Sharpener: Keep your pencils sharp! A sharp point allows for precise lines and details, which are crucial when learning how to draw an airplane.
- Optional: If you want to add color, consider colored pencils, markers, or even watercolors. For outlining, a fine-point black pen can make your airplane drawing pop.
Having these basic tools ready will set you up for success and allow you to focus entirely on the drawing process itself.
Getting Started: Basic Principles of Airplane Drawing
Every great drawing begins with understanding fundamental shapes and perspectives. When you set out to learn how to draw an airplane, it's not about replicating every minute detail immediately, but rather about capturing the overall form and essence. Think of the airplane as a collection of simpler geometric shapes that are then refined. This approach makes the process less daunting and more manageable, especially for beginners.
- Riley Green The Country Star Who Proudly Stands As A Trump Supporter
- Camilla Araujo Onlyfans Videos
- Sophie Rain Only Fans Leak
- Sophie Rain
- Shawn Killinger Husband Joe Carretta
Understanding Perspective: The 3/4 View
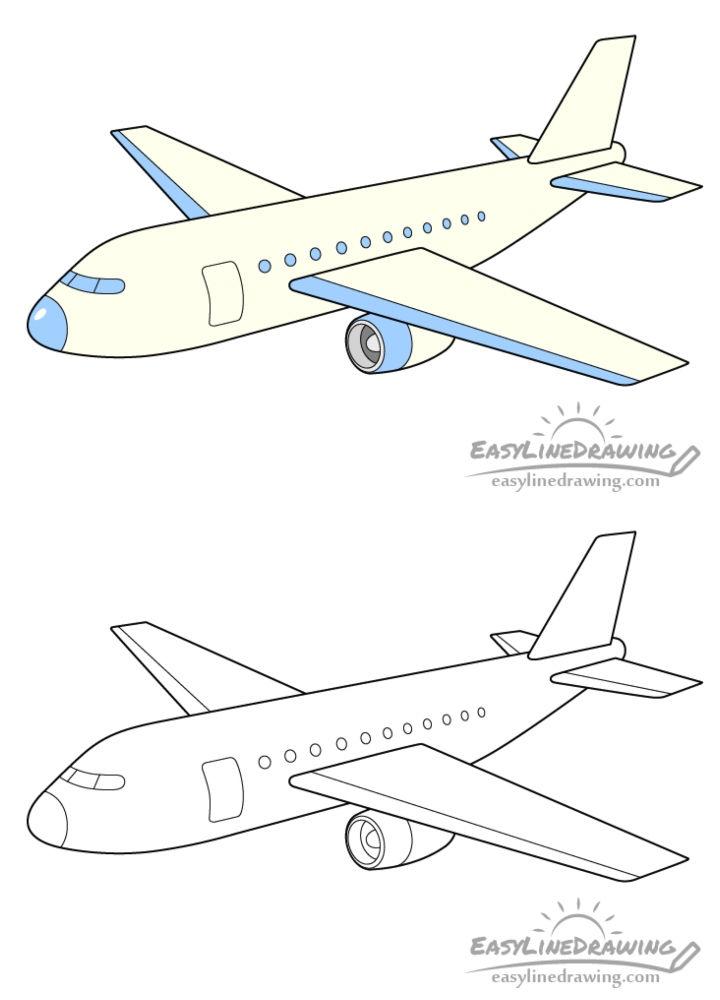
One of the most common and dynamic ways to draw an airplane is in a 3/4 view. This perspective gives the drawing depth and makes the aircraft appear to be flying towards or away from the viewer, rather than just a flat side or top view. This tutorial shows how to draw an airplane in 3/4 view. It includes simple drawing instructions along with step-by-step illustrated examples, making it easy to grasp.
To achieve a 3/4 view, you'll be drawing lines that recede into the distance, creating the illusion of three dimensions. This involves understanding how shapes appear shorter or narrower when viewed at an angle. Don't worry if it sounds complex; we'll simplify it into actionable steps. The airplane in this example is a simple passenger jet that should be fairly easy to draw, making it perfect for practicing this perspective.
Breaking Down the Shape: Fuselage First
The fuselage is the main body of the airplane, and it's the perfect starting point for your drawing. Think of it as the central anchor from which all other parts extend. When learning how to draw an airplane, starting with the fuselage helps you establish the overall size and orientation of your aircraft on the page.
To draw a plane, start by drawing a horizontal upward curve that looks like a hook at one end. This curve will form the top contour of the fuselage. Then, draw a horizontal downward curve on top of it to close the shape and make the body of the plane. This initial oval-like shape, reminiscent of an egg, is your foundational step. This approach simplifies the complex form of an airplane into manageable, easy-to-draw segments. It’s a technique that allows you to build confidence as you progress through each stage of your airplane drawing.
Step-by-Step Guide: Drawing a Simple Passenger Jet
Now, let's get into the practical steps of how to draw an airplane. We'll focus on a simple passenger jet, which is ideal for beginners due to its relatively straightforward design. Follow these steps carefully, and you’ll be amazed at what you can create.
The Initial Body Outline
As mentioned, we begin with the fuselage. This step is crucial as it sets the foundation for the entire aircraft. Remember, precision here will make subsequent steps much easier.
- Step 1: The Basic Fuselage Shape. Start by lightly sketching a long, somewhat oval shape. This will be the main body of your passenger jet. Think of it like a stretched egg or a sausage shape. Ensure it's not too wide or too narrow, aiming for proportions that look like a modern airliner. This initial outline should be very light, as you'll refine it later.
- Step 2: Refining the Fuselage. To draw a plane, start by drawing a horizontal upward curve that looks like a hook at one end. This defines the top of the plane's nose and begins to curve gently towards the tail. Then, draw a horizontal downward curve on top of it to close the shape and make the body of the plane. This creates the streamlined, aerodynamic form of the fuselage. At the rear, taper the fuselage slightly to prepare for the tail section.
- Step 3: Defining the Cockpit and Nose. At the front of your fuselage, gently curve the top line downwards to create the distinctive nose cone. Below this, draw a series of small, connected rectangles or a single curved shape for the cockpit windows. These details immediately make your drawing recognizable as an airplane.
Adding Wings and Tail
Once the fuselage is established, the wings and tail are the next major components that give the airplane its characteristic silhouette. These elements are critical for flight and for making your airplane drawing look realistic.
- Step 4: Sketching the Main Wings. Next, sketch 2 slanted rectangles on either side of the body, which will be the wings. These should extend outwards and slightly backwards from the middle to front section of the fuselage. Pay attention to the angle; they typically have a slight upward slant (dihedral) for stability. Make sure the wings are proportionate to the fuselage. Starting where you left off at the bottom of the fuselage, extend a straight line out at an angle, turn the corner, and draw a straight line back to the aircraft. This helps define the wing's leading and trailing edges.
- Step 5: Adding the Tail Section. The tail consists of the vertical stabilizer (fin) and horizontal stabilizers (tailplanes). Draw the vertical stabilizer as a large, somewhat triangular fin extending upwards from the rear of the fuselage. Then, draw the rear wing of the tail, which are the horizontal stabilizers, extending outwards from the base of the vertical fin. These should be smaller than the main wings but still clearly visible.
- Step 6: Drawing the Engines. Most passenger jets have engines mounted under the wings. Draw two oval or cylindrical shapes beneath each main wing. These should be proportional to the wings and fuselage. For a more realistic look, add a small intake at the front and a nozzle at the back of each engine.
- Step 7: Adding Landing Gear (Optional). If your airplane is on the ground or landing, you can add the landing gear. Draw two more legs for the helicopter (or airplane, in this case) extending from the underside of the fuselage, usually near the wings, and a smaller one from the nose. Add small circles for the wheels. If the plane is in flight, you can omit this step or indicate retracted gear.
- Step 8: Final Details and Refinements. Now it’s time to add the smaller, yet important, details. Add windows along the side of the fuselage – a series of small, evenly spaced circles or rectangles. Draw the passenger doors. You can also add navigation lights on the wingtips, and perhaps some subtle panel lines to give your airplane drawing more texture and realism. Erase any unnecessary guide lines and clean up your drawing.
By following these steps, you’ll have created a detailed and impressive airplane drawing. Remember, practice makes perfect. Don't be afraid to try drawing the same plane multiple times to improve your technique.
Advanced Techniques and Details
Once you've mastered the basics of how to draw an airplane, you might want to explore more advanced techniques to add depth, realism, and dynamism to your artwork. These techniques can truly elevate your airplane drawing from a simple outline to a captivating scene.
Capturing Movement: Planes Flying Through Clouds
One of the most effective ways to make your airplane drawing come alive is by depicting it in motion. A plane flying through clouds offers a fantastic opportunity to add atmosphere and a sense of scale. Learn how to draw an airplane in this simple drawing tutorial of a plane flying through clouds.
- Drawing Clouds: Clouds are soft, organic shapes. Use gentle, swirling lines to outline their forms. Remember that clouds aren't solid; they have lighter and darker areas. Use soft shading to create volume and depth, indicating where light hits them and where shadows fall. Think about how the plane would interact with the clouds – perhaps a wing disappearing slightly into a cloud, or a cloud trailing behind the engines.
- Perspective in Motion: To convey movement, you can add subtle motion lines behind the plane or engines. These are usually light, parallel lines that suggest speed. Consider the plane's angle – is it climbing, descending, or flying level? Adjusting the tilt of the fuselage and wings can dramatically change the perceived action.
- Lighting and Shading: Pay attention to your light source. If the sun is above and to the left, the top and left side of the plane will be brighter, while the underside and right side will be in shadow. Shading adds three-dimensionality and weight to your airplane drawing, making it look less flat. For planes, reflections on the metal surface can also add a lot of realism.
- Details that Matter: Small details like rivets, panel lines, and even the subtle curvature of the fuselage can make a big difference. These are often best added after the main shapes and shading are complete. Don't overdo it, though; sometimes less is more.
By incorporating these elements, your airplane drawing will not just be a static image, but a vibrant depiction of flight.
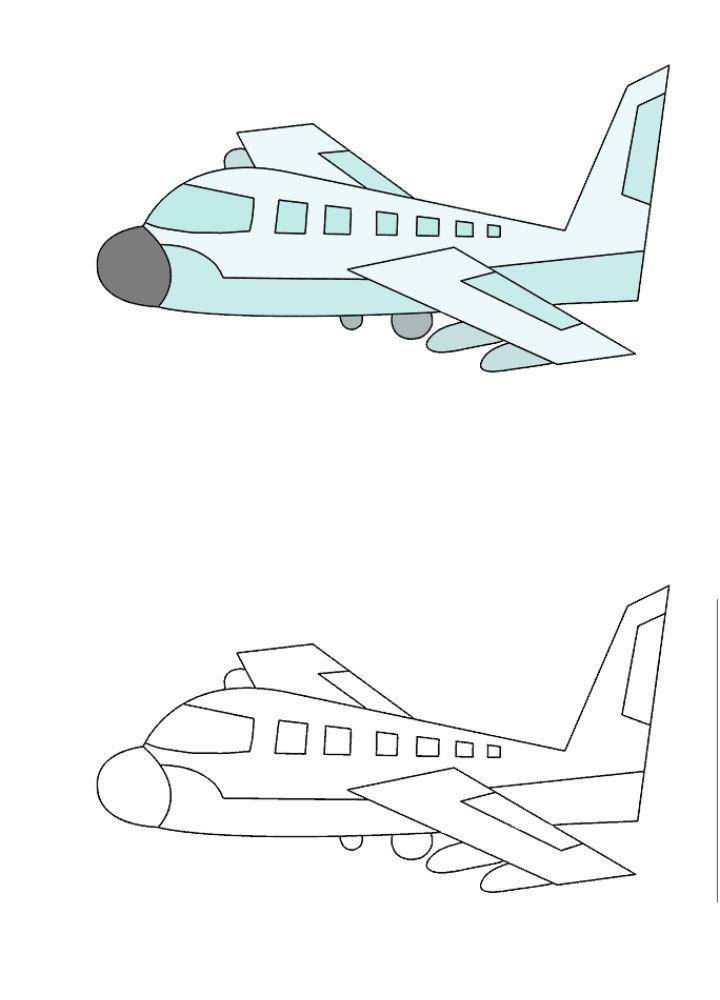
Exploring Different Types of Aircraft
The world of aviation is incredibly diverse, offering a plethora of aircraft types, each with its unique design and characteristics. Once you're comfortable with drawing a simple passenger jet, challenge yourself by exploring different models. This will not only expand your drawing repertoire but also deepen your appreciation for aeronautical design.
- Fighter Jets: These are sleek, agile, and often have sharp angles and aggressive profiles. They typically feature prominent air intakes, complex wing shapes (like delta wings or swept wings), and powerful engines. Drawing a fighter jet requires attention to speed lines and dynamic poses.
- Propeller Planes: From small private Cessnas to large cargo planes like the C-130, propeller planes offer a different set of drawing challenges. They have prominent propellers (which can be drawn blurred to indicate motion), often have fixed landing gear, and a more classic, rounded fuselage.
- Helicopters: While not fixed-wing aircraft, helicopters are fascinating to draw. They involve complex rotor systems (main rotor and tail rotor), skids or wheels for landing, and often a more compact body. The challenge lies in accurately depicting the intricate mechanics of the rotor blades. Remember the "draw two more legs for the helicopter" instruction from the data, which can be adapted for airplane landing gear too!
- Vintage Aircraft: Biplanes, early commercial airliners, and World War II fighters have a distinct charm. They often feature exposed engines, fabric-covered wings, and unique landing gear. Researching historical photos can provide excellent reference material for these.
- Spacecraft: Taking your aviation art to the next level, spacecraft like rockets, shuttles, or even futuristic starships offer limitless creative freedom. Our archives are the repository for more than two million aircraft and spacecraft technical and scale drawings, donated over the decades by manufacturers, the armed services, and by individual illustrators. This vast resource can be invaluable for accurate depictions or for inspiring your own designs.
Each type of aircraft presents a new learning opportunity in terms of form, function, and detail. Don't hesitate to find and download free graphic resources for airplane drawing vectors, stock photos & PSD files. Many are free for commercial use high quality images, providing excellent reference for your practice.
Resources for Aspiring Aviation Artists
In today's digital age, learning how to draw an airplane is more accessible than ever. There's a wealth of information and inspiration available at your fingertips. Leveraging these resources can significantly accelerate your learning curve and provide continuous motivation.
- Online Tutorials: Websites like easydrawforkids.com offer 6 easy methods for drawing an airplane, ensuring that even beginners can achieve impressive results. Sketchok's comprehensive guide can teach you how to draw planes and jets like a pro. These platforms often break down complex drawings into simple, manageable steps, complete with illustrated examples. Many provide step-by-step drawing tutorials that are super easy art tutorials for kids and adults, only requiring you to follow along.
- Video Guides: YouTube is a treasure trove of drawing tutorials. Search for "airplane drawing tutorial" and you'll find countless artists demonstrating techniques in real-time. This visual guidance can be incredibly helpful for understanding proportions, shading, and the flow of lines. Don't forget to subscribe for more drawing tutorials from artists you enjoy!
- Reference Images: As mentioned earlier, archives like those containing millions of aircraft and spacecraft technical and scale drawings are invaluable. You can also find top, side, and front view vector outline drawing plane on a blue background, which are excellent for understanding the plane's structure from all angles. High-quality stock photos of real airplanes are also fantastic for studying details, lighting, and textures.
- Drawing Books: Many books are dedicated to drawing vehicles, including airplanes. These often provide structured lessons and exercises that can help you build foundational skills.
- Online Communities: Joining online art communities or forums allows you to share your work, receive feedback, and connect with other aspiring and experienced artists. This can be a great source of encouragement and new ideas.
Stop by and grab yours for free! Many resources are freely available, making it easier than ever to dive into the world of airplane drawing.
Elevating Your Art: From Beginner to Pro
The journey from tentative scribbles to confident aviation art is a continuous one, filled with learning and practice. To truly elevate your airplane drawing skills, consider these tips:
- Practice Consistently: The old adage holds true: practice makes perfect. Regular drawing sessions, even short ones, will build your muscle memory and improve your eye for detail and proportion.
- Study Real Airplanes: Look at photographs, watch documentaries, or even visit an aviation museum. Observe how light hits different surfaces, the texture of the metal, and the intricate details of engines and landing gear. The more you understand the subject, the better you can draw it.
- Experiment with Mediums: Don't limit yourself to just pencils. Try charcoal for dramatic shading, ink for crisp lines, or watercolors for vibrant skies. Each medium offers a different feel and can push your creative boundaries.
- Learn from Feedback: Share your work with others and be open to constructive criticism. An outside perspective can highlight areas for improvement you might have overlooked.
- Don't Be Afraid to Fail: Every artist makes mistakes. See them as learning opportunities rather than setbacks. Embrace the process of trial and error.
- Enjoy the Process: Drawing should be fun! Maintain a sense of curiosity and passion for your subject. This enthusiasm will shine through in your artwork.
By the close of our tailored tutorials on how to draw an airplane, you’ll have leveled up from tentative scribbles to confident aviation art. Keep pushing your boundaries, and you'll be amazed at how far your skills can take you.
Frequently Asked Questions about Airplane Drawing
- Q: Is airplane drawing difficult for beginners?
- A: Not at all! While airplanes can look complex, breaking them down into simple shapes makes it very approachable. Many tutorials, including this one, are designed for beginners. It's super easy art tutorial for kids and adults, only follow me step by step, if you need more guidance, there are plenty of resources available.
- Q: What's the best way to start drawing an airplane?
- A: The best way to start is by focusing on the main body (fuselage) first, using simple curves and an oval-like shape. Then, add the wings and tail. This builds the drawing from the ground up, ensuring good proportions.
- Q: How do I make my airplane drawing look realistic?
- A: Realism comes from accurate proportions, proper perspective (like the 3/4 view), and effective shading to create depth and volume. Adding small details like windows, doors, and panel lines also helps immensely.
- Q: Where can I find good reference images for airplane drawing?
- A: You can find reference images from various sources: online image searches, aviation websites, museum archives (like those with millions of technical drawings), and even by observing real planes at airports. Look for top, side, and front views to understand the full structure.
- Q: Can I use different art supplies for airplane drawing?
- A: Absolutely! While pencils are great for starting, you can experiment with colored pencils, markers, ink, or even digital drawing tools. Each medium offers a different aesthetic and can enhance your airplane drawing in unique ways.
Conclusion
Learning how to draw an airplane is a rewarding journey that combines artistic skill with an appreciation for engineering and flight. From understanding basic shapes and perspectives to adding intricate details and capturing movement, each step brings you closer to creating stunning aviation art. We've covered the essential tools, a step-by-step guide for a simple passenger jet, and explored advanced techniques to make your drawings truly soar.
Remember, this guide is crafted just for kids who adore drawing and dreaming about soaring through the skies, and it’s easy for all ages! You can follow along and draw your own aircraft, and it’s easy for all ages! The key is consistent practice, a willingness to experiment, and the joy of creation. So, keep sketching, keep exploring, and keep bringing these magnificent flying machines to life on your canvas. We hope you've enjoyed this comprehensive guide on how to draw an airplane. We encourage you to share your creations in the comments below, or tell us what other drawing tutorials you'd like to see next. Happy drawing!
- Barron Trump Illness The Facts Speculations And Everything You Need To Know
- How Old Is Chino Alex
- Jd Vance Meme
- Judy Blooms
- Lily Phillips World Record Video
20 Easy Airplane Drawing Ideas - How to Draw a Plane
20 Easy Airplane Drawing Ideas - How to Draw a Plane

Airplane Line Drawing at PaintingValley.com | Explore collection of
