Mastering The Perfect Homemade Strawberry Syrup Recipe
Few things capture the essence of summer quite like the vibrant flavor of fresh strawberries, and transforming them into a luscious homemade strawberry syrup recipe is an experience every home cook should savor. This delightful concoction is not just a sweet addition to your pantry; it's a versatile ingredient that can elevate everything from your morning pancakes to sophisticated evening cocktails. Forget store-bought alternatives that often taste artificial; with just a few simple ingredients and a bit of time, you can create a smooth, thick, and intensely fruity syrup that bursts with the authentic taste of summer berries.
Whether you're looking to drizzle it over pancakes, waffles, or even ice cream for a burst of fresh, fruity flavor, or seeking a key ingredient for your favorite drinks and desserts, learning how to make this homemade strawberry syrup is a culinary game-changer. This guide will walk you through every step, ensuring your syrup is perfect for adding to your favorite drinks, topping pancakes or waffles, or drizzling over ice cream, making it a true staple in your kitchen.
Table of Contents
- Why Make Your Own Strawberry Syrup?
- Understanding the Core Ingredients for Your Strawberry Syrup Recipe
- The Classic Strawberry Syrup Recipe: A Step-by-Step Guide
- From Syrup to Simple Syrup: Adjusting Your Strawberry Creation
- Canning and Storing Your Homemade Strawberry Syrup Safely
- Troubleshooting Common Strawberry Syrup Challenges
- Creative Ways to Enjoy Your Homemade Strawberry Syrup
- Beyond the Basics: Elevating Your Strawberry Syrup Experience
Why Make Your Own Strawberry Syrup?
In a world brimming with convenient, pre-packaged goods, one might wonder why dedicate time to crafting a homemade strawberry syrup recipe. The answer lies in the unparalleled quality, control, and sheer joy that comes from creating something truly special from scratch. When you make your own, you're not just preparing food; you're engaging in a culinary art that yields superior results in every aspect.
The Unmatched Flavor of Homemade
The most compelling reason to make your own strawberry syrup is undoubtedly the flavor. Unlike commercial syrups, which often rely on artificial flavors, high-fructose corn syrup, and preservatives, homemade versions are a pure expression of the fruit itself. When you cook the strawberries down until they break open and release their juices, the syrup truly captures the strawberry flavor, making it perfect for adding taste to tons of dishes. You'll notice a significant difference – a brighter, more authentic berry taste that can only come from fresh, or even frozen, fruit. This natural intensity means your homemade syrup tastes like fresh summer berries instead of like jam, offering a nuanced sweetness that elevates any dish it touches. The ability to control the sweetness level also allows you to tailor the syrup to your personal preference, ensuring it’s never cloyingly sweet but perfectly balanced.
Versatility Beyond Your Wildest Dreams
A homemade strawberry syrup is incredibly versatile. While it's commonly known for its role as a pancake or waffle topping, its applications extend far beyond breakfast. Use it for drinks, desserts, waffles, and more. It makes a lovely addition to cocktails and mocktails, transforming a simple seltzer into a refreshing strawberry spritzer or a classic margarita into a fruity delight. Imagine a glass of homemade strawberry lemonade on a hot day, or a dollop of this vibrant syrup drizzled over a scoop of vanilla ice cream or a bowl of yogurt. It's the best syrup for french toast, pancakes, for drinks, and makes the perfect strawberry sauce for dessert. This easy strawberry syrup recipe is also great for a quick strawberry shortcake, proving its adaptability in various culinary scenarios. With seasonal strawberries at their peak, it's the perfect time to whip up this delightful concoction that only requires 3 basic ingredients, bursting with flavor and incredibly easy to make, this vibrant syrup will elevate drinks and desserts to a whole new level of deliciousness.
Understanding the Core Ingredients for Your Strawberry Syrup Recipe
At its heart, a classic strawberry syrup recipe is remarkably simple, typically requiring just a few key ingredients. The beauty of this simplicity is that the quality of your ingredients directly impacts the final product, so choosing wisely is paramount.
- Kiara Peach
- Is Bobby Brown Still Alive
- Bocil Sotwe
- How Old Is Chino Alex
- Ola Alphy The Rising Star You Need To Know About
- Strawberries: The star of the show. You can use either fresh or frozen berries. Fresh, local, in-season strawberries will yield the most vibrant flavor. If using fresh, ensure they are ripe, sweet, and free from blemishes. If using frozen, there's no need to thaw them beforehand; they can go straight into the pot. The quantity of strawberries will dictate the intensity of the berry flavor in your syrup.
- Sugar: Granulated white sugar is the standard choice. It dissolves easily and provides the necessary sweetness and contributes to the syrup's texture and shelf life. The amount of sugar can be adjusted to your taste, but it's crucial for preserving the syrup if you plan to store it for an extended period.
- Water: Water helps dissolve the sugar and allows the strawberries to cook down properly, releasing their juices without scorching. The ratio of water to sugar and berries will determine the final consistency of your syrup.
- Lemon Juice (Optional, but Recommended): A squeeze of fresh lemon juice is a secret weapon for many fruit-based recipes. To brighten up the syrup and bring out the berry flavor, consider adding a squeeze of fresh lemon juice. Depending on the berries, this helps if the syrup tastes a bit flat. It also adds a touch of acidity that balances the sweetness and helps preserve the vibrant red color of the syrup. For canning, lemon juice is often a non-negotiable ingredient, especially if you're using a water bath canner, as it ensures proper acidity for safe preservation. For jars, just use ½ teaspoon lemon juice.
This simple combination of ingredients, when prepared correctly, forms the foundation of an exquisite homemade strawberry syrup. With only 4 ingredients it's so quick to make, proving that gourmet results don't always require complex lists.
The Classic Strawberry Syrup Recipe: A Step-by-Step Guide
Making a smooth and thick strawberry syrup with only two or three ingredients in 15 minutes is entirely achievable. This process is straightforward and yields a rich, flavorful syrup that will quickly become a household favorite. Get ready to savor the sweet taste of summer with this mouthwatering recipe for homemade strawberry simple syrup.
Preparing Your Berries
The first step to a fantastic strawberry syrup recipe is proper berry preparation. If using fresh strawberries, gently wash them under cool running water. Hull the strawberries by removing the green tops and any white core. You can then chop them into smaller pieces. This helps them break down more easily during cooking, releasing their vibrant juices. If using frozen berries, no special preparation is needed; they can be added directly to the pot.
Cooking and Thickening the Syrup
Here’s how to make this homemade syrup:
- Combine Ingredients: In a pot over medium heat, add the sugar and chopped strawberries. If your recipe calls for water, add it now.
- Simmer and Stir: Bring the mixture to a gentle simmer, stirring occasionally to help the sugar dissolve. As the mixture heats, the strawberries will begin to soften and release their juices. You cook the strawberries down until they break open and release their juices, then it thickens into a sauce.
- Cook Until Berries Break Down: Continue to simmer for about 10-15 minutes, or until the strawberries are very soft and have completely broken down. The mixture should resemble a thick sauce. This step is crucial for extracting maximum flavor and color.
- Strain for Smoothness: This is where you decide on your desired texture. For a smooth, clear syrup, you'll need to strain the mixture. Place a fine-mesh sieve over a large bowl. Carefully pour the cooked strawberry mixture into the sieve. Allow the liquid to drain naturally. Resist the urge to press the berries through the sieve; if you press the berries, the syrup will be cloudy in color. For a clear, jewel-toned syrup that truly captures the essence of fresh summer berries, simply let gravity do the work. This method ensures that you extract the fresh juices without any pulp, resulting in a syrup that tastes like fresh summer berries instead of like jam.
- Optional: Thicken Further: If your strained syrup isn't as thick as you'd like, you can return it to the pot and simmer it gently for another 5-10 minutes, stirring occasionally, until it reaches your desired consistency. Be mindful that it will thicken further as it cools.
- Add Lemon Juice (Optional): Once the syrup has reached its desired consistency, remove it from the heat. If using, stir in the fresh lemon juice. This brightens the flavor and adds a lovely tang.
- Cool and Store: Let it cool slightly and enjoy immediately or store it. Place leftover syrup in an airtight container in the fridge. It will keep well for 2-3 weeks.
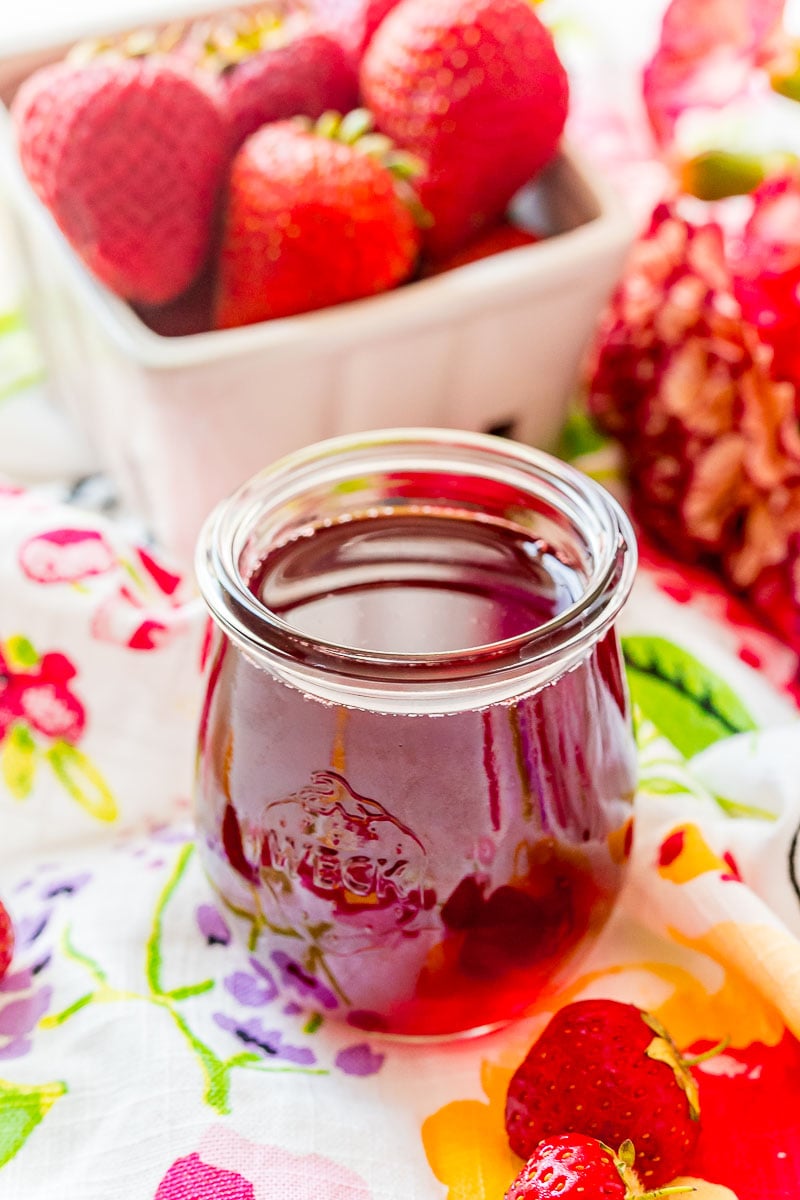
This homemade strawberry syrup recipe is a sweet red liquid made from fresh strawberries, sugar, and water, offering a delightful way to preserve the taste of summer.
From Syrup to Simple Syrup: Adjusting Your Strawberry Creation
While the classic strawberry syrup recipe described above yields a thick, rich sauce perfect for topping, there's also a variation known as strawberry simple syrup. Understanding the difference and how to achieve each consistency is key to maximizing the versatility of your homemade creation.
Strawberry simple syrup is thinner and a bit sweeter, perfect for flavoring cocktails like a margarita or for making strawberry lemonade. The primary difference lies in the proportion of strawberries and water, and sometimes, the cooking method.
To modify this into a strawberry simple syrup recipe, you'll typically use a higher ratio of water to berries and sugar, and the cooking time might be shorter, focusing more on infusing the liquid with flavor rather than breaking down the fruit into a thick sauce. For example, to modify this into a strawberry simple syrup recipe, reduce the amount of strawberries to ½ pound (225g) and add 1 cup (240ml) water, alongside the usual sugar. This results in a lighter, more pourable consistency ideal for beverages.
While the recipe above is for a cooked strawberry syrup, you can also make fresh strawberry simple syrup with no cooking and no time spent waiting for it to cool. This "no-cook" method typically involves macerating fresh strawberries with sugar, then straining the resulting liquid. While quicker, it might not extract as much deep flavor as the cooked version and generally has a shorter shelf life.
The choice between a thick strawberry syrup and a thinner strawberry simple syrup depends entirely on its intended use. For pancakes and desserts, the rich, cooked syrup is often preferred. For happy hour, this strawberry simple syrup is perfect for adding to your favorite fruity cocktails. Made with just 3 ingredients, it’s a mixed drink staple if you love strawberries. Understanding these nuances allows you to tailor your homemade strawberry creation to perfection, ensuring it meets your specific culinary needs.
Canning and Storing Your Homemade Strawberry Syrup Safely
One of the greatest advantages of making your own strawberry syrup is the ability to preserve it, allowing you to enjoy the taste of summer long after the season ends. Proper canning and storage are crucial for ensuring the safety and longevity of your homemade syrup. This is where the principles of YMYL (Your Money or Your Life) come into play, as food preservation requires adherence to established safety guidelines to prevent spoilage and foodborne illnesses.
Learn how to make and can your own strawberry syrup with fresh local berries, and extend its shelf life significantly. The most common and recommended method for canning fruit syrups is the water bath canning method, which is suitable for high-acid foods like fruit and fruit syrups. The acidity, often boosted by added lemon juice, is a key factor in safe water bath canning.
Steps for Safe Water Bath Canning:
- Prepare Your Jars: Start with clean canning jars (pint or half-pint are ideal for syrup), lids, and bands. Sterilize your jars by boiling them in water for at least 10 minutes, or by running them through a hot cycle in your dishwasher. Keep them hot until ready to fill. Lids should be simmered in hot (not boiling) water to soften the sealing compound.
- Fill Jars: Strawberry syrup is easiest to can when the syrup is still piping hot from being on the stove. Carefully ladle the hot syrup into the hot sterilized jars, leaving about ¼ inch of headspace (the space between the syrup and the rim of the jar).
- Add Lemon Juice (Crucial for Safety): If your recipe doesn't already include it, add ½ teaspoon of bottled lemon juice per pint jar (or ¼ teaspoon per half-pint jar) directly into the jar before adding the syrup. Bottled lemon juice has a standardized acidity, which is essential for safe canning.
- Remove Air Bubbles: Use a non-metallic utensil (like a plastic chopstick or rubber spatula) to gently remove any air bubbles from the jars.
- Wipe Rims and Apply Lids: Wipe the rims of the jars clean with a damp cloth. Any syrup residue on the rim can prevent a proper seal. Place the hot lids on the jars, and then screw on the bands finger-tight (just until resistance is met).
- Process in Water Bath Canner: Place the filled jars into a water bath canner, ensuring they are fully submerged by at least 1 inch of water. Bring the water to a rolling boil. Once boiling, process pint jars for 10 minutes (adjusting for altitude if necessary).
- Cool and Check Seals: After processing, turn off the heat, remove the canner lid, and let the jars sit in the hot water for 5 minutes before carefully removing them to a wire rack. Allow them to cool undisturbed for 12-24 hours. Once cool, check the seals by pressing on the center of each lid; it should not flex. If a lid doesn't seal, refrigerate that jar and use its contents within a few weeks.
Properly canned strawberry syrup can be stored in a cool, dark place for up to a year. For un-canned syrup, place leftover syrup in an airtight container in the fridge, where it will last for 2-3 weeks. Always label your jars with the date of canning to keep track of freshness. Adhering to these guidelines ensures that your homemade strawberry syrup remains a safe and delicious treat for months to come.
Troubleshooting Common Strawberry Syrup Challenges
Even with a straightforward strawberry syrup recipe, you might encounter a few common issues. Knowing how to troubleshoot them ensures a perfect batch every time.
- Syrup is Too Thin: If your syrup seems too watery after cooling, it simply means it needs to be cooked down further. Return the strained syrup to the pot and simmer it gently over medium-low heat. Stir occasionally to prevent scorching. The syrup will thicken as water evaporates. Remember, it will thicken considerably more once it cools, so err on the side of slightly thinner when hot.
- Syrup is Too Thick/Jam-like: Conversely, if your syrup is too thick or has the consistency of jam, it means too much water has evaporated. You can easily remedy this by adding a small amount of hot water (start with 1-2 tablespoons) and stirring it into the syrup over low heat until you reach your desired consistency.
- Syrup is Cloudy: As mentioned earlier, if you press the berries through the sieve, the syrup will be cloudy in color. This doesn't affect the flavor but impacts the aesthetic. To achieve a clear, vibrant syrup, resist the urge to press the fruit. Let gravity do the work, even if it takes a bit longer for all the liquid to drain.
- Lack of Bright Berry Flavor: If your syrup tastes a bit flat or lacks that punchy strawberry flavor, a squeeze of fresh lemon juice can work wonders. The acidity brightens the flavor profile and enhances the natural sweetness of the berries. You can add it at the end of the cooking process.
- Syrup Scorched/Burned: This usually happens if the heat is too high or the syrup isn't stirred frequently enough, especially as it thickens. Always use medium to medium-low heat and stir regularly. If it does scorch, unfortunately, the burned flavor will permeate the syrup, and it's best to discard it and start fresh.
By understanding these common pitfalls and their solutions, you can confidently tackle any issues that arise, ensuring your homemade strawberry syrup recipe consistently yields delicious results.
Creative Ways to Enjoy Your Homemade Strawberry Syrup
Once you've mastered the homemade strawberry syrup recipe, the possibilities for its use are virtually endless. This versatile condiment can transform everyday meals and drinks into extraordinary culinary experiences.
- Breakfast Bliss: This syrup is perfect for topping ice cream, yogurt, pancakes, waffles and more. Drizzle it generously over a stack of fluffy pancakes or crispy waffles. It's also the best syrup for french toast, adding a burst of fruity sweetness to your morning.
- Beverage Booster: Homemade strawberry syrup can be used for a number of purposes, and it is most commonly added to beverages and cocktails to give them a strong, sweet strawberry flavor. Try adding it to lemonade to make strawberry lemonade or seltzer to make a strawberry spritzer. It makes a lovely addition to cocktails and mocktails. When happy hour rolls around, this strawberry simple syrup is perfect for adding to your favorite fruity cocktails. Made with just 3 ingredients, it’s a mixed drink staple if you love strawberries.
- Dessert Dazzler: Elevate simple desserts with a generous pour. Drizzle it over vanilla ice cream, plain yogurt, or even a classic cheesecake. It makes the perfect strawberry sauce for dessert, and an easy strawberry syrup recipe is great for a quick strawberry shortcake. You can also use it to flavor whipped cream or as a glaze for pastries.
- Yogurt & Oatmeal Enhancer: Stir a spoonful into your morning oatmeal or plain Greek yogurt for a naturally sweetened, fruit-flavored breakfast.
- Salad Dressing Base: For a unique twist, whisk a small amount of strawberry syrup into a vinaigrette for a sweet and tangy salad dressing, especially delightful with spinach and goat cheese salads.
- Marinade Magic: A touch of strawberry syrup can add a surprising depth of flavor to marinades for chicken or pork, creating a sweet and savory glaze when grilled.
The richness of flavor that this homemade strawberry syrup brings truly captures the strawberry flavor, making it perfect for adding taste to tons of dishes. Experiment and discover your own favorite ways to incorporate this delightful syrup into your culinary repertoire.
Beyond the Basics: Elevating Your Strawberry Syrup Experience
While the classic homemade strawberry syrup recipe is a triumph in itself, there are always ways to experiment and personalize your creation, pushing the boundaries of flavor and texture. Think of your basic recipe as a canvas, ready for additional strokes of culinary genius.
- Herb Infusions: Consider infusing your syrup with fresh herbs during the cooking process. A sprig of fresh mint, a few basil leaves, or a sprig of rosemary can add an unexpected layer of complexity that complements the sweetness of the strawberries beautifully. Add the herbs during the simmering stage and remove them before straining.
- Spice It Up: For a warmer, more comforting flavor profile, a hint of spice can be transformative. A small piece of cinnamon stick, a few cardamom pods, or a pinch of black pepper (yes, pepper!) can create an intriguing contrast. These work particularly well if you plan to use the syrup in fall or winter desserts or warm beverages.
- Citrus Zest: Beyond lemon juice, consider adding the zest of an orange or lime to the cooking berries. The essential oils in the zest will infuse the syrup with a bright, aromatic quality that enhances the fruitiness without adding extra liquid.
- Vanilla Bean: For a luxurious touch, split a vanilla bean lengthwise and add it to the pot while the syrup simmers. The rich, creamy notes of vanilla are a classic pairing with strawberries and will elevate your syrup to gourmet status.
- Mixed Berry Blends: Don't limit yourself to just strawberries. Experiment with a combination of berries – raspberries, blueberries, or blackberries – to create a unique mixed berry syrup. Each berry will contribute its own distinct flavor, resulting in a more complex and nuanced syrup.
These additions can transform your standard strawberry syrup into something truly unique and tailored to your palate. By embracing these creative enhancements, you can continually discover new dimensions of flavor and ensure your homemade strawberry syrup recipe remains a source of culinary inspiration for all your favorite dishes and drinks.
Conclusion
Mastering the homemade strawberry syrup recipe is more than just learning to cook; it's about embracing the joy of creating something truly delicious and versatile from scratch. We've explored everything from the simple ingredients and step-by-step cooking process to the crucial aspects of safe canning and creative serving suggestions. This vibrant, intensely flavorful syrup, whether thick for drizzling or thin for cocktails, truly captures the essence of summer and offers endless possibilities for elevating your culinary creations.
By making your own, you gain control over the quality, sweetness, and purity of your ingredients, resulting in a product far superior to anything you can buy off the shelf. So, why wait? Gather your fresh or frozen berries, a bit of sugar, and water, and embark on this rewarding culinary journey. We encourage you to try this recipe and experience the difference firsthand. Share your creations and favorite uses for homemade strawberry syrup in the comments below – we'd love to hear from you! And if you found this guide helpful, don't hesitate to share it with fellow food enthusiasts or explore other delightful recipes on our site.
- Shawn Killinger Husband Joe Carretta
- Mayme Hatcher Johnson
- Is Bobby Brown Still Alive
- Who Is Ryan Vella
- Jase Robertson Kids

Easy Homemade Strawberry Syrup Recipe - Seanna's Kitchen
Strawberry Simple Syrup Recipe - Sugar and Soul

Strawberry Syrup Recipe Easy at Donald Harding blog
