Homemade Chocolate Syrup Recipe: Rich, Glossy, & Easy!
Are you tired of bland, store-bought chocolate syrup that tastes more like sugar water than rich cocoa? Imagine a world where every drizzle over your ice cream, every swirl in your coffee, and every glass of chocolate milk is infused with deep, authentic chocolate flavor. This dream is not only achievable but incredibly simple to make a reality right in your own kitchen. Learning how to master a classic chocolate syrup recipe is a game-changer, promising unparalleled taste and quality that will forever elevate your dessert and beverage game.
Forget the long ingredient lists and complicated steps. This comprehensive guide will walk you through everything you need to know to create a luscious, dark, and glossy chocolate syrup that’s far superior to anything you’ll find on supermarket shelves. From understanding the core ingredients to troubleshooting common issues and exploring endless creative uses, prepare to unlock the full potential of homemade chocolate goodness. Get ready to impress your family and friends with a simple yet profound culinary skill that truly makes a difference.
Table of Contents
- Why Homemade Chocolate Syrup Reigns Supreme
- Understanding the Core Ingredients for Your Perfect Chocolate Syrup Recipe
- The Classic 6-Minute Chocolate Syrup Recipe: Step-by-Step Guide
- Beyond the Basics: Elevating Your Homemade Chocolate Syrup
- Mastering Storage: Keeping Your Chocolate Syrup Fresh and Delicious
- Unleashing the Versatility: Creative Uses for Your Homemade Chocolate Syrup
- Troubleshooting Common Chocolate Syrup Recipe Issues
- The Science Behind the Syrup: Why This Recipe Works
Why Homemade Chocolate Syrup Reigns Supreme
There's a distinct satisfaction that comes with creating something delicious from scratch, and a homemade chocolate syrup recipe is no exception. While convenience often dictates our choices, the store-bought versions simply cannot compare in terms of flavor depth, quality of ingredients, or even cost-effectiveness in the long run. Many commercial syrups are laden with high-fructose corn syrup, artificial flavors, and preservatives that detract from the true essence of chocolate. When you make it yourself, you control every single ingredient, ensuring a purer, richer, and more authentic taste experience.
- Caitlin Clark Shower
- Miu Shiromine
- Paige Vanzant Leaked Nudes
- How Old Is Chino Alex
- Aishah Sofey Erome The Rising Star In The Digital Age
One of the most compelling reasons to embrace this culinary endeavor is that this recipe is not only easy to make, it's delicious and beats buying chocolate syrup hands down. You get to choose high-quality cocoa powder, adjust the sweetness to your preference, and even experiment with different flavor profiles. This level of customization is simply unavailable with pre-packaged options. Furthermore, the cost of raw ingredients like sugar, cocoa powder, and vanilla extract is often significantly less than purchasing bottled syrup over time, especially if you're a frequent user. The minimal effort required for such a superior product makes homemade chocolate syrup a truly rewarding kitchen project that enhances everything it touches.
Understanding the Core Ingredients for Your Perfect Chocolate Syrup Recipe
At the heart of every great chocolate syrup recipe lies a handful of simple, yet crucial, ingredients. Understanding their role is key to achieving that perfect balance of sweetness, richness, and glossy texture. While the basic formula is straightforward, variations in ingredient quality and type can significantly impact the final product. Learn how to make your own chocolate syrup with sugar, water, cacao powder, and vanilla extract, and discover how a few optional additions can elevate your creation even further.
The Sweet Foundation: Sugar
Sugar is not just for sweetness; it also contributes to the syrup's body and helps preserve it. Granulated sugar (sucrose) is the most common choice, dissolving easily to create a smooth consistency. For a deeper, slightly more complex flavor, some prefer to use a portion of brown sugar, which introduces subtle caramel notes. For those looking for alternatives, you could experiment with maple syrup or agave nectar, though these might alter the texture and require adjustments to the water content. The key is to find a balance that suits your palate without overpowering the chocolate.
The Liquid Base: Water
Water acts as the solvent, dissolving the sugar and allowing the cocoa powder to disperse evenly. The quality of your water can subtly affect the taste, so using filtered water is always a good idea if your tap water has a strong flavor. The amount of water determines the syrup's final consistency. Less water results in a thicker, more concentrated syrup, while more water yields a thinner, more pourable one. This simple ingredient plays a pivotal role in achieving the desired viscosity for your chocolate syrup recipe.
The Heart of Chocolate: Cacao or Cocoa Powder
This is where the magic happens. While often used interchangeably, there's a subtle difference between cacao powder and cocoa powder. Cacao powder is made from fermented, dried, unroasted cacao beans, retaining more nutrients and a slightly more bitter, intense flavor. Cocoa powder, on the other hand, is roasted at higher temperatures and often processed with an alkali (Dutch-processed) to reduce acidity, resulting in a darker color and mellower flavor. For a rich, dark, and glossy chocolate syrup, a good quality unsweetened cocoa powder (natural or Dutch-processed) is essential. Learn how to make your own homemade chocolate syrup with cocoa powder, sugar, water, salt and vanilla, and remember that the quality of your cocoa powder will directly translate to the depth of your syrup's chocolate flavor.
The Aromatic Enhancers: Vanilla, Salt, and Beyond
- Vanilla Extract: A touch of vanilla extract is crucial for rounding out the flavors and adding a warm, aromatic depth. It enhances the chocolate notes without making the syrup taste distinctly like vanilla. Use pure vanilla extract for the best results.
- Salt: A pinch of salt might seem counterintuitive in a sweet recipe, but it's a game-changer. Salt balances the sweetness and intensifies the chocolate flavor, making it pop. It's the secret ingredient that elevates good to great.
- Corn Syrup (Optional): For an extra glossy finish and to prevent crystallization, some recipes, like the one from Good Eats, Reloaded, incorporate a small amount of corn syrup. Learn how to make your own chocolate syrup with cocoa powder, sugar, water, corn syrup, vanilla and cardamom if you desire this professional sheen and smoother texture. It’s not strictly necessary but can make a noticeable difference in the final appearance and mouthfeel.
- Cardamom (Optional): This is where you can get creative. A hint of ground cardamom introduces a unique, exotic, and subtly spicy note that pairs beautifully with chocolate. Other optional additions include espresso powder (to deepen chocolate flavor), a pinch of cayenne pepper for a spicy kick, or even a drop of peppermint extract for a festive twist.
By understanding and carefully selecting these ingredients, you lay the groundwork for a truly exceptional homemade chocolate syrup recipe.
The Classic 6-Minute Chocolate Syrup Recipe: Step-by-Step Guide
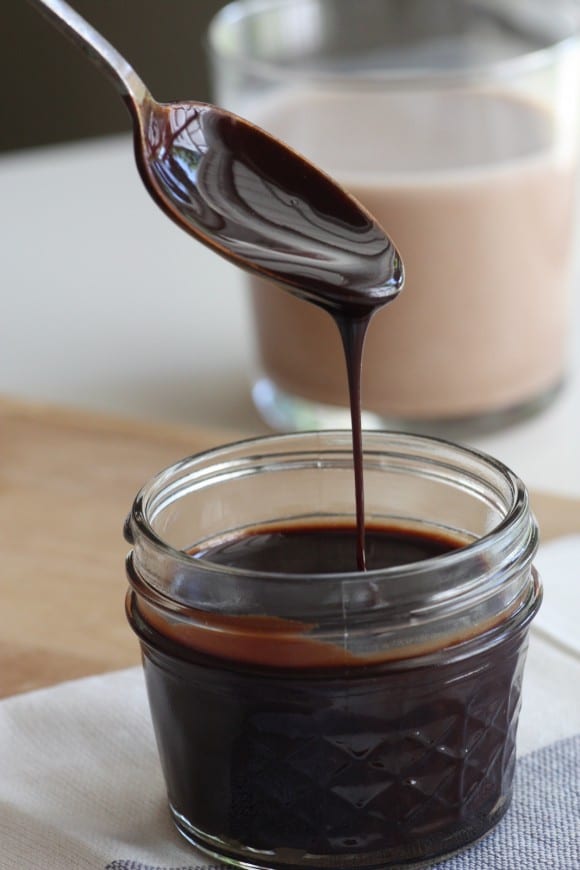
Now that we've covered the essential ingredients, it's time to bring them together to create your perfect homemade chocolate syrup. This recipe is designed for speed and simplicity, proving that you don't need hours in the kitchen to achieve gourmet results. This easy and delicious recipe is ready in 6 minutes and can be used for chocolate milk, ice cream, coffee, and more. While the active cooking time is minimal, allowing it to cool slightly will yield the perfect rich, dark, and glossy chocolate syrup.
Yields: Approximately 1.5 cups
Prep time: 2 minutes
Cook time: 4-6 minutes
Ingredients:
- 1 cup granulated sugar
- ½ cup unsweetened cocoa powder (natural or Dutch-processed, your preference)
- ¼ teaspoon salt (fine sea salt works best)
- 1 cup water
- 1 teaspoon pure vanilla extract
- Optional: 1 tablespoon light corn syrup (for extra gloss and smoothness)
Equipment:
- Medium saucepan
- Whisk
- Heat-proof jar or bottle for storage
Instructions:
- Combine Dry Ingredients: In a medium saucepan, whisk together the sugar, cocoa powder, and salt. Whisking them dry first helps to break up any lumps in the cocoa powder and ensures a smooth syrup. This is a critical step to avoid a grainy texture.
- Add Liquids: Gradually add the water to the dry mixture, whisking continuously to incorporate. If using corn syrup, add it now as well. Continue whisking until the mixture is smooth and no dry lumps remain. It will look thin at this stage, but don't worry, it will thicken as it heats.
- Bring to a Simmer: Place the saucepan over medium heat. Bring the mixture to a gentle simmer, stirring frequently with your whisk. The key here is "gentle simmer" – you don't want a rolling boil, as this can cause the sugar to crystallize or the syrup to reduce too quickly. Continue to stir for about 3-5 minutes, allowing the sugar to fully dissolve and the cocoa to bloom, intensifying its flavor. You'll notice the mixture start to thicken slightly and become more cohesive.
- Remove from Heat & Add Vanilla: Once the syrup has simmered for the recommended time and has a slightly thickened consistency (it will thicken more as it cools), remove the saucepan from the heat. Stir in the vanilla extract. Adding vanilla after removing from heat preserves its delicate flavor, as high heat can diminish its aromatic qualities.
- Cool and Store: Allow the chocolate syrup to cool completely in the saucepan before transferring it to a clean, airtight jar or bottle. As it cools, it will continue to thicken to that perfect, pourable consistency. For best results, let it cool to room temperature before refrigerating. This entire process, from start to finish, including cooling, aligns with the idea of being able to learn how to make rich, dark, and glossy chocolate syrup with just 4 ingredients (or 5) in 10 minutes (including cooling time).
This simple chocolate syrup recipe provides a versatile base that you can use for countless applications, from beverages to desserts. Its ease of preparation makes it a staple in any kitchen.
Beyond the Basics: Elevating Your Homemade Chocolate Syrup
While the classic chocolate syrup recipe is a masterpiece in itself, there's always room for culinary exploration. Once you've mastered the fundamental technique, you can start experimenting with different flavor profiles and textures to truly make it your own. Elevating your homemade chocolate syrup is about understanding how small additions or adjustments can create entirely new sensory experiences.
Flavor Variations & Add-ins
The beauty of homemade is the ability to customize. Here are some ideas to infuse your chocolate syrup with exciting new dimensions:
- Espresso/Coffee: Add 1-2 teaspoons of instant espresso powder or strong brewed coffee along with the water. This deepens the chocolate flavor without making it taste distinctly like coffee, creating a more complex and sophisticated profile.
- Spicy Kick: For a Mexican hot chocolate vibe, add a pinch (⅛ to ¼ teaspoon) of cayenne pepper or chili powder along with the cocoa powder. Start small and adjust to your heat preference.
- Minty Fresh: Stir in ¼ to ½ teaspoon of pure peppermint extract (not flavoring) at the same time you add the vanilla. Perfect for holiday treats or a refreshing twist.
- Citrus Zest: A teaspoon of finely grated orange or tangerine zest simmered with the syrup can add a bright, aromatic counterpoint to the rich chocolate. Strain it out before storing if you prefer a smooth syrup.
- Nutty Notes: A few drops of almond extract can provide a lovely nutty undertone that complements chocolate beautifully.
- Boozy Bliss: Once the syrup has cooled, stir in a tablespoon or two of your favorite liqueur, such as Kahlua, Irish cream, rum, or bourbon. This is excellent for adult desserts or coffee drinks.
- Cardamom Infusion: As mentioned in some advanced recipes, a pinch of ground cardamom (⅛ teaspoon) can add a unique, warm, and slightly floral note. Learn how to make your own chocolate syrup with cocoa powder, sugar, water, corn syrup, vanilla and cardamom for a truly gourmet experience.
Achieving Different Consistencies
The thickness of your chocolate syrup can be adjusted to suit its intended use:
- Thicker Syrup (for drizzling, glazes): To achieve a thicker consistency, you can either reduce the amount of water slightly (e.g., use ¾ cup instead of 1 cup) or simmer the syrup for a few extra minutes (e.g., 6-8 minutes instead of 3-5). Be careful not to over-reduce, as it can become too thick or even crystallize. The addition of corn syrup also contributes to a thicker, glossier texture.
- Thinner Syrup (for mixing into drinks): If you prefer a thinner, more pourable syrup, you can increase the water by a tablespoon or two, or simply reduce the simmering time. Alternatively, you can thin out an already made syrup by whisking in a small amount of hot water or milk until desired consistency is reached.
Experimentation is key to finding your perfect chocolate syrup recipe. Don't be afraid to play with ratios and additions to create a syrup that perfectly matches your preferences and culinary needs.
Mastering Storage: Keeping Your Chocolate Syrup Fresh and Delicious
Once you've crafted your perfect batch of homemade chocolate syrup, proper storage is crucial to maintain its freshness, flavor, and consistency. One of the great advantages of this chocolate syrup recipe is that it keeps well in the fridge or freezer, allowing you to enjoy your efforts for an extended period without worry. Understanding the best practices for storage ensures that every pour is as delightful as the first.
Refrigeration:
The most common and recommended method for storing homemade chocolate syrup is in the refrigerator. After your syrup has cooled completely to room temperature, transfer it to a clean, airtight container. Glass jars with tight-fitting lids (like mason jars or repurposed syrup bottles) are ideal, as they don't absorb odors and are easy to clean. Plastic containers can also work, but ensure they are food-grade and seal well.
- Shelf Life: When stored properly in the refrigerator, homemade chocolate syrup typically lasts for 3-4 weeks. The high sugar content acts as a natural preservative, inhibiting bacterial growth.
- Consistency Change: It's normal for the syrup to thicken considerably when chilled. Don't worry, this is expected! When you're ready to use it, simply let it sit at room temperature for 10-15 minutes, or gently warm it in a microwave for a few seconds (stirring well) to restore its pourable consistency.
Freezing:
For longer-term storage, freezing is an excellent option. This is particularly useful if you make a large batch or want to have chocolate syrup on hand for months. Again, ensure the syrup is completely cooled before freezing.
- Containers: You can freeze chocolate syrup in freezer-safe jars, plastic containers, or even ice cube trays for convenient single-serving portions. If using jars, leave some headspace (about an inch) to allow for expansion as the syrup freezes.
- Shelf Life: Frozen chocolate syrup can maintain its quality for up to 3-6 months. Beyond that, while still safe, its flavor might start to diminish slightly.
- Thawing: To use frozen syrup, transfer it to the refrigerator to thaw overnight. For quicker thawing, you can place the container in a bowl of warm water. Once thawed, stir well to ensure a uniform consistency.
Food Safety Considerations:
- Cleanliness: Always use clean, sanitized containers for storage to prevent contamination.
- Cooling: Ensure the syrup is fully cooled before refrigerating or freezing. Putting hot syrup directly into the fridge can raise the internal temperature of your refrigerator, potentially affecting other foods, and can also lead to condensation and a less stable product.
- Signs of Spoilage: While rare due to the sugar content, always check for any signs of spoilage before use, such as mold growth, an off-odor, or unusual discoloration. If in doubt, it's always best to discard it.
By following these simple storage guidelines, you can ensure that your homemade chocolate syrup recipe remains a fresh, delicious, and convenient treat whenever a chocolate craving strikes.
Unleashing the Versatility: Creative Uses for Your Homemade Chocolate Syrup
The beauty of a well-made homemade chocolate syrup lies not just in its superior taste, but in its incredible versatility. Far from being limited to just one or two applications, your freshly made syrup can elevate a myriad of dishes and beverages, transforming ordinary moments into delightful experiences. Use it for chocolate milk or your favorite dessert, and discover just how much this simple condiment can do. This easy recipe can be used for chocolate milk, desserts and more, proving its indispensable role in any kitchen.
Classic Applications
Let's start with the timeless uses that first come to mind when thinking about chocolate syrup:
- Chocolate Milk: The quintessential use! Forget powdery mixes; a spoonful or two of your homemade syrup stirred into cold milk creates the richest, creamiest, and most satisfying chocolate milk imaginable. Adjust the amount to your desired chocolate intensity.
- Ice Cream Topping: Drizzle generously over vanilla, coffee, or even mint chocolate chip ice cream. The syrup hardens slightly when it hits the cold ice cream, creating a delightful texture contrast. It's the ultimate upgrade for any sundae.
- Coffee Enhancer: Transform your morning coffee or afternoon pick-me-up into a café-worthy mocha. Stir a tablespoon into hot coffee, or blend it with cold brew and milk for an iced mocha. It's also perfect for making your own specialty lattes and cappuccinos at home. This easy and delicious recipe is ready in 6 minutes and can be used for chocolate milk, ice cream, coffee, and more, making your daily coffee ritual a luxurious affair.
- Pancakes, Waffles & French Toast: Move beyond maple syrup. A generous pour of chocolate syrup over a stack of warm pancakes or waffles adds an indulgent touch, especially when paired with fresh berries or whipped cream.
Innovative Dessert & Beverage Ideas
Don't stop at the classics! Your homemade chocolate syrup recipe opens up a world of culinary creativity:
- Dessert Sauces & Glazes: Use it as a base for a quick chocolate glaze for cakes, cupcakes, or brownies. You can thicken it slightly by simmering it down further, or thin it with a touch of milk for a more pourable consistency. It’s fantastic drizzled over fruit tarts or cheesecakes.
- Fruit Dip: Serve it alongside fresh fruit like strawberries, bananas, or apple slices for a simple yet elegant dessert or snack.
- Cocktails & Mocktails: Add a sophisticated chocolate note to your beverages. It works wonderfully in chocolate martinis, espresso martinis, or even non-alcoholic concoctions like chocolate sodas or spritzers.
- Hot Chocolate: While it might seem redundant, using your syrup for hot chocolate ensures a velvety smooth drink without any powdery residue. Simply warm milk and stir in the desired amount of syrup.
- Baking Ingredient: Incorporate it directly into baking. Use it in place of some sugar and cocoa powder in brownie or cake recipes for an extra moist and rich texture. It can also be swirled into cheesecake batter or muffin batter for a marble effect.
- Yogurt & Oatmeal Topping: Elevate your breakfast or snack by drizzling chocolate syrup over plain yogurt, granola, or a bowl of warm oatmeal.
- Peanut Butter & Chocolate Sandwiches: A nostalgic treat. Spread peanut butter on bread, then drizzle with chocolate syrup for a simple, satisfying snack.
The possibilities are truly endless. By having a batch of homemade chocolate syrup on hand, you're always just a drizzle away from transforming everyday dishes into something extraordinary. Its rich flavor and smooth texture make it a far superior choice for any application compared to its store-bought counterparts.
Troubleshooting Common Chocolate Syrup Recipe Issues
Even with the simplest chocolate syrup recipe, sometimes things don't go exactly as planned. Don't despair! Most common issues are easily fixable. Understanding why these problems occur will help you troubleshoot effectively and ensure your next batch is perfect. Here are some typical challenges and how to overcome them:
- Issue 1: My Syrup is Too Thin!
- Cause: Not enough simmering time, or too much water.
- Solution: Return the syrup to the saucepan and gently simmer it over medium-low heat for an additional 2-5 minutes, stirring frequently. As the water evaporates, the syrup will thicken. Remember, it will continue to thicken as it cools, so don't overdo it. If it's already cooled, you can re-heat and reduce, or for immediate use, just accept the thinner consistency for drinks.
- Issue 2: My Syrup is Too Thick!
- Cause: Simmered for too long, or not enough water.
- Solution: While the syrup is still warm, whisk in a tablespoon or two of hot water or milk at a time until you reach your desired consistency. If it's already cold and very thick, gently warm it in a microwave or on the stovetop with a little added liquid, then whisk until smooth.
- Issue 3: My Syrup is Grainy or Sugary!
- Cause: Sugar crystallization. This happens when sugar crystals form and grow, often due to insufficient stirring, sugar crystals clinging to the sides of the pan, or rapid cooling.
- Solution: Return the syrup to the saucepan. Add a tablespoon or two of water. Gently heat over low heat, stirring constantly, until the sugar crystals dissolve. To prevent this in the future, ensure all sugar is dissolved before bringing to a boil, avoid scraping down the sides of the pan once simmering (or use a wet pastry brush to wash down any sugar crystals on the sides), and consider adding a touch of corn syrup as a "crystal inhibitor" if you frequently face this issue.
- Issue 4: My Syrup Tastes Bitter or Flat!
- Cause: Quality of cocoa powder, lack of salt, or insufficient vanilla.
- Solution: The quality of your cocoa powder makes a huge difference. Invest in a good brand. If it's still bitter, ensure you added the pinch of salt – it's crucial for balancing sweetness and enhancing chocolate flavor. You can also try adding a tiny bit more vanilla extract or a pinch of instant espresso powder (not coffee grounds) to deepen the chocolate notes without adding bitterness.
- Desi Punjabi Mms
- Did Jep And Jessica Get Divorced The Untold Story Behind Their Relationshiphtml
- Barron Trump Height Disease
- Shawn Killinger Husband Joe Carretta
- Unveiling The Life Of Emily Compagno And Her Husband

Make Your Own Chocolate Chips - Can be Organic & All Natural!

3 Ingredient Chocolate Syrup - All Natural, Ready in 6 Minutes!
easy-thick-chocolate-syrup-recipe-30 - The Catch My Party Blog The
