Mastering The Art Of Braiding: Your Ultimate Guide To Beautiful Hair
Table of Contents
- Why Embrace the Braid: Practicality and Creativity
- Essential Tools and Preparation for Successful Braiding
- The Foundation: Mastering the 3-Strand Braid
- Elevating Your Skills: Beyond the Basic Braid
- Advanced Braiding Techniques and Variations
- Expert Insights and Common Challenges
- Caring for Your Braids and Hair Health
- Unleashing Your Creativity with Braids
Why Embrace the Braid: Practicality and Creativity
Braids offer an incredible blend of practicality and aesthetic appeal. Not only are braids extremely practical for securing your hair during physical activities, keeping it out of your face during workouts, or protecting it from environmental damage, but they also serve as a fantastic creative outlet. I believe that braiding your own hair can be a great creative outlet, allowing you to express your personal style without needing a salon visit. For those days in between washes when you want something more than a messy bun, a braid can add a fun twist and make you look like you’ve put more effort into your look than you really have. The versatility of braids means there’s a style for every hair type and occasion, from sleek and professional to bohemian and relaxed. Learning how to braid opens up a world of possibilities for your hair, offering both convenience and endless styling options.Essential Tools and Preparation for Successful Braiding
Before you dive into the actual braiding, having the right tools and preparing your hair properly can make a significant difference in the outcome. Hair braiding may seem simple enough, but it takes a lot of fast finger work and can be difficult to do on yourself without the right setup. Here’s what you’ll typically need:- **Comb or Brush:** To detangle and smooth your hair. A fine-tooth comb is great for sectioning.
- **Hair Ties/Elastics:** Small, clear elastic bands are ideal for securing the ends of your braids, especially for intricate styles. Larger hair ties are useful for creating initial ponytails.
- **Clips:** Sectioning clips are invaluable for holding parts of your hair out of the way while you work on other sections.
- **Spray Bottle with Water:** A light mist of water can help tame flyaways and make hair more pliable, especially for very fine or frizzy hair.
- **Hair Products:** Depending on your hair type and the desired look, consider:
- **Leave-in conditioner or detangling spray:** For smooth, manageable hair.
- **Styling cream or mousse:** To add grip and reduce frizz.
- **Edge control or gel:** For sleek edges, particularly for intricate styles like cornrows or box braids.
- **Light-hold hairspray:** To set the finished braid and control flyaways.
- **Mirror:** A good mirror, preferably a three-way mirror or a handheld mirror in conjunction with a wall mirror, is crucial when learning how to braid your own hair.
The Foundation: Mastering the 3-Strand Braid
Everyone has to start somewhere, and when it comes to the world of braiding, the three-strand braid is the ultimate first step. It’s a foundational skill for most other braid styles, and once you master this basic technique, you’ll unlock the door to countless more complex and beautiful looks. This is the core of how to braid.Step-by-Step: The Classic 3-Strand Braid
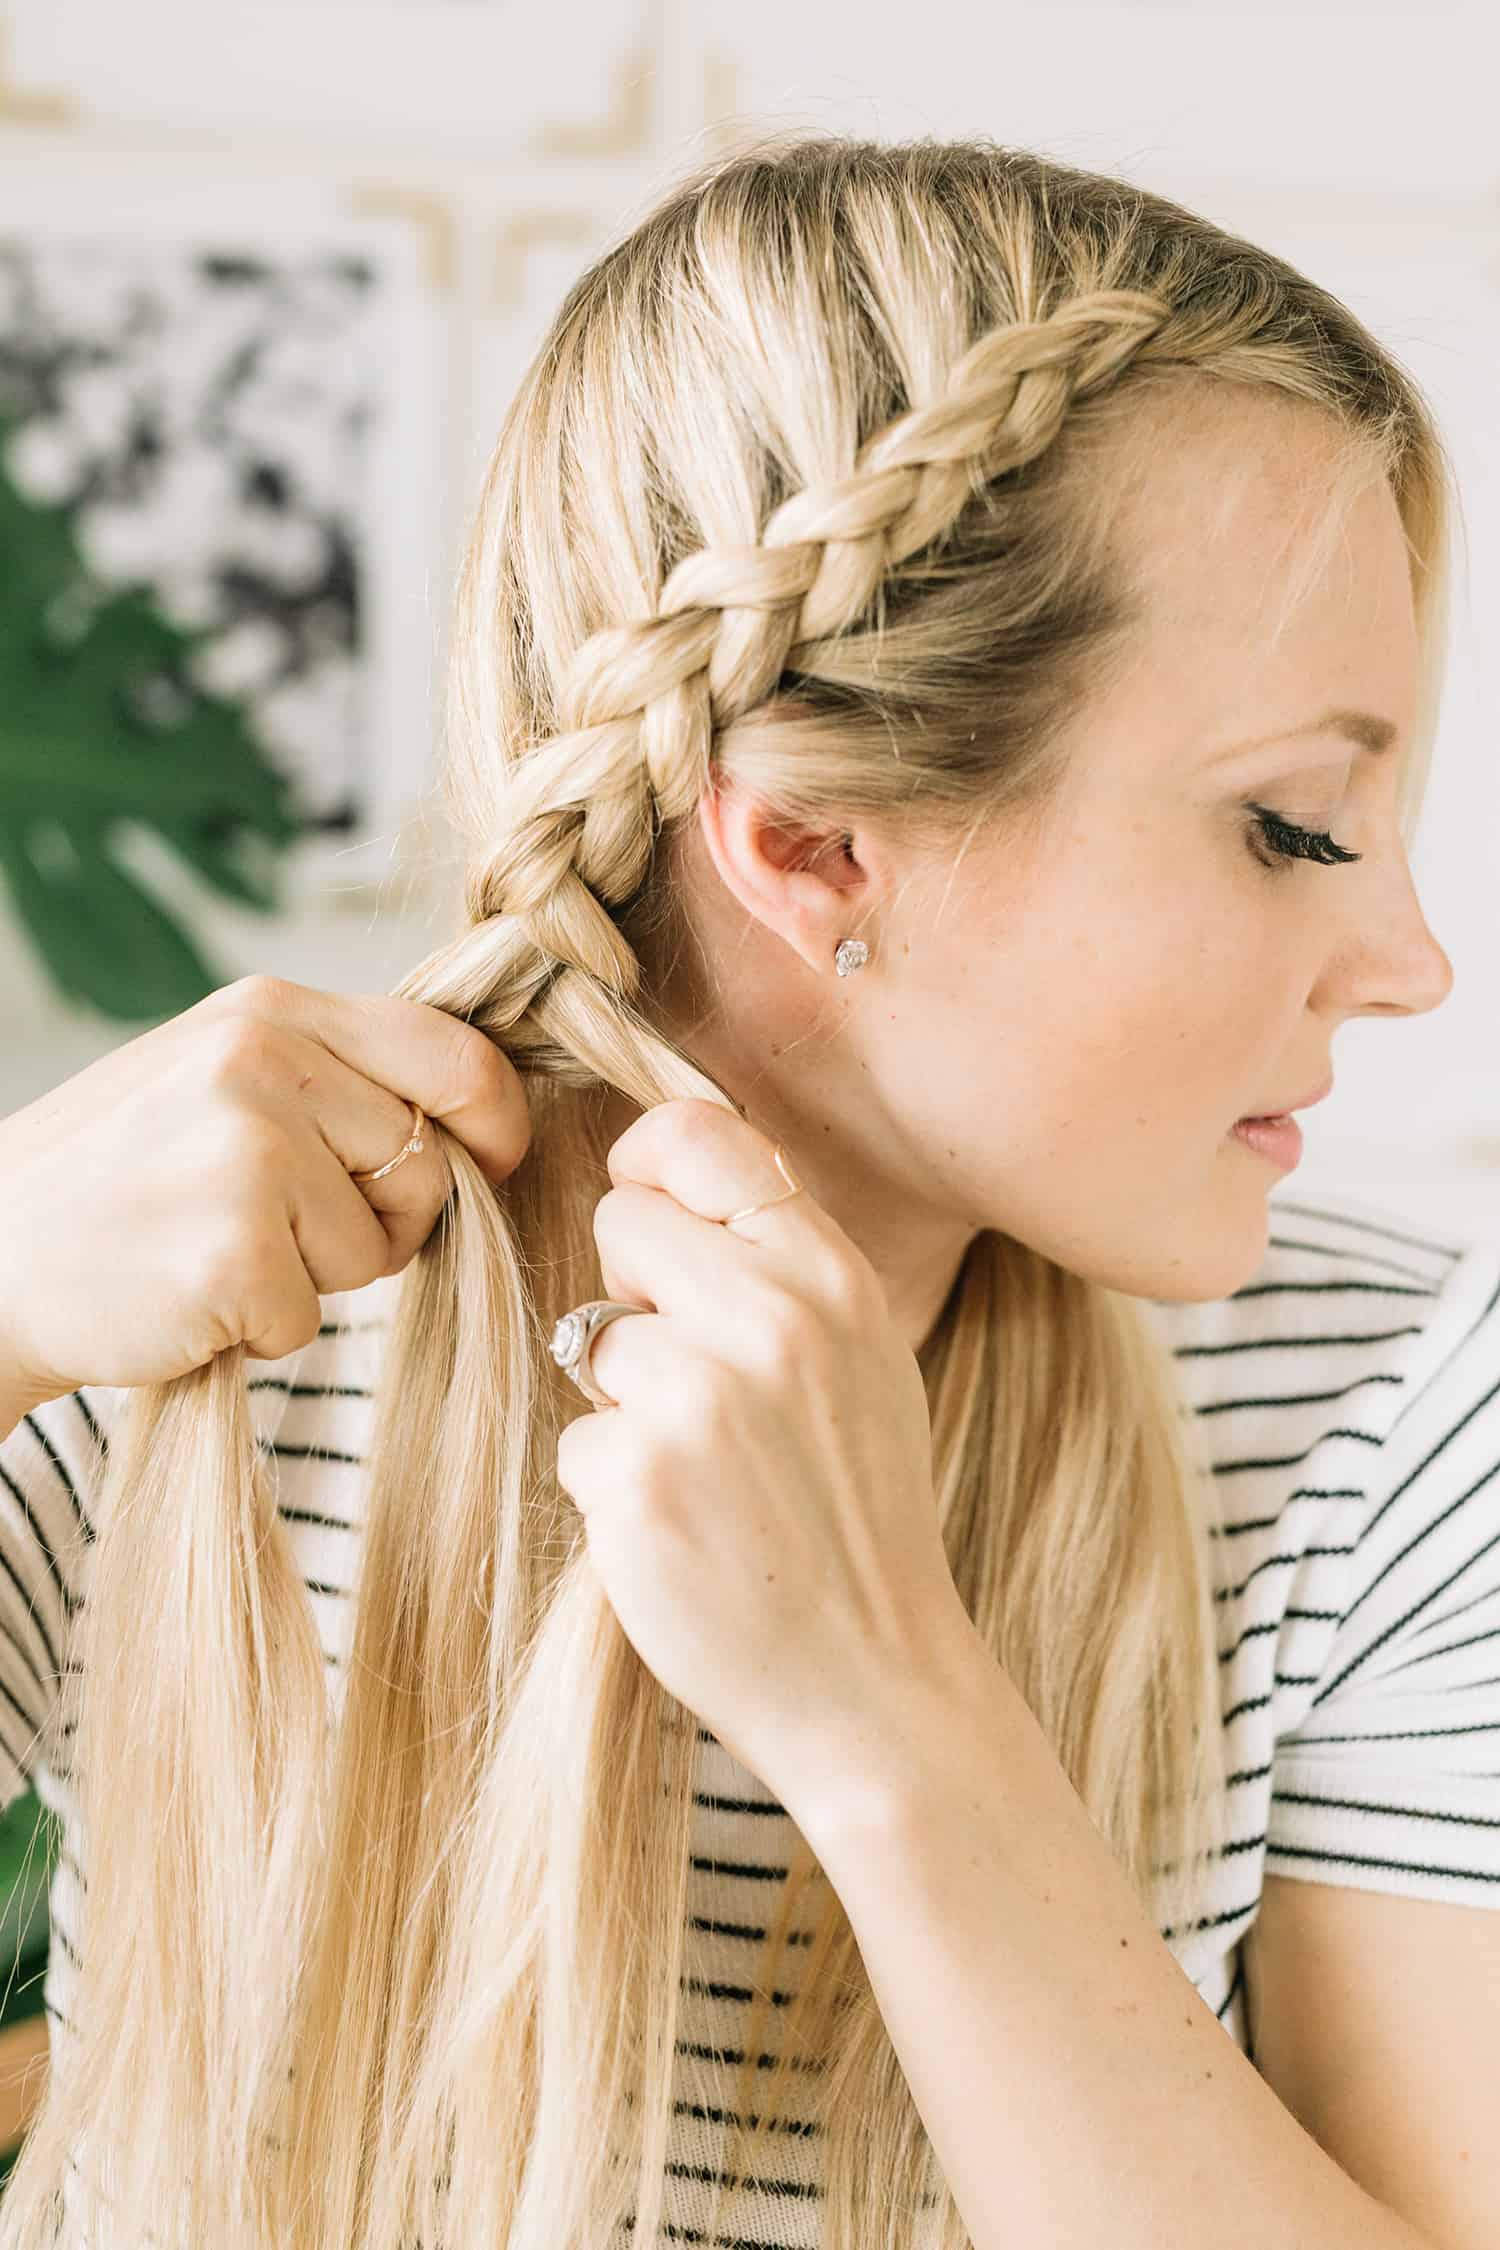
This is the simplest way to how to braid hair, and it's essential to get it right.- **Prepare Your Hair:** Ensure your hair is detangled and smooth. You can start with loose hair or, for beginners, tie your hair into a ponytail to make a secure base. If you tie your hair into a ponytail or half ponytail with a hair tie, your braid will be easier to handle and come out neater.
- **Divide the Hair:** Take the section of hair you want to braid and divide it into three equal sections. Let's call them Left (L), Middle (M), and Right (R).
- **Start Braiding:**
- Take the **Right (R)** section and cross it over the **Middle (M)** section. The Right section now becomes the new Middle section.
- Take the **Left (L)** section and cross it over the **(new) Middle (M)** section. The Left section now becomes the new Middle section.
- **Repeat:** Continue this pattern, alternating crossing outer strands (first the right, then the left) over the center, maintaining braid tightness. Keep your hands flat to the scalp and close to the braid you're making, especially as you work your way down.
- **Secure the End:** Once you reach the end of the hair, secure the braid with a hair tie.
Tips for Beginners: Making it Easier
* **Start with a Ponytail:** As mentioned, tying your hair into a ponytail makes a secure base and significantly simplifies the process of learning how to braid. It keeps the hair contained and prevents it from slipping. * **Practice on Someone Else:** It's often easier to practice on a friend or a mannequin head before attempting to braid your own hair. This allows you to see what you're doing clearly. * **Use a Mirror:** If braiding your own hair, use a mirror to observe your hand movements. However, a common tip is: Don't look at the underside of the braid while you're braiding, focus on the top and your hand placement. * **Maintain Even Tension:** The key to a neat braid is consistent tension. Keep sections tight for a 3D look, and ensure strands are smooth and even. * **Practice Makes Perfect:** Easy braids can become second nature with practice. Don't get discouraged if your first attempts aren't perfect. Keep trying!Elevating Your Skills: Beyond the Basic Braid
Once you’ve gotten the hang of braiding starting with a ponytail, move on to braiding loose hair at the nape of your neck, and then challenge yourself with more intricate styles. Here, you'll learn to master the classic French braid, and the bold Dutch braid, which are fundamental for many advanced styles.The Elegant French Braid
The French braid is a timeless and elegant style that adds hair as you go for a braid close to the scalp. It's a foundation for most other braid styles that sit flush against the head. Here's how to braid a French braid:- **Start at the Crown:** Take a section of hair from the top of your head (the crown) and divide it into three equal strands, just like you would for a regular three-strand braid.
- **Initial Cross-Overs:** Perform one or two cross-overs of a regular three-strand braid (Right over Middle, then Left over Middle).
- **Add Hair:** Before crossing the next outer section over the middle, pick up a small, equal section of loose hair from the side of your head, adjacent to that outer strand. Add this new hair to the outer strand you are about to cross over.
- **Cross Over:** Now, cross this combined (original strand + new hair) section over the middle section.
- **Repeat on Other Side:** Do the same on the other side: pick up a small section of loose hair, add it to the outer strand, and then cross this combined section over the new middle section.
- **Continue Down:** Continue this process, adding hair from alternating sides each time you bring an outer section to the middle. Try to keep the added sections of hair even in size for a consistent look.
- **Finish with a Regular Braid:** Once you've incorporated all the loose hair, typically around the nape of your neck, finish the rest of the braid as a regular three-strand braid. When you reach the nape of your neck, lean your head forward as you braid to make it easier to reach.
- **Secure:** Secure the end with a hair tie.
The Bold Dutch Braid
The Dutch braid is often called an "inside-out" French braid because, instead of crossing sections over, you cross them *under*. This creates a beautiful, raised, 3D effect that stands out from the head. It's similar to a French braid but sections are crossed under. To learn how to braid a Dutch braid:- **Start at the Crown:** Take a section of hair from the top of your head and divide it into three equal strands.
- **Initial Under-Crosses:**
- Take the **Right** section and cross it *under* the **Middle** section. The Right section is now the new Middle.
- Take the **Left** section and cross it *under* the **(new) Middle** section. The Left section is now the new Middle.
- **Add Hair (Underneath):** Before crossing the next outer section under the middle, pick up a small, equal section of loose hair from the side of your head, adjacent to that outer strand. Add this new hair to the outer strand you are about to cross *under*.
- **Cross Under:** Now, cross this combined (original strand + new hair) section *under* the middle section.
- **Repeat on Other Side:** Do the same on the other side: pick up a small section of loose hair, add it to the outer strand, and then cross this combined section *under* the new middle section.
- **Continue Down:** Continue this process, adding hair from alternating sides each time you bring an outer section *under* the middle. Keep sections tight for a 3D look.
- **Finish and Secure:** Once all loose hair is incorporated, finish the rest of the braid as a regular three-strand braid (crossing under) and secure with a hair tie.
Advanced Braiding Techniques and Variations
Once you're comfortable with French and Dutch braids, you can begin to experiment with styling variations, braid placement, and hair types for unique looks. Depending on the type of braid you want to create, there are a handful of more complex techniques. This is where you truly expand your knowledge of how to braid. Some popular advanced braids include: * **Fishtail Braid:** Involves dividing hair into two sections and taking small strands from the outside of each section, crossing them over to the inside of the opposite section. * **Box Braids:** A protective style often done with hair extensions, where hair is divided into square sections and braided individually. * **Cornrows:** Braids that lie very close to the scalp, created by braiding hair underhand and adding small sections of hair as you go, similar to a Dutch braid but flat against the head. * **Waterfall Braid:** A beautiful, cascading braid that allows sections of hair to fall freely, creating a "waterfall" effect. * **Rope Braid:** A simple yet elegant braid made by twisting two sections of hair around each other.Braiding with Extensions: A Step-by-Step Guide
Adding extensions can increase length, volume, and allow for more intricate styles, especially for protective styles like box braids or Senegalese twists. Here’s a basic approach to how to braid with extensions:- **Prepare Natural Hair:** Ensure your natural hair is clean, detangled, and moisturized. Section off the part you want to braid.
- **Prepare Braiding Hair:** Take a piece of braiding hair (synthetic or human) and fold it in half to create a loop.
- **Attach Extension:** Loop the braiding hair around the first section of the natural hair you want to braid. You should now have three "legs": the two split sections of braiding hair, and one section of your natural hair in the middle.
- **Start Braiding:** Start braiding the three legs together, treating your natural hair as one of the strands initially.
- **Incorporate Natural Hair:** As you braid down, gradually incorporate your natural hair into one of the extension strands. This ensures a seamless blend and secures your hair within the braid.
- **Weave in More Extension Hair (if needed):** For longer braids or if you're creating a style like box braids, you might need to weave in more hair from the larger extension once you reach the end of your natural hair, continuing the braid with just the extension hair.
- **Maintain Tension:** Keep consistent tension throughout the braid to ensure it's neat and secure, but not so tight that it causes discomfort or hair damage.
- **Seal the Ends:** For synthetic extensions, you can seal the ends by dipping them in hot water or using a lighter (with extreme caution!) to prevent unraveling.
Expert Insights and Common Challenges
Braiding, especially on oneself, can be challenging. It requires coordination, patience, and a lot of practice. However, with the right approach, anyone can learn how to braid. **Insights from Experts:** Ndeye, with over 20 years of experience in African hair, including braiding box braids, Senegalese twists, crochet braids, faux dread locs, goddess locs, kinky twists, and lakhass braids, emphasizes the importance of tradition and proper technique. Ndeye was the first female of her tribe in Africa to move to America and is now sharing her knowledge of African braids passed on from generation to generation. Her expertise highlights that braiding is not just a skill but often a cultural art form passed down through generations, emphasizing precision and care. **Common Challenges and Solutions:** * **Uneven Sections:** Leads to lumpy or crooked braids. * *Solution:* Use a fine-tooth comb to create clean, even sections. Practice helps you eyeball sections better over time. * **Loose Braids:** Braids unravel easily or look messy. * *Solution:* Maintain consistent, firm tension from start to finish. Keep your hands close to the scalp. * **Flyaways and Frizz:** Hair escaping the braid. * *Solution:* Use styling products like gel, mousse, or edge control before braiding. A light mist of water can also help. * **Arm Fatigue:** Especially when braiding your own hair. * *Solution:* Take breaks! Work in front of a mirror to minimize awkward arm positions. Practice will build endurance. * **Difficulty Reaching Back of Head:** * *Solution:* Lean your head forward when you reach the nape of your neck. Use multiple mirrors. Practice on a friend first. Remember, practice makes perfect—easy braids can become second nature. Don't be afraid to experiment with different techniques and styles.Caring for Your Braids and Hair Health
While braids are a great protective style, proper care is crucial to maintain their appearance and ensure the health of your natural hair underneath. * **Moisturize:** Even when braided, your scalp and hair need moisture. Use a light leave-in conditioner or hair oil, focusing on the scalp and any exposed hair. * **Cleanse:** Depending on the braid type and how long you plan to keep it, gentle cleansing is important. Use a diluted shampoo or a dry shampoo specifically for braids. * **Protect at Night:** Wrap your braids in a silk or satin scarf or use a satin pillowcase. This reduces friction, prevents frizz, and helps the braids last longer. * **Avoid Over-Tightening:** While tension is needed for neat braids, excessive tightness can lead to traction alopecia (hair loss). If a braid feels painful, it's too tight. * **Don't Keep Them In Too Long:** Even protective styles have a lifespan. Keeping braids in for too long can lead to product buildup, matting, and breakage. Follow recommended timelines for different braid types. * **Gentle Removal:** When taking out braids, be patient and gentle. Use a detangling spray or conditioner to help loosen the hair and minimize breakage. For specialized tools and products, explore options for braiding hair products that cater to your hair type and the specific braid style you're creating.Unleashing Your Creativity with Braids
The world of braids is vast and full of creative potential. Once you’ve mastered the basic techniques of how to braid, don't be afraid to experiment. * **Combine Styles:** Try a French braid that transitions into a fishtail, or a Dutch braid crown that ends in a messy bun. * **Accessorize:** Add beads, rings, ribbons, or flowers to your braids for a personalized touch. * **Placement:** Instead of a single braid, try two pigtail braids, a side braid, or multiple smaller braids. * **Hair Types:** Explore how different hair textures (straight, wavy, curly, coily) affect the look of a braid. Braiding hair for a variety of hair types and hairstyles at home is entirely possible with practice. Braiding is a journey of continuous learning and creativity. The more you practice, the more intuitive it becomes, and the more confident you'll be in trying new and exciting styles.Conclusion
Learning how to braid your hair is a rewarding skill that opens up a world of versatile and beautiful hairstyles. We've covered the foundational three-strand braid, progressed to the elegant French and bold Dutch braids, and even touched upon incorporating extensions. Remember the importance of preparation, consistent tension, and the invaluable role of practice. Whether you're looking for a practical way to secure your hair, a creative outlet, or simply a fresh new look, braids offer endless possibilities. So grab your comb, section your hair, and start braiding! Share your braiding journey in the comments below – what's your favorite braid to create, or what challenge are you currently facing? We'd love to hear from you! If you found this guide helpful, consider sharing it with friends who are also looking to master the art of braiding.- Becca Bloom
- King Von Autopsy
- Paige Vanzant Leaked Nudes
- Daisys Destruction An Indepth Look At The Controversial Case
- Rhea Ripley
:max_bytes(150000):strip_icc()/9-1-4f457feb5e9b47db90d59bdb35916293.jpg)
Beautiful Braid Hairstyles You Can Wear Any Day Of The Week, 60% OFF
Dutch Braid Tutorial - A Beautiful Mess
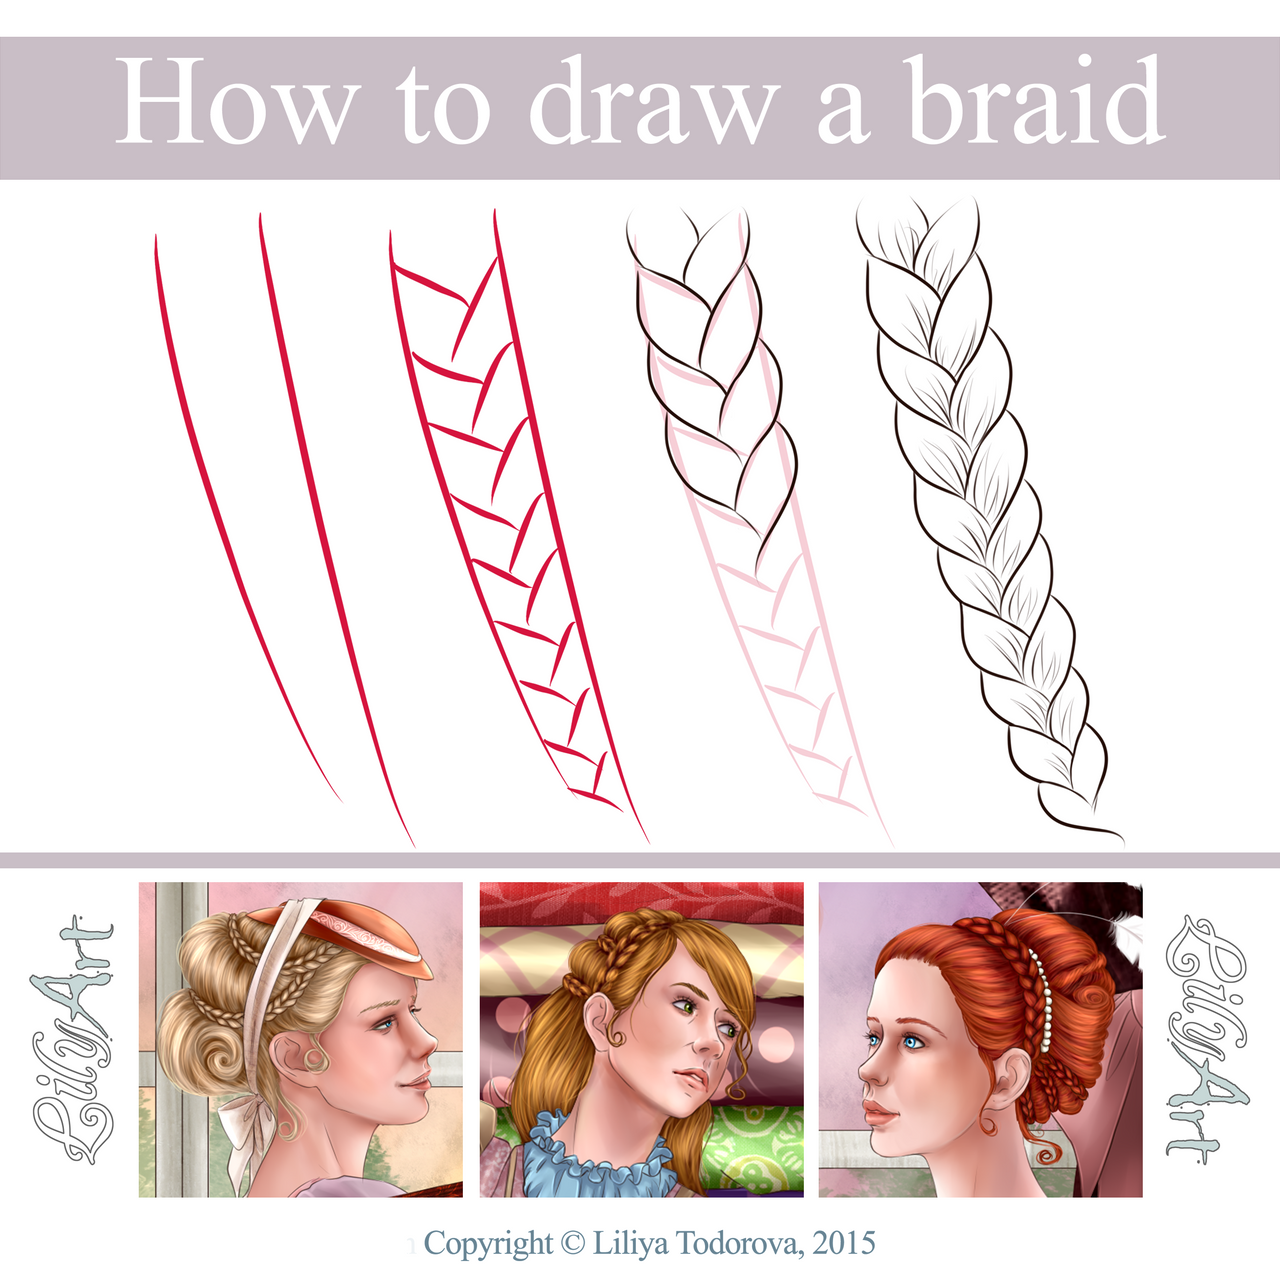
How to draw a braid by LilyT-Art on DeviantArt
