Crispy Southern Fried Okra: Your Ultimate Skillet Recipe
Hey folks, it's time to share a long overdue recipe! Today, we're diving deep into the heart of Southern comfort food with the ultimate crispy fried okra recipe. This isn't just any side dish; it's a culinary cornerstone, a true southern staple that promises perfectly crisp bites of okra coated in a simple, flavorful breading, perfect for a side or appetizer.
For generations, this easy recipe for skillet fried okra has graced tables, becoming a family favorite. Learn how to make crispy, crunchy fried okra with fresh okra, buttermilk, eggs, cornmeal, and spices, ensuring that unbelievably crispy outside and tender—never slimy—inside. The whole process takes just 30 minutes, making it an ideal vegetable side dish of the summer or a quick appetizer that everyone will love.
Table of Contents
- Why This Fried Okra Recipe Stands Out
- Essential Ingredients for the Best Fried Okra
- Step-by-Step Guide to Perfect Fried Okra
- Frying Techniques for Golden Perfection
- Troubleshooting Common Fried Okra Challenges
- Exciting Variations for Your Fried Okra Recipe
- Serving Suggestions & Reheating Your Fried Okra
- Why This is The Best Fried Okra Recipe You'll Ever Make
Why This Fried Okra Recipe Stands Out
There are countless ways to prepare okra, but for many, the crispy, golden-brown delight of fried okra holds a special place. This isn't just any fried okra recipe; it's an heirloom family fried okra recipe that has been perfected over generations. What makes it so special? It’s the meticulous balance of textures and flavors, ensuring each bite is a symphony of crunch on the outside and tender, non-slimy goodness on the inside. Southern fried okra is a truly classic recipe, embodying the warmth and hospitality of Southern cuisine.
The beauty of this particular approach lies in its simplicity combined with foolproof techniques. We’re talking about perfectly crisp bites of okra coated in a simple, flavorful breading, making it an ideal side or appetizer for any meal. Forget those soggy, greasy versions you might have encountered; this method guarantees a light, airy, and incredibly satisfying crunch that will have everyone reaching for more. It's so simple to make, yet the results are profoundly delicious, elevating a humble vegetable into a star side dish.
Furthermore, this recipe is designed for accessibility. Our crispy fried okra recipe uses fresh okra pods and a handful of pantry staples, meaning you won't need to hunt for obscure ingredients. It's a testament to the idea that the best dishes often come from the simplest components, prepared with care and attention to detail. This is the best fried okra recipe and a family favorite for generations, promising a culinary experience that’s both comforting and exciting.
Essential Ingredients for the Best Fried Okra
To achieve that quintessential crispy, tender, and flavorful fried okra, starting with the right ingredients is paramount. This southern fried okra recipe is made with fresh okra coated in buttermilk and dredged in a flavorful mixture of flour, cornmeal, and seasonings. The quality of each component directly impacts the final taste and texture, ensuring you get that perfect result every time.
- Bocil Sotwe
- Is Jasmine Crockett Married With Children
- Aishah Sofey Erome The Rising Star In The Digital Age
- Did Jep And Jessica Get Divorced The Untold Story Behind Their Relationshiphtml
- Caitlin Clark Shower
Fresh Okra: Selecting and Preparing
The star of our show is, of course, fresh okra. When selecting okra, look for pods that are vibrant green, firm to the touch, and free from blemishes or soft spots. Smaller pods tend to be more tender and less fibrous. Once you have your fresh bounty, proper preparation is key to avoiding sliminess, a common concern with okra. You must wash and dry the okra thoroughly before proceeding. Excess moisture can prevent the breading from adhering properly and contribute to a less crispy result. After washing, gently pat each pod completely dry with paper towels. Remember, the goal is crispy, crunchy fried okra with fresh okra, buttermilk, eggs, cornmeal, and spices.
The Buttermilk & Egg Bath
This is where the magic truly begins for the coating. The buttermilk and egg mixture acts as the adhesive, allowing the seasoned cornmeal dredge to cling beautifully to each okra piece. In one bowl, whisk together the buttermilk and eggs. For this recipe, you'll want to pour buttermilk into a medium bowl. Then, in a separate medium bowl, lightly beat the eggs with ½ teaspoon salt. Combining these two liquids creates a slightly acidic, creamy base that not only helps the breading stick but also tenderizes the okra slightly, contributing to that desirable non-slimy texture.
The Flavorful Cornmeal Dredge
The breading is what gives fried okra its signature crunch and taste. Our crispy fried okra recipe uses a blend that's simple yet incredibly effective. In a large bowl, combine flour, cornmeal, salt, garlic powder, paprika, and peppers. This combination creates a robust flavor profile that perfectly complements the mildness of the okra. The cornmeal is crucial for that characteristic Southern crispiness, while the flour helps create a cohesive coating. The seasonings are versatile; you can adjust them to your preference, but this foundational mix ensures a universally loved outcome. The result is okra covered with the best breading mixture and crispy coating around, making this a truly delicious fried okra recipe.
Step-by-Step Guide to Perfect Fried Okra
Mastering the art of fried okra is all about following a few crucial steps. This easy recipe for skillet fried okra breaks down the process into simple, manageable stages, ensuring success even for novice cooks. The whole process takes just 30 minutes, from prep to plate, yielding unbelievably crispy okra every time.
Preparing Your Fresh Okra
The foundation of great fried okra lies in how you prepare the vegetable itself. First, you must wash and dry the okra thoroughly. This is non-negotiable for a truly crispy result. Any residual moisture can turn your fried okra soggy. Once dry, it’s time to trim. Step 1: trim the stems and thin tips from the fresh okra pods. You want to remove the very top stem and the pointy tip, but be careful not to cut too much into the pod itself. Then, slice the okra into ½-inch to ¾-inch rounds. This size is ideal for frying evenly and ensuring a tender interior. A critical piece of advice here: when cutting your okra, make sure you don’t cut the pieces too small. That will make the texture and taste more slimy in the end. Larger pieces retain their structure better and contribute to a more pleasant mouthfeel.
Crafting the Crispy Coating
With your okra prepped, it's time to build that irresistible crispy coating. This fried okra recipe relies on a classic two-step dredging process. First, prepare your wet mixture: in one bowl, whisk together the buttermilk and eggs. Specifically, pour buttermilk into a medium bowl, and in a separate medium bowl, lightly beat the eggs with ½ teaspoon salt. Combine these two liquids thoroughly. Next, set up your dry dredging station: in a large bowl, combine flour, cornmeal, salt, garlic powder, paprika, and peppers. This seasoned cornmeal mixture is the key to the golden-brown perfection. Now, for the coating process: working in batches, take a handful of trimmed okra pieces and toss them into the buttermilk-egg mixture, ensuring they are fully coated. Let any excess drip off, then transfer them directly into the dry cornmeal mixture. Toss vigorously until each piece of okra is completely coated. This southern fried okra recipe is made with fresh okra coated in buttermilk and dredged in a flavorful mixture of flour, cornmeal, and seasonings, creating a robust and crispy exterior. The result is okra covered with the best breading mixture and crispy coating around, promising that delightful crunch.
Frying Techniques for Golden Perfection
Frying is an art, and when it comes to fried okra, precision ensures that beautiful golden-brown color and ultimate crispiness. The right temperature and technique are crucial for preventing soggy or overly greasy results. This section will guide you through the best practices for frying your okra to perfection, transforming it into a truly classic recipe.
Achieving the Ideal Oil Temperature
The most critical factor in achieving crispy fried okra is the oil temperature. Make sure your oil is at around 350°F (175°C) before you start frying. Using a deep-fry thermometer is highly recommended to monitor this precisely. If the oil is too cool, the okra will absorb too much oil, becoming greasy and soggy. If it’s too hot, the coating will burn before the okra inside has a chance to cook through. Maintaining a consistent temperature is key; they seem to keep a more uniform temperature when you use a reliable thermometer and a heavy-bottomed skillet, which distributes heat evenly. For the best flavor and authentic Southern touch, you can make this fried okra recipe with lard (pork fat) or tallow (beef fat) instead of cooking oil. These traditional fats impart a richer flavor and often result in an even crispier texture due to their higher smoke points.
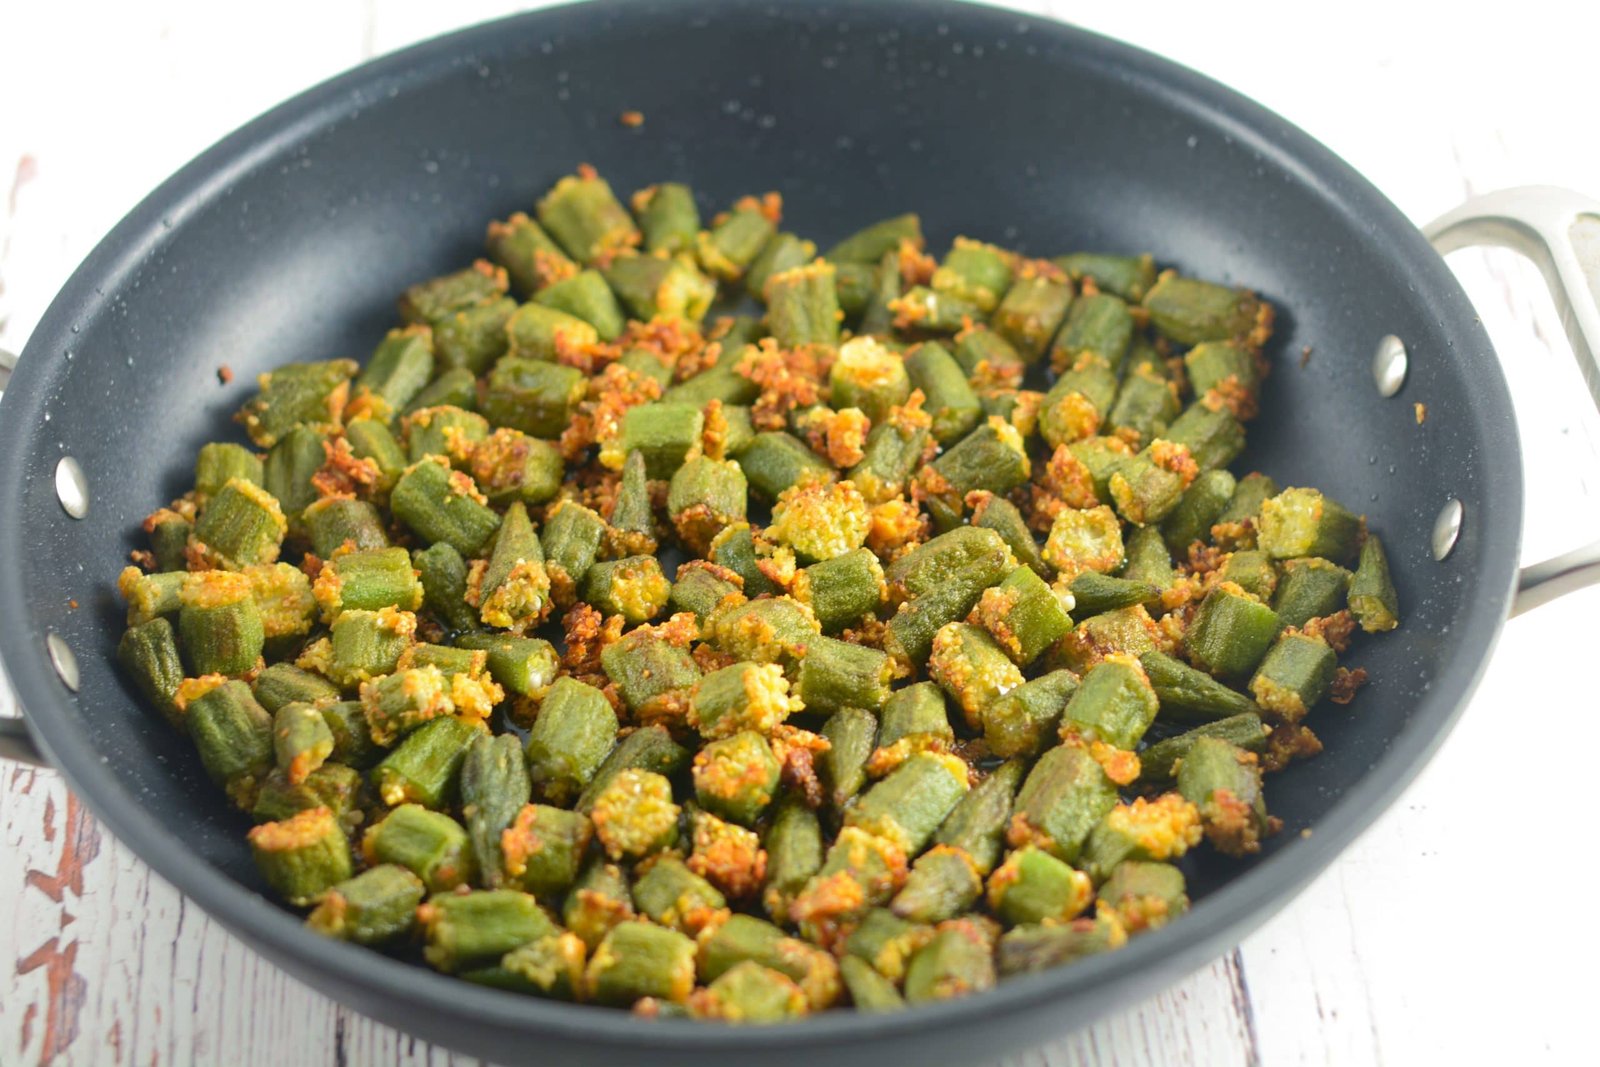
Frying in Batches
Once your oil is at the perfect temperature, it's time to fry. Step 2: working in batches. This is essential for maintaining the oil temperature and preventing overcrowding. Overcrowding the skillet will drop the oil temperature significantly, leading to less crispy okra. Place the breaded okra in the hot oil in the skillet, ensuring there’s enough space between each piece for even cooking. Fry for about 3-5 minutes, or until the okra is golden brown and crispy. Use a slotted spoon or spider to carefully turn the okra as it cooks, ensuring all sides get evenly browned. Once golden, remove the fried okra from the oil and immediately transfer it to a baking sheet lined with paper towels. Step 1: line a baking sheet with paper towels. This allows excess oil to drain off, keeping your fried okra wonderfully crisp and less greasy. Repeat the process with the remaining okra, ensuring the oil returns to 350°F between batches. This meticulous approach ensures every piece of this southern fried okra recipe is perfectly cooked and irresistibly crunchy.
Troubleshooting Common Fried Okra Challenges
Even with the best intentions, sometimes challenges arise in the kitchen. When it comes to fried okra, two common issues can deter a perfect outcome: sliminess and dealing with frozen okra. Understanding how to tackle these will ensure your fried okra recipe always turns out crispy and delicious.
Preventing Sliminess
Okra has a natural mucilage that can become slimy if not handled correctly. The key to preventing this lies in both preparation and cooking technique. Firstly, as mentioned earlier, when cutting your okra, make sure you don’t cut the pieces too small. That will make the texture and taste more slimy in the end. Larger cuts allow the interior to cook thoroughly without releasing excessive mucilage. Secondly, thoroughly washing and drying the okra before coating is paramount. Any surface moisture can activate the sliminess. Finally, ensuring your oil is at the correct temperature (350°F) and frying in small batches allows the okra to cook quickly and evenly, searing the exterior and locking in the internal moisture without releasing the slime. A quick, hot fry is your best defense against a slimy texture.
Dealing with Frozen Okra
While fresh okra is always preferred for the best results, sometimes frozen okra is all you have. It can certainly work for a delicious fried okra recipe, but it requires an extra step. When making fried okra from frozen, make sure you thaw your frozen okra completely before frying. Do not attempt to fry it directly from frozen, as this will lead to a soggy, unappetizing mess. Once thawed, drain and pat the pieces completely dry with a paper towel before tossing them in the coating and frying. This crucial step removes the ice crystals and excess water that form during thawing, which would otherwise steam the okra instead of frying it, preventing that desired crispiness. With proper thawing and drying, even frozen okra can be transformed into a surprisingly crispy and flavorful side dish.
Maintaining Crispiness
The ultimate goal is a perfectly crisp bite. Beyond the initial frying, maintaining this crispiness is important, especially if you're not serving immediately. Avoid stacking fried okra, as the steam will soften the coating. Instead, spread it in a single layer on a wire rack set over a baking sheet to allow air circulation. If serving later, a quick reheat in an air fryer or oven can bring back much of that initial crunch. Remember, the result is okra covered with the best breading mixture and crispy coating around, and a little care post-frying helps preserve that.
Exciting Variations for Your Fried Okra Recipe
While the classic southern fried okra recipe is a masterpiece in itself, the beauty of cooking lies in its adaptability. Once you've mastered the basic fried okra recipe, feel free to experiment with different flavor profiles to suit your palate. These variations can transform a beloved side dish into a new culinary adventure, proving that this easy recipe for skillet fried okra is incredibly versatile.
Spicy Kicks
For those who love a little heat, turning up the spice in your fried okra is incredibly easy and satisfying. To make spicy fried okra, simply add cayenne pepper to the cornmeal mixture. Start with ½ teaspoon and increase to your desired level of heat. For a spicier fried okra recipe, I recommend adding a generous pinch of cayenne pepper or a dash of hot sauce directly to the buttermilk-egg mixture. This infuses the heat throughout the coating, creating a more uniform spicy kick. You could also experiment with a pinch of smoked paprika for a smoky heat, or a touch of chili powder for a different kind of warmth. The possibilities are endless for those who crave a fiery bite.
Herbaceous Twists
Beyond spice, herbs and other seasonings can significantly alter the character of your fried okra. Instead of just garlic powder, consider adding onion powder for a deeper savory note. Swap in blackened seasoning or a Cajun spice mix instead of the garlic herb seasoning blend for a truly Southern-inspired twist. These blends often contain a complex mix of herbs like thyme, oregano, and basil, along with various peppers, which can elevate the flavor profile considerably. For a more Mediterranean flair, a touch of dried dill or oregano in the cornmeal mixture can be surprisingly delightful. Don't be afraid to experiment with your favorite dried herbs; a little goes a long way in adding depth and complexity to this already delicious fried okra recipe.
Gluten-Free Options
For those with dietary restrictions, enjoying fried okra is still entirely possible. The primary component of the breading that contains gluten is the all-purpose flour. You can easily substitute this with a good quality gluten-free all-purpose flour blend. Many such blends are available on the market and work wonderfully for frying, providing a similar crispiness and texture. Ensure your cornmeal is also certified gluten-free, as some brands may have cross-contamination. With these simple swaps, everyone can enjoy this classic Southern staple, making this a truly inclusive fried okra recipe.
Serving Suggestions & Reheating Your Fried Okra
Once your crispy fried okra is ready, the only thing left is to enjoy it! This versatile dish shines whether as a centerpiece or a supporting act. Plus, knowing how to properly reheat it means you can enjoy those perfect bites even after the first round.
Perfect Pairings
This fried okra recipe goes great with any dinner meal that you make, especially if it is of the Southern kind. It's a natural complement to classic Southern fare like fried chicken, barbecue ribs, pulled pork, or catfish. The crispness of the okra provides a wonderful textural contrast to richer, more tender meats. It also pairs beautifully with lighter dishes, adding a satisfying crunch to a simple grilled fish or a fresh summer salad. Consider it alongside collard greens, cornbread, or black-eyed peas for a complete Southern feast. As the vegetable side dish of the summer, it's perfect for backyard barbecues and casual family dinners.
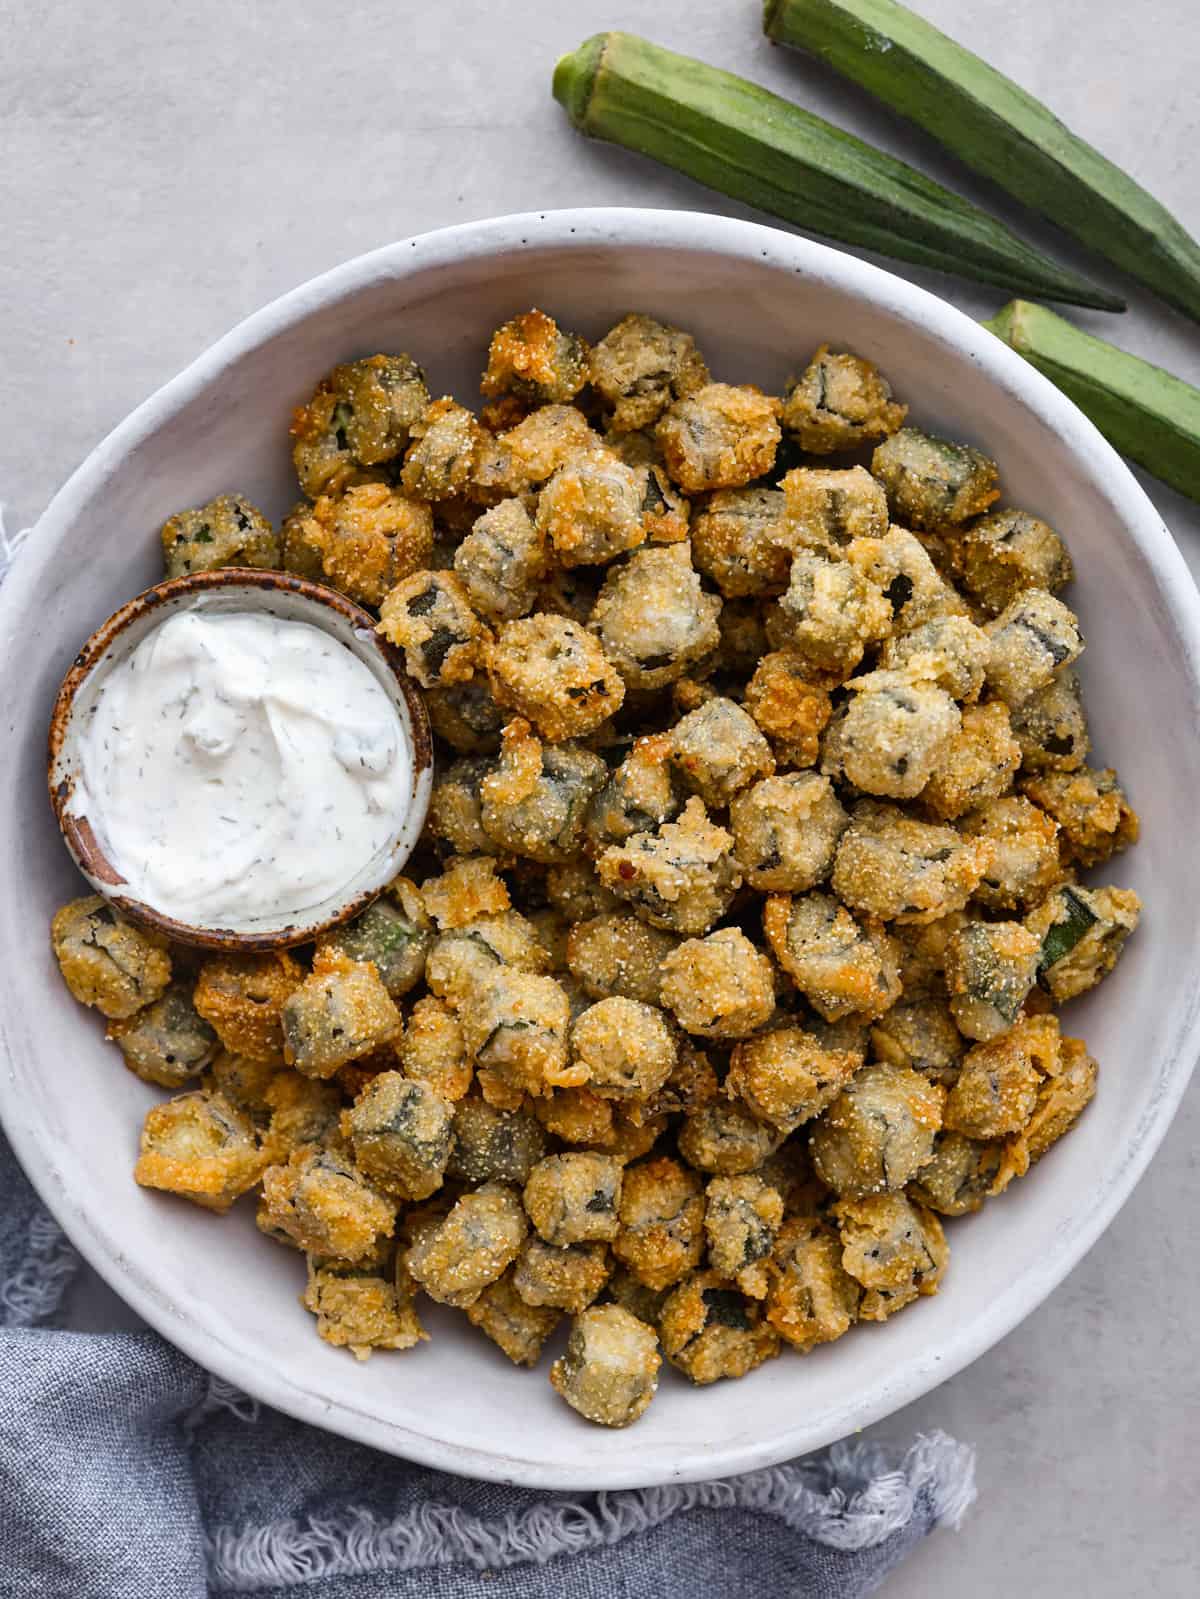
Appetizer Delight
Beyond being a stellar side, fried okra is also great to just whip up as an appetizer and munch on with some dipping sauce. Its bite-sized nature and addictive crispiness make it ideal for snacking. Serve it with a variety of dipping sauces: classic ranch, a spicy remoulade, a tangy comeback sauce, or even a simple garlic aioli. The possibilities are endless, and it’s super easy to make too, making it a fantastic last-minute addition to any gathering. I can’t get enough of fried okra coated in crispy breading, especially when it’s served with a zesty dip.
Reheating for Freshness
- Becca Bloom
- Unveiling The Life Of Emily Compagno And Her Husband
- Emily Compagno Age
- Bocil Sotwe
- Nude Fashion Show
Fried Okra | The Recipe Critic
Crunchy Fried Okra Recipe

Fried Okra Authentic Recipe | TasteAtlas
