Jump Start Your Car Safely: The Ultimate Jumper Lead Guide
Few things are as frustrating as turning the key in your ignition only to be met with silence. You probably need a jump start. Whether it's due to leaving your lights on, extreme weather, or just an aging power source, a flat battery can bring your day to a grinding halt. Thankfully, a quick jump is usually enough to get you charged and ready to hit the road again. All you need is a set of jumper cables and a working car or a portable jumping battery.
A jump start is a handy way to revive a car with a flat battery, allowing you to borrow a charge and start your vehicle again. However, it's crucial to understand that using jumper leads incorrectly can cause damage to both cars and people if they’re not used properly. For your safety, and our peace of mind, we’d always prefer you to give us a call and leave the jump starting to our trained mechanics. But if you’re keen to do it yourself, take a look at our advice on how to jump start a car safely and effectively. We’ll show you how to position and expose the batteries, hook up the cables, and get your car back in working order.
Table of Contents
- Why You Need to Know How to Use Jumper Leads
- Essential Tools for a Successful Jump Start
- Safety First: Crucial Precautions Before You Begin
- Step-by-Step Guide: Connecting Your Jumper Cables
- The Jump Start Process: Bringing Your Battery Back to Life
- Disconnecting Jumper Cables Safely
- Troubleshooting Common Jump Start Issues
- When to Call for Professional Help
Why You Need to Know How to Use Jumper Leads
Understanding how to use jumper leads is an invaluable skill for any driver. A dead battery can strike at the most inconvenient times – in a remote area, late at night, or when you're already running late for an important appointment. Being able to jump start your car means you won't be stranded, saving you time, money, and a significant amount of stress. It empowers you to take control of a common automotive problem, rather than relying solely on roadside assistance. While professional help is always an option, knowing the steps to properly use jumper leads gives you an immediate solution for minor battery issues. It's a fundamental aspect of vehicle preparedness, much like knowing how to change a flat tire. This knowledge not only helps you but also enables you to assist others who might be in a similar predicament, fostering a sense of community on the road. The ability to perform a quick jump start can be the difference between a minor inconvenience and a major disruption to your day.Essential Tools for a Successful Jump Start
Before you can even begin to think about how to use jumper leads, you need to ensure you have the right equipment. The primary tools required are, of course, a set of jumper cables and either a working car (the "donor" vehicle) or a portable jump starter. It’s always a good idea to have jumper cables and an emergency kit or battery booster in your vehicle in case you have a problem. If you don’t have jumper cables in your trunk and you’re borrowing a set, buy some once you’ve got the current problem sorted out. Having your own set is a proactive measure against future battery woes.Choosing the Right Jumper Cables
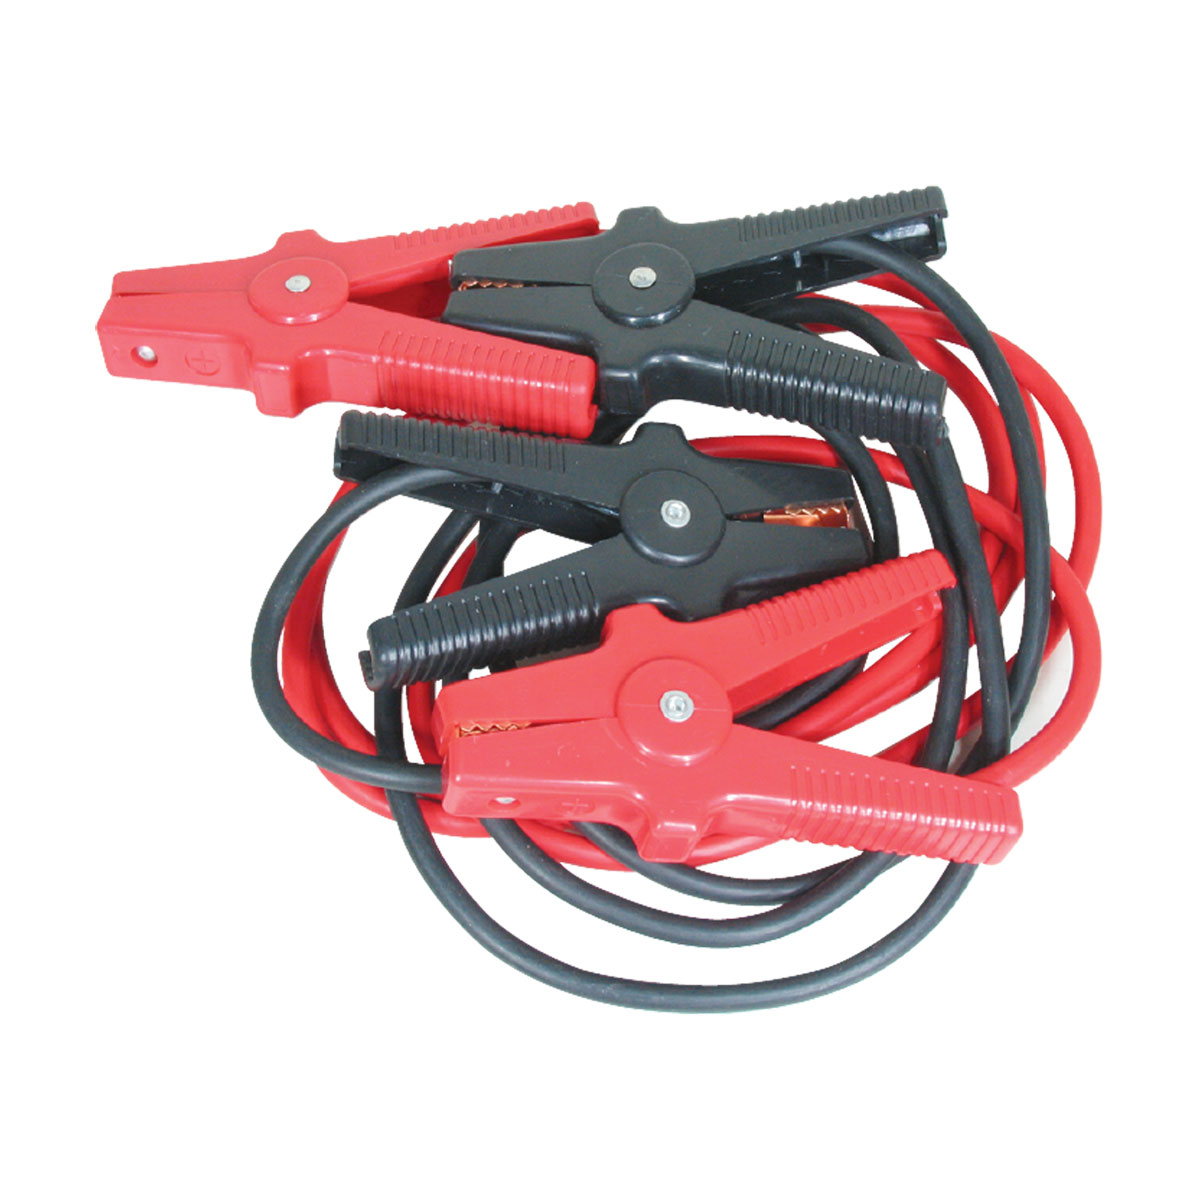
When it comes to jumper cables, any set will do the trick in a pinch. However, if you have a choice, opt for longer, thicker cables. The longer and bigger the cables, the easier they will be to maneuver, especially when trying to position two cars close enough without touching. Thicker cables (indicated by a lower gauge number, e.g., 4-gauge or 2-gauge are better than 8-gauge) have less electrical resistance, allowing more current to flow and making the jump start more efficient, particularly for larger engines or severely drained batteries. We often use a heavy-duty set of 1 AWG jumper cables to show the procedure, as they are robust and highly effective. Always make sure the jumper cables are in good condition with no breaks or cuts in the insulation, and clean the metal contacts as needed to ensure a good connection. Damaged cables can be dangerous and ineffective.The Importance of an Emergency Kit
Beyond just the jumper cables, a comprehensive emergency kit can be a lifesaver. This kit should include items like work gloves (to protect your hands), safety glasses (to shield your eyes from potential sparks or battery acid), a flashlight (for nighttime or low-light situations), and perhaps even a basic set of tools. A portable jump starter, also known as a battery booster, is an excellent alternative to needing a second vehicle. These compact devices are pre-charged and can deliver the necessary jolt to your battery without the need for another car, offering unparalleled convenience and independence. Having these additional items ensures you're prepared for any contingency and can perform the jump start safely and effectively.Safety First: Crucial Precautions Before You Begin
Before you even think about how to use jumper leads, safety must be your absolute top priority. But jump leads can cause damage to both cars and people if they’re not used properly. This only takes a few minutes to set up, but you’ll want to carefully follow a few specific steps to stay safe. Of course, there is more to figuring out how to hook up jumper cables safely than just the connection steps. Ignoring safety protocols can lead to serious injury, electrical damage to your vehicle, or even a battery explosion. Sparks or an open flame near a battery have the potential to cause a battery to explode, so always avoid these conditions.Assessing Battery Compatibility
Before you attempt to jump start the car, make sure both batteries are of similar voltage. Most modern passenger vehicles use 12-volt batteries, but some older or specialized vehicles might use 6-volt or 24-volt systems. Attempting to jump start a 12-volt car with a 6-volt battery, or vice versa, can cause severe damage to the electrical components of both vehicles. Always check the battery labels to confirm voltage compatibility. Also, ensure that neither battery shows signs of leakage, cracks, or excessive corrosion. A damaged battery should not be jump-started; it needs to be replaced.Vehicle Positioning and Preparation
Once you've confirmed battery compatibility, position the cars. Get the cars as close together as possible but without them touching. Ideally, park the donor car (the one with the good battery) nose-to-nose with the disabled car, or side-by-side if your cables are long enough. Ensure both vehicles are turned off, in park (for automatics) or neutral (for manuals), with the parking brakes engaged. This prevents accidental movement. Turn off all non-essential electrical components in both vehicles, such as lights, radio, and air conditioning, to minimize electrical load. Open the hoods of both cars to access the batteries. Identify the positive (+) and negative (-) terminals on each battery. The positive terminal is usually larger and marked with a plus sign, often covered by a red cap. The negative terminal is smaller, marked with a minus sign, and typically has a black cap or no cap. First of all, you need to make sure the cables don't touch any of the engine components, especially moving parts like fan blades.Step-by-Step Guide: Connecting Your Jumper Cables
Knowing how to properly use jumper leads involves a precise connection sequence to ensure safety and effectiveness. This is where many people make mistakes, so pay close attention to each step. The jumper cables will connect the dead battery to the healthy battery so you can borrow a charge and start your vehicle again. Here's the correct order for connecting your jumper cables: 1. **Connect Red to Dead Positive:** Take one of the red (positive) clamps and connect it securely to the positive (+) terminal of the dead battery. Ensure the clamp has a firm grip on the metal terminal, not just the plastic cover. 2. **Connect Red to Donor Positive:** Take the other red (positive) clamp and connect it securely to the positive (+) terminal of the working (donor) battery. Again, a solid connection is key. 3. **Connect Black to Donor Negative:** Take one of the black (negative) clamps and connect it securely to the negative (-) terminal of the working (donor) battery. 4. **Connect Black to Metal Ground on Dead Car:** This is the most critical safety step. Do NOT connect the remaining black (negative) clamp directly to the negative (-) terminal of the dead battery. Instead, connect it to a clean, unpainted metal surface on the engine block or frame of the dead car, away from the battery itself. This provides a ground connection and helps dissipate any sparks away from the battery, reducing the risk of explosion. A good spot is often a metal bolt or a sturdy, unpainted bracket. Ensure the clamp is firmly attached. Once all four clamps are connected, double-check that no cables are dangling or touching any moving engine parts, such as belts or fans. Make sure the cables are not near any fuel lines or hot engine components.The Jump Start Process: Bringing Your Battery Back to Life
With the jumper cables correctly connected, you are now ready to initiate the jump start. This process requires patience and careful monitoring to ensure the best outcome for both vehicles. Today, we show you how to properly use the jumper cables from one car to another, and this is the crucial phase. Follow these steps to bring your car back to life: 1. **Start the Donor Vehicle:** Start the engine of the donor vehicle. Let it run for about 5-10 minutes. This allows the donor battery to charge the dead battery through the jumper cables. Some experts recommend revving the donor engine slightly (to about 1500-2000 RPM) to increase the alternator's output, but this isn't always necessary for a successful jump. 2. **Attempt to Start the Dead Vehicle:** After the charging period, try to start the dead vehicle. If it doesn't start immediately, wait another few minutes with the donor car running and try again. Avoid cranking the engine for more than 5-10 seconds at a time to prevent overheating the starter motor. If the car still doesn't start after several attempts, there might be a more significant issue than just a flat battery, such as a faulty starter, alternator, or a deeper electrical problem. 3. **Keep the Revs Up (if started):** Once the dead car starts, keep its engine running. You might want to keep the donor car running for a few more minutes as well, allowing the newly started car's alternator to begin recharging its battery. It's often recommended to keep the revived car running for at least 15-20 minutes, or even take it for a drive, to allow the alternator to sufficiently recharge the battery. This ensures that the battery has enough charge to start the car again on its own later.Disconnecting Jumper Cables Safely
Just as important as the connection sequence is the disconnection sequence. Improper disconnection can lead to sparks, short circuits, or damage to the vehicles' electrical systems. Always ensure both vehicles are running when you disconnect the cables, especially the newly jump-started car. Here's the correct order for disconnecting your jumper cables: 1. **Remove Black from Dead Car's Ground:** Carefully remove the black (negative) clamp from the unpainted metal surface on the engine block or frame of the now-running dead car. This was the last clamp you connected. 2. **Remove Black from Donor Negative:** Remove the black (negative) clamp from the negative (-) terminal of the donor battery. 3. **Remove Red from Donor Positive:** Remove the red (positive) clamp from the positive (+) terminal of the donor battery. 4. **Remove Red from Dead Positive:** Finally, remove the red (positive) clamp from the positive (+) terminal of the now-running dead car's battery. This was the first clamp you connected. Once all the cables are removed, close the hoods of both vehicles. Remember to drive the jump-started car for at least 15-20 minutes, or longer, to allow the battery to fully recharge from the alternator. If the battery dies again shortly after, it likely needs to be replaced.Troubleshooting Common Jump Start Issues
Even when you follow all the steps on how to use jumper leads, sometimes things don't go as planned. Here are some common issues you might encounter and how to troubleshoot them: * **No Click or Crank:** If you hear no sound or just a faint click when trying to start the dead car, double-check all your cable connections. Ensure they are clean and firmly attached to the terminals and the ground point. Sometimes, wiggling the clamps can re-establish a poor connection. Also, verify that the donor car is running and its battery is healthy. * **Engine Cranks but Doesn't Start:** This indicates that the battery might be getting power, but there could be an issue with the fuel system, ignition system, or starter motor itself. A jump start only addresses a dead battery; it won't fix other mechanical problems. In this case, you'll need professional assistance. * **Smoke or Burning Smell:** Immediately turn off both cars and disconnect the cables if you notice smoke or a burning smell. This is a sign of an electrical short or overheating, and continuing could cause serious damage or fire. Re-evaluate your connections, especially ensuring the polarity is correct (positive to positive, negative to negative/ground). * **Donor Car Dies:** If the donor car's engine dies during the process, it might indicate that its battery or alternator is not strong enough to handle the load, or there's an issue with its own electrical system. In such cases, you'll need a different donor vehicle or a portable jump starter. * **Battery Dies Again Shortly After:** If your car starts after a jump but dies again quickly, it's a strong indicator that the battery is no longer holding a charge, or your alternator is failing to recharge it. At this point, the battery likely needs to be replaced, or the charging system needs to be inspected by a mechanic.When to Call for Professional Help
While knowing how to use jumper leads is an essential skill, there are times when it's simply safer and more practical to call in the professionals. As mentioned earlier, for your safety, and our peace of mind, we’d always prefer you to give us a call and leave the jump starting to our trained mechanics. Consider calling for professional roadside assistance or a mechanic if: * **You're Unsure or Uncomfortable:** If you're hesitant about any step or feel unsafe, it's always best to err on the side of caution. * **The Jump Start Fails Repeatedly:** If your car doesn't start after several attempts, even with correct cable connections, it suggests a problem beyond a simple dead battery. * **You Notice Damage:** If either battery is leaking, cracked, or severely corroded, do not attempt a jump start. This could be extremely dangerous. * **You Don't Have the Right Equipment:** If you lack proper jumper cables or a suitable donor vehicle, a professional service will have all the necessary tools. * **Your Car Dies Immediately After the Jump:** This indicates a problem with the battery's ability to hold a charge or a faulty alternator, both of which require professional diagnosis and repair. * **You Drive a Hybrid or Electric Vehicle:** These vehicles often have complex high-voltage systems that require specialized procedures for jump-starting, and attempting it yourself can be dangerous or cause significant damage. Always consult your owner's manual or a qualified technician.Learning how to use jumper leads safely is a fundamental skill for any driver, offering a quick solution to a common problem. It’s always a good idea to have jumper cables and an emergency kit or battery booster in your vehicle in case you have a problem. By following these easy steps, you can confidently jump start a car and use jumper cables safely, getting yourself or someone else back on the road. Remember, while empowering, safety should always be your guiding principle. If you found this guide helpful, consider sharing it with friends and family. Do you have any jump-starting tips or stories? Share them in the comments below! And for more automotive maintenance advice, explore other articles on our site.
- Johnny Rivers Wife
- Katseye Members
- Exploring Kaitlan Collins Husbands Nationality A Comprehensive Insight
- King Von Autopsy
- Terrel Williams
- Burger King Plane Guy
- Judy Blooms
- Jd Vance Meme
- Unveiling The Secrets Behind Crazyjamjam Leaks
- Katseye Members
Jumper Leads - Boathouse Marine

jumper leads - food for faith

Jumper leads (BBJL2535) – PJ Fallon & Son
