Mastering Pumpkin Carving: Your Ultimate Guide For Halloween Fun
Bring the Halloween spirit home this fall by carving pumpkins. This beloved tradition transforms ordinary gourds into glowing masterpieces, casting eerie shadows or friendly smiles across your porch. As the air chills and autumn leaves begin their vibrant dance, there's an undeniable magic in preparing for the season's most anticipated holiday, and at the heart of it all lies the humble pumpkin, waiting to be brought to life.
Whether you're a seasoned artisan with years of experience wielding carving tools or a complete novice eager to try your hand at this festive craft, this comprehensive guide will walk you through every step. From selecting the perfect pumpkin to mastering intricate designs and ensuring your creation lasts through the spooky season, we'll equip you with the knowledge and inspiration needed to make your Halloween display truly unforgettable. Get ready to embrace the creative spirit and learn how to carve a pumpkin like a pro!
Table of Contents
- The Art of Carving: More Than Just a Pumpkin
- Essential Tools for Your Pumpkin Carving Journey
- Preparing Your Pumpkin for a Masterpiece
- Unleashing Creativity: Pumpkin Carving Ideas for Every Skill Level
- Techniques and Styles in Pumpkin Carving
- Safety First: Important Tips for a Smooth Carving Experience
- Displaying Your Carved Creation
- Beyond the Basics: Taking Your Pumpkin Carving to the Next Level
The Art of Carving: More Than Just a Pumpkin
At its core, carving is the act of using tools to shape something from a material by scraping away portions of that material. This fundamental technique can be applied to any substance solid enough to hold a form even when pieces have been removed, yet soft enough for portions to be scraped away with available tools. While often associated with traditional art forms like wood, stone, or metal sculpture, the same principles beautifully translate to the seasonal joy of carving on pumpkin.
- Discovering The Legacy Of Desi Arnaz Jr
- Bonnie Bruise
- Daisys Destruction An Indepth Look At The Controversial Case
- Mayme Hatcher Johnson
- Who Is Ryan Vella
Pumpkin carving, specifically, is a traditional art form that has been practiced for centuries, evolving from ancient Celtic traditions. Originally, turnips and potatoes were carved with grotesque faces to ward off evil spirits during harvest festivals. When Irish immigrants brought this custom to America, they discovered the native pumpkin was an ideal canvas – larger, softer, and much easier to carve. This transformation cemented the pumpkin's place as an iconic symbol of Halloween, a festive and creative outlet that continues to be popular today. There's something always so pleasant about building something out of nothing, transforming a simple gourd into a captivating piece of art, whether it's a spooky ghoul or a friendly face.
Essential Tools for Your Pumpkin Carving Journey
To embark on your pumpkin carving adventure, having the right tools can make all the difference, enhancing both the ease and safety of the process. While basic kitchen tools can certainly get the job done, specialized pumpkin carving kits offer distinct advantages.
The best tools for carving pumpkins are specialized pumpkin carving kits, which typically include safe, serrated tools designed for easy handling. These kits make the process simpler and safer, especially for children, as their tools are often less sharp than standard kitchen knives but still effective for cutting through pumpkin flesh. For instance, you can use a serrated knife from your kitchen or the largest serrated tool in a pumpkin carving kit for the initial cuts.
- 4 Girls One Fingerprint Unraveling The Mystery Behind The Viral Trend
- Melly
- Mothers Warmth Chapter 3 Jackerman
- Nude Fashion Show
- Aditi Mistry Nip Slip The Full Story Behind The Viral Moment
Beyond the primary cutting tools, a good kit often includes:
- Scoops: Essential for thoroughly cleaning out the pumpkin's insides, removing seeds and stringy pulp.
- Small Saws/Knives: Finer serrated tools for intricate details, allowing for precise cuts for eyes, noses, and mouths.
- Drills/Punches: For creating small holes or patterns, adding texture and detail.
- Stencils: Many kits come with pre-designed stencils, perfect for beginners or those looking for quick, impressive results.
Preparing Your Pumpkin for a Masterpiece
Before you dive into the artistic part of pumpkin carving, proper preparation is key. A well-prepared pumpkin ensures a smoother carving process and a longer-lasting display.
First, select a pumpkin that is firm, free of soft spots or blemishes, and has a relatively flat base so it won't wobble. Consider its shape and size in relation to your desired design. A taller pumpkin might be great for a ghostly figure, while a wider one offers more canvas for an elaborate scene.
Once you have your perfect pumpkin, it's time to open it up. Draw a circle with about a 2-inch (5.1 cm) radius from the stem with a washable marker. This marks the lid of your pumpkin. When cutting the lid, angle your knife slightly inwards, creating a cone shape. This prevents the lid from falling into the pumpkin once it's cut. Cut a lid into the top of the pumpkin with a serrated knife. Remember, you can use a serrated knife from your kitchen or the largest serrated tool in a pumpkin carving kit.
After the lid is removed, it's time for the messy, but crucial, step: scooping. Use a sturdy spoon or a specialized pumpkin scoop to thoroughly scrape out all the seeds and stringy pulp from the inside walls. The cleaner the interior, the less likely your pumpkin is to rot quickly, and the better the light will shine through your carved designs. Don't forget to scrape the inside of the lid as well! Some people even thin the walls of the pumpkin slightly, especially in areas where intricate details will be carved, to make cutting easier.
Unleashing Creativity: Pumpkin Carving Ideas for Every Skill Level
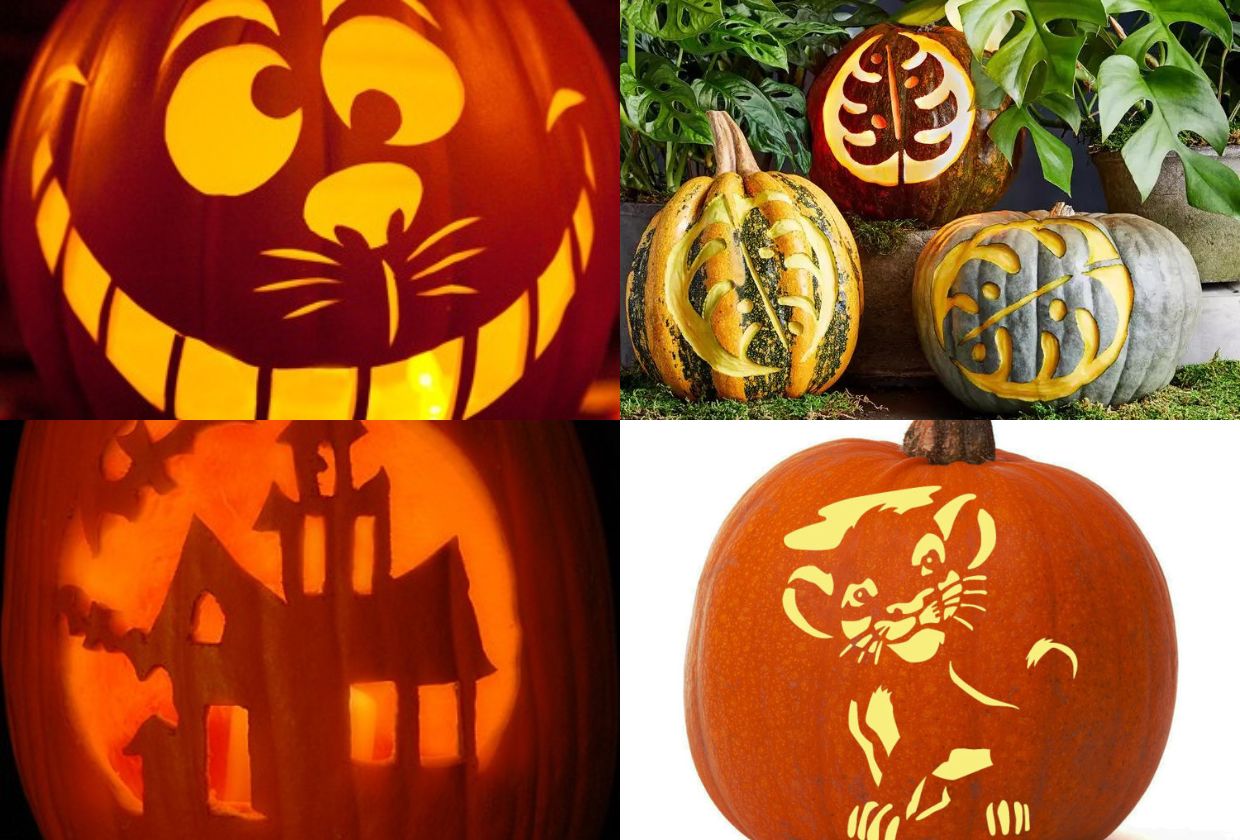
With your pumpkin prepped, the fun truly begins: designing! Since Halloween is quickly approaching, it’s time to start brainstorming your Halloween pumpkin carving designs. The possibilities are endless, ranging from delightfully simple to breathtakingly complex. We found the best easy pumpkin carving ideas to get you and your front porch into the Halloween spirit.
For beginners, the key is simplicity. Find simple options for beginners too! You don't need intricate details to create an impactful display. Think classic shapes: triangles for eyes, a simple crescent for a mouth. Easy pumpkin carving ideas, from sophisticated to cute to full on country, are guaranteed to delight all season long. Discover 30 super easy carving ideas perfect for beginners, like simple geometric patterns, friendly faces, or even just a few well-placed holes that create a starry effect when lit.
As you gain confidence, you can explore more intricate designs. From scary to cute, this list of pumpkin carving ideas is great for beginners and experts alike. You can go sweet or scary, cute or funny, clever or traditional. Consider popular themes like spooky ghosts, friendly monsters, black cats, or even characters from your favorite Halloween movies. For those looking for a challenge, try creating scenes with multiple elements or experimenting with shading techniques that don't cut all the way through the pumpkin wall.
Remember, the goal is to have fun and express your creativity. Don't be afraid to experiment with different styles and themes. The beauty of pumpkin carving is that every creation is unique, reflecting the personality of its carver.
Techniques and Styles in Pumpkin Carving
While many people think of pumpkin carving as simply cutting holes, there's a rich array of techniques and styles that can elevate your design. Just as in traditional carving arts, understanding different approaches can unlock new levels of creativity and detail for your Halloween pumpkin.
Basic Carving Techniques: The Classic Cut-Through
The most common and straightforward technique involves cutting completely through the pumpkin wall to create openings. This is the method used for traditional jack-o'-lanterns. It's excellent for bold, graphic designs, silhouetted shapes, and achieving maximum light output. For beginners, mastering clean, smooth lines with this technique is the first step. Practice makes perfect, and focusing on steady, controlled cuts will yield the best results.
Advanced Carving: Relief and 3D Effects
Inspired by techniques like relief carving in wood, you can create designs that don't cut entirely through the pumpkin. This involves scraping away only the outer layer of the pumpkin skin, or varying depths of the flesh, to create lighter areas that glow softly when lit from within. This method allows for incredible detail, shading, and texture, bringing your pumpkin to life with a more artistic, sculptural feel. Think of it as painting with light and shadow. For truly ambitious carvers, you can even attempt carving in the round, creating three-dimensional sculptures from the pumpkin, though this requires significant skill and specialized tools.
Pumpkin carving master James Hall explains pumpkin carving in 13 spooky levels of difficulty, showcasing the vast spectrum from simple cut-outs to incredibly detailed, multi-layered designs. His approach highlights how different techniques, often adapted from traditional carving methods, can be applied to pumpkins to achieve stunning results.
Innovating Your Pumpkin Designs
Here’s how to innovate your pumpkin carving and push the boundaries beyond traditional cuts:
- Surface Etching: Instead of cutting through, use small gouges or chisels to etch designs onto the pumpkin's surface. This creates a subtle, elegant look.
- Painting and Carving Combo: Paint your pumpkin in vibrant hues before carving. This adds an extra dimension of color, allowing you to create designs that pop even during the day.
- Varying Shapes: Don't stick to conventional shapes. Use different shapes for eyes, noses, and mouths to create unique expressions. A spiral eye or a jagged, toothy grin can be far more impactful than simple triangles.
- Adding Embellishments: Think beyond just the carving. Glue on googly eyes or yarn hair for a whimsical touch. Attach fabric scraps, buttons, or even small branches to give your pumpkin character.
- Textural Carving: Try carving scales or fur patterns. This involves making many small, repetitive cuts or scrapes to create realistic textures, adding depth and interest to your design.
- Multiple Pumpkins: Create a scene with several pumpkins, each contributing to a larger narrative. This allows for more complex storytelling and a grander display.
Safety First: Important Tips for a Smooth Carving Experience
While pumpkin carving is a fun and creative activity, it involves sharp tools, so safety should always be your top priority. That's where these pumpkin carving tips come in handy to ensure a smooth and injury-free experience for everyone involved.
- Supervision for Children: Always supervise children when they are involved in pumpkin carving. For very young children, it's best to let them draw the design and handle the scooping, while an adult does all the cutting. Specialized kid-friendly carving kits often include plastic tools that are safer for little hands, but adult supervision is still crucial.
- Sharp Tools are Safer: Counterintuitively, a dull knife requires more force, increasing the risk of slips. Ensure your carving tools are adequately sharp (if using kitchen knives) or use the serrated tools from a carving kit which are designed for safe, effective cutting.
- Cut Away from Yourself: Always direct your cuts away from your body and fingers. Maintain a firm grip on both the pumpkin and the tool.
- Stable Surface: Carve on a clean, dry, and stable surface. A wobbly pumpkin or a slippery counter can lead to accidents. Place a towel or newspaper underneath for easy cleanup.
- Good Lighting: Ensure you have ample lighting in your workspace. This helps you see your lines clearly and reduces the chance of miscuts.
- Take Your Time: Don't rush the process. Slow, deliberate cuts are much safer and lead to better results than hasty ones. If a piece is stuck, gently wiggle it rather than forcing it out.
By following these safety guidelines, you can ensure that your pumpkin carving experience remains a joyful and memorable part of your Halloween celebrations.
Displaying Your Carved Creation
Once your masterpiece is complete, the final step is to display it proudly. The right lighting and preservation techniques can make your carved pumpkin shine for days.
For lighting, traditional candles are classic, but LED battery-operated lights or string lights are safer alternatives, especially around children or in windy conditions. They also last longer and eliminate the risk of fire. Place your light source inside the pumpkin and watch your design come to life, casting spooky or cheerful glows.
To preserve your carved pumpkin and prevent it from rotting quickly, there are a few tricks:
- Moisturize: After carving, spray the inside and cut edges of your pumpkin with a mixture of water and a small amount of bleach (about 1 tablespoon per quart of water). This helps kill bacteria and keeps the pumpkin hydrated.
- Petroleum Jelly: Rub petroleum jelly (Vaseline) on all cut edges. This seals in moisture and prevents the pumpkin from drying out and shriveling.
- Refrigerate Overnight: If possible, place your pumpkin in a plastic bag and refrigerate it overnight. This helps it rehydrate and stay fresh longer.
- Avoid Direct Sunlight: Display your pumpkin in a cool, shaded area, away from direct sunlight, which can accelerate decomposition.
Beyond the Basics: Taking Your Pumpkin Carving to the Next Level
Pumpkin carving is an evolving art form, and there's always something new to learn or try. As Halloween approaches, it’s time to start brainstorming your Halloween pumpkin carving designs, whether you're aiming for a simple, charming display or an elaborate, show-stopping creation.
Carving with Kids: Fun and Easy Projects
Pumpkin carving is a fantastic family activity. Great to do with kids as it’s really easy to do with hardly any tools. Go crazy and let their imaginations run wild! For younger children, focus on the fun rather than perfection. They can help with drawing designs on the pumpkin with washable markers, scooping out the pulp, or decorating the pumpkin with paint, glitter, or stick-on embellishments. For slightly older children, simple cut-out shapes or stencils are ideal. Emphasize safety and supervision, making it a collaborative effort where adults handle the sharp tools and children contribute to the creative vision and non-cutting tasks. This shared experience fosters creativity and builds lasting Halloween memories.
Brainstorming Your Next Masterpiece
Since Halloween is quickly approaching, it’s time to start brainstorming your Halloween pumpkin carving designs. Don't limit yourself to traditional faces. Consider themes from pop culture, nature, or abstract art. Look for inspiration in books, movies, or even online galleries of carved pumpkins. Think about how light will interact with your design – will it create spooky shadows, a soft glow, or a dramatic silhouette? Experiment with different types of pumpkins too; some have unique shapes or colors that can inspire entirely new concepts. Are you ready to carve your path in pumpkin artistry? There’s something always so pleasant about building something out of nothing, and with a pumpkin, the possibilities are truly endless.
Conclusion
Pumpkin carving is more than just a Halloween activity; it's a cherished tradition that brings families together, sparks creativity, and adds a unique, glowing charm to the autumn season. From the initial hunt for the perfect pumpkin to the careful selection of tools, the messy but satisfying scooping, and finally, the intricate process of carving, each step is part of a rewarding journey. We've explored everything from essential tools and preparation techniques to a myriad of design ideas for every skill level, emphasizing safety and innovation along the way.
Whether you choose to create a classic jack-o'-lantern, an elaborate relief carving, or a whimsical painted pumpkin, the joy lies in the process and the unique character you bring to your gourd. So, as the days grow shorter and the air turns crisp, grab your tools, gather your loved ones, and let your imagination run wild. Your front porch awaits its glowing, handcrafted masterpiece. What spooky or sweet design will you bring to life this Halloween? Share your ideas in the comments below, or better yet, share photos of your amazing carved pumpkins!
- Kaitlan Collins Husband A Closer Look At Their Relationship
- Peter Doocy Wife Cancer
- Peter Ellis Kings Guard
- Jayshree Gaikwad Web Series
- Malika Andrews Husband
30 of the best pumpkin carving stencils for Halloween 2024 - Gathered

Turkey Pumpkin Carving Design

Pumpkin Carving Templates
