Mushroom Drawing: Your Ultimate Guide To Capturing Fungal Beauty
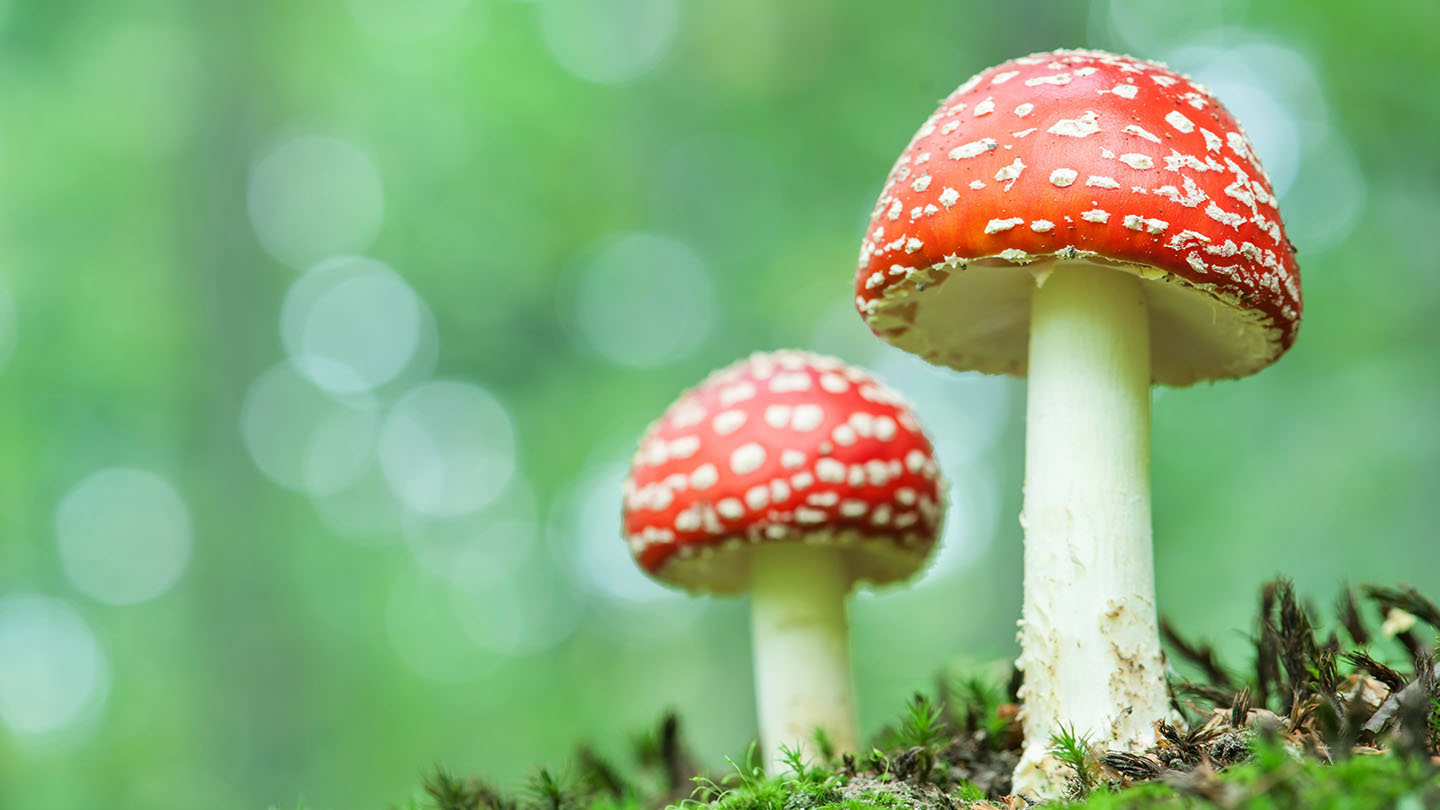
Step into the enchanting world of fungi, where nature's most whimsical forms await your artistic touch. From the majestic fly agaric to the humble button mushroom, the diversity of these organisms offers an endless canvas for creativity. Whether you're a seasoned artist seeking new inspiration or a curious beginner just starting your journey, the art of mushroom drawing provides a unique blend of challenge and delight, allowing you to explore intricate details, playful shapes, and the subtle interplay of light and shadow.
This comprehensive guide is designed to equip you with the knowledge, techniques, and inspiration needed to master the art of mushroom drawing. We'll delve into everything from foundational anatomy and perspective to advanced shading techniques and creative prompts, ensuring that no matter your skill level—beginner, intermediate, or even professional—you'll find valuable insights to elevate your artwork. Prepare to discover the joy of bringing these fascinating organisms to life on paper, transforming simple lines into captivating fungal masterpieces.
Table of Contents
- The Enduring Appeal of Mushroom Drawing
- Getting Started: Essential Tools for Mushroom Drawing
- Foundation First: Understanding Mushroom Anatomy for Drawing
- Mastering Perspective and Depth in Mushroom Drawing
- Techniques for Realistic Mushroom Drawing
- Exploring Diverse Mushroom Drawing Ideas and Prompts
- Step-by-Step Guide: Drawing a Simple Mushroom
- Drawing Challenging Mushrooms: The Destroying Angel
- The Broader Art Community and Mushroom Enthusiasts
The Enduring Appeal of Mushroom Drawing
Mushrooms, with their myriad shapes, textures, and often vibrant colors, have captivated artists and naturalists for centuries. Their unique biological forms, ranging from classic umbrella shapes to intricate coral-like structures, offer an endless source of artistic inspiration. Beyond their aesthetic appeal, mushrooms often evoke a sense of mystery, whimsy, and connection to the natural world, making them a popular subject in various art forms. For many, the act of mushroom drawing is not just about replicating a form but about capturing the essence of these fascinating organisms that thrive in damp, shaded environments.
- Guillermo Net Worth Jimmy Kimmel
- Alexandria Hoff
- Roman And Sharon
- 4 Girls One Fingerprint Unraveling The Mystery Behind The Viral Trend
- Emily Compagno Age
The popularity of drawing, in general, is evident in the vast online communities dedicated to it. With millions of enthusiasts, such as the 4.6 million subscribers in one prominent drawing community and another boasting 5 million subscribers, it's clear that drawing is a universally cherished act of making marks on a substrate by moving something across it. Within this expansive artistic landscape, the specific niche of mushroom drawing thrives, supported by dedicated communities like the 201k subscribers in the mushrooms community, where enthusiasts share their fungal finds and artistic interpretations. This cross-pollination between nature lovers and artists highlights the enduring appeal of mushrooms as a subject that marries botanical interest with creative expression.
Getting Started: Essential Tools for Mushroom Drawing
Embarking on your mushroom drawing journey doesn't require an extensive art studio. In fact, some of the most beautiful illustrations are created with surprisingly simple tools. The core idea behind drawing is simply the act of making marks on a substrate by moving something across it, and for mushroom drawing, this principle holds true.
- Pencils: A basic set of graphite pencils (HB, 2B, 4B, 6B) will allow you to achieve a range of line weights and shading. HB is great for initial sketches, while softer leads (like 4B or 6B) are perfect for darker tones and rich shadows.
- Paper: Choose a smooth drawing paper that can withstand erasing without tearing or smudging too much. A good quality sketch pad is an excellent starting point.
- Eraser: A kneaded eraser is invaluable for lifting graphite without damaging the paper, and a vinyl eraser is good for crisp, clean removal.
- Blender/Stumps: Tortillons or blending stumps can help you achieve smooth transitions in your shading, giving your mushroom drawings a more polished look.
- Reference Images: While drawing from life is ideal, high-quality photographs of various mushrooms are excellent references. Look for images that show clear lighting and different angles.
Remember, the tools are merely extensions of your hand and eye. The true artistry lies in your observation and dedication. Don't let a lack of fancy equipment deter you; simple tools are often the best for learning the fundamentals of mushroom drawing.
Foundation First: Understanding Mushroom Anatomy for Drawing
Before you can master mushroom drawing, it's crucial to understand their basic anatomy. Each part plays a role in the overall form and character of the mushroom, and knowing these components will significantly improve the accuracy and realism of your drawings. From the towering caps that peak above you to the subtle details of their undersides, every element contributes to the mushroom's unique appearance.
The Cap: Shapes and Textures
The cap is often the most distinctive feature of a mushroom, varying widely in shape, size, and texture. Common cap shapes include:
- Conical: Pointed, like a wizard's hat.
- Convex: Dome-shaped, like a button mushroom.
- Flat/Planar: Completely flat, often seen in mature specimens.
- Umbilicate: With a central depression.
- Infundibuliform: Funnel-shaped.
When drawing the cap, pay attention to its curvature and how it interacts with light. Textures can range from smooth and slimy to scaly, velvety, or even hairy. Observing these details will add depth and realism to your mushroom drawing. For instance, outlining the cap of a simple mushroom often starts by drawing two rounded triangles, which can then be refined into the desired shape.
The Stalk: Structure and Form
The stalk, or stipe, supports the cap and connects it to the substrate. Stalks can be thick or slender, straight or curved, and may have various features like rings (annulus) or volvas (a cup-like structure at the base). When drawing the stalk, consider its proportion to the cap and how it tapers or widens. Artists can create a simple, curved line for the stem and add small details to give it character, capturing the essence of a whimsical shroom stalk that adds a playful touch to minimalist mushroom drawings. Remember that the stalk also plays a crucial role in establishing perspective, as we'll discuss later.
Gills and Spores: Hidden Details
Underneath the cap, most mushrooms have gills, which are radiating folds that produce spores. Gills can be tightly packed or widely spaced, and their color can vary. While often not the primary focus of a mushroom drawing, indicating the presence of gills, even subtly, adds to the realism. Spore prints, though not usually visible on the mushroom itself, are an interesting detail for more scientific or detailed illustrations. Understanding these internal structures helps in creating a believable and accurate representation of your fungal subject.
Mastering Perspective and Depth in Mushroom Drawing
Creating a sense of depth and realism in your mushroom drawing is paramount to making it visually compelling. Without proper perspective, even a well-drawn mushroom can feel flat or like an optical illusion. This is where understanding how objects appear at different distances and angles becomes crucial.
Consider the scenario described in the "Data Kalimat": "The cap of the fat mushroom overlapping the stalk of the tall mushroom tells you it is nearest to the viewer." This is a fundamental principle of overlapping. When one object partially covers another, the one in front is perceived as closer. To further enhance this, if you have a "tall mushroom" that is "further away and leaning even further away," it absolutely "should not be in front of the fat one" that is closer to the viewer. This seemingly simple rule is vital for avoiding visual confusion and creating a believable three-dimensional space on a two-dimensional surface.
To achieve depth in your mushroom drawing:
- Overlapping: As mentioned, strategically place elements so that closer objects obscure parts of farther ones.
- Size Variation: Objects appear smaller as they recede into the distance. Draw mushrooms in the background smaller than those in the foreground.
- Detail and Clarity: Objects closer to the viewer should have more detail and sharper lines. As objects recede, their details become less distinct, and their lines can be softer or lighter.
- Atmospheric Perspective: For more complex scenes, objects further away may appear lighter, less saturated, and bluer due to the atmosphere between them and the viewer.
- Foreshortening: When parts of an object are angled towards or away from the viewer, they appear shorter than their actual length. This is especially important when drawing a mushroom cap viewed from an extreme angle.
By consciously applying these perspective techniques, your mushroom drawings will transcend simple outlines and gain a captivating sense of space and realism, making them truly good drawings where the lines are great and the depth is convincing.
Techniques for Realistic Mushroom Drawing
Once you understand the anatomy and principles of perspective, you can dive into the techniques that bring your mushroom drawing to life. Realism in art is often achieved through careful observation and the skillful application of line, tone, and texture.
Line Work and Shading
Line work forms the skeleton of your mushroom drawing. Start with light, confident lines to establish the basic shapes. As you refine your drawing, vary the line weight—thicker lines for closer edges or areas in shadow, thinner lines for lighter areas or details.
Shading is where the magic happens, transforming flat shapes into three-dimensional forms. To achieve realistic shading:
- Identify the Light Source: Determine where the light is coming from. This will dictate where highlights, mid-tones, and shadows fall.
- Build Up Layers: Don't press too hard initially. Gradually build up darker tones by layering your pencil strokes.
- Cross-Hatching/Circulism: Use various shading techniques. Cross-hatching involves overlapping parallel lines. Circulism uses tiny, overlapping circles to create smooth textures, ideal for the often organic surfaces of mushrooms.
- Reflected Light: Look for subtle areas where light bounces off surrounding surfaces and illuminates the shadow side of the mushroom.
- Cast Shadows: These are crucial for grounding your mushroom in its environment. A mushroom cut to a stump, with the remains of a campfire nearby, or a footprint in the damp soil of a cave’s floor, all suggest a cast shadow that anchors the drawing in reality.
Adding Whimsical Touches: Beyond Realism
While realism is rewarding, mushroom drawing also lends itself beautifully to imaginative and whimsical interpretations. As the "Data Kalimat" suggests, "A whimsical shroom stalk adds a playful touch to minimalist mushroom drawings." This means you don't always have to stick to strict botanical accuracy.
Consider:
- Exaggerated Features: Draw an unusually tall, thin stalk, or a cap that's disproportionately large and colorful.
- Fantasy Elements: Integrate your mushrooms into a magical forest scene, perhaps with tiny doors at their base, or glowing spores. Imagine a scene where you're standing just outside the torchlight, and a shadowy humanoid with glowing red eyes appears, with more eyes appearing behind it, and others peaking over the mushroom caps that tower above you. This kind of narrative can inspire truly unique and fantastical mushroom drawings.
- Personification: Give your mushrooms faces, limbs, or even tiny accessories.
- Stylization: Simplify forms, use bold outlines, or experiment with abstract patterns on the caps.
This approach allows for immense creative freedom, turning your mushroom drawing into a portal to fantastical realms and personal expression.
Exploring Diverse Mushroom Drawing Ideas and Prompts
The world of mushrooms is incredibly vast, offering an inexhaustible supply of inspiration for your artistic endeavors. Whether you're looking for something simple or a more complex scene, there are countless mushroom drawing ideas to spark your creativity. As the "Data Kalimat" highlights, you can "Learn how to draw a simple mushroom and discover a wide array of mushroom drawing ideas, suitable for all skill levels and ages. With over 40 drawing prompts to choose from, you’re sure to find the perfect inspiration for your artistic endeavors."
Here are some prompts to get you started:
- Single Specimen Study: Focus on one mushroom, capturing its unique details, textures, and the way light hits its surface.
- Mushroom Cluster: Draw a group of mushrooms growing together, experimenting with overlapping and varying sizes to create depth.
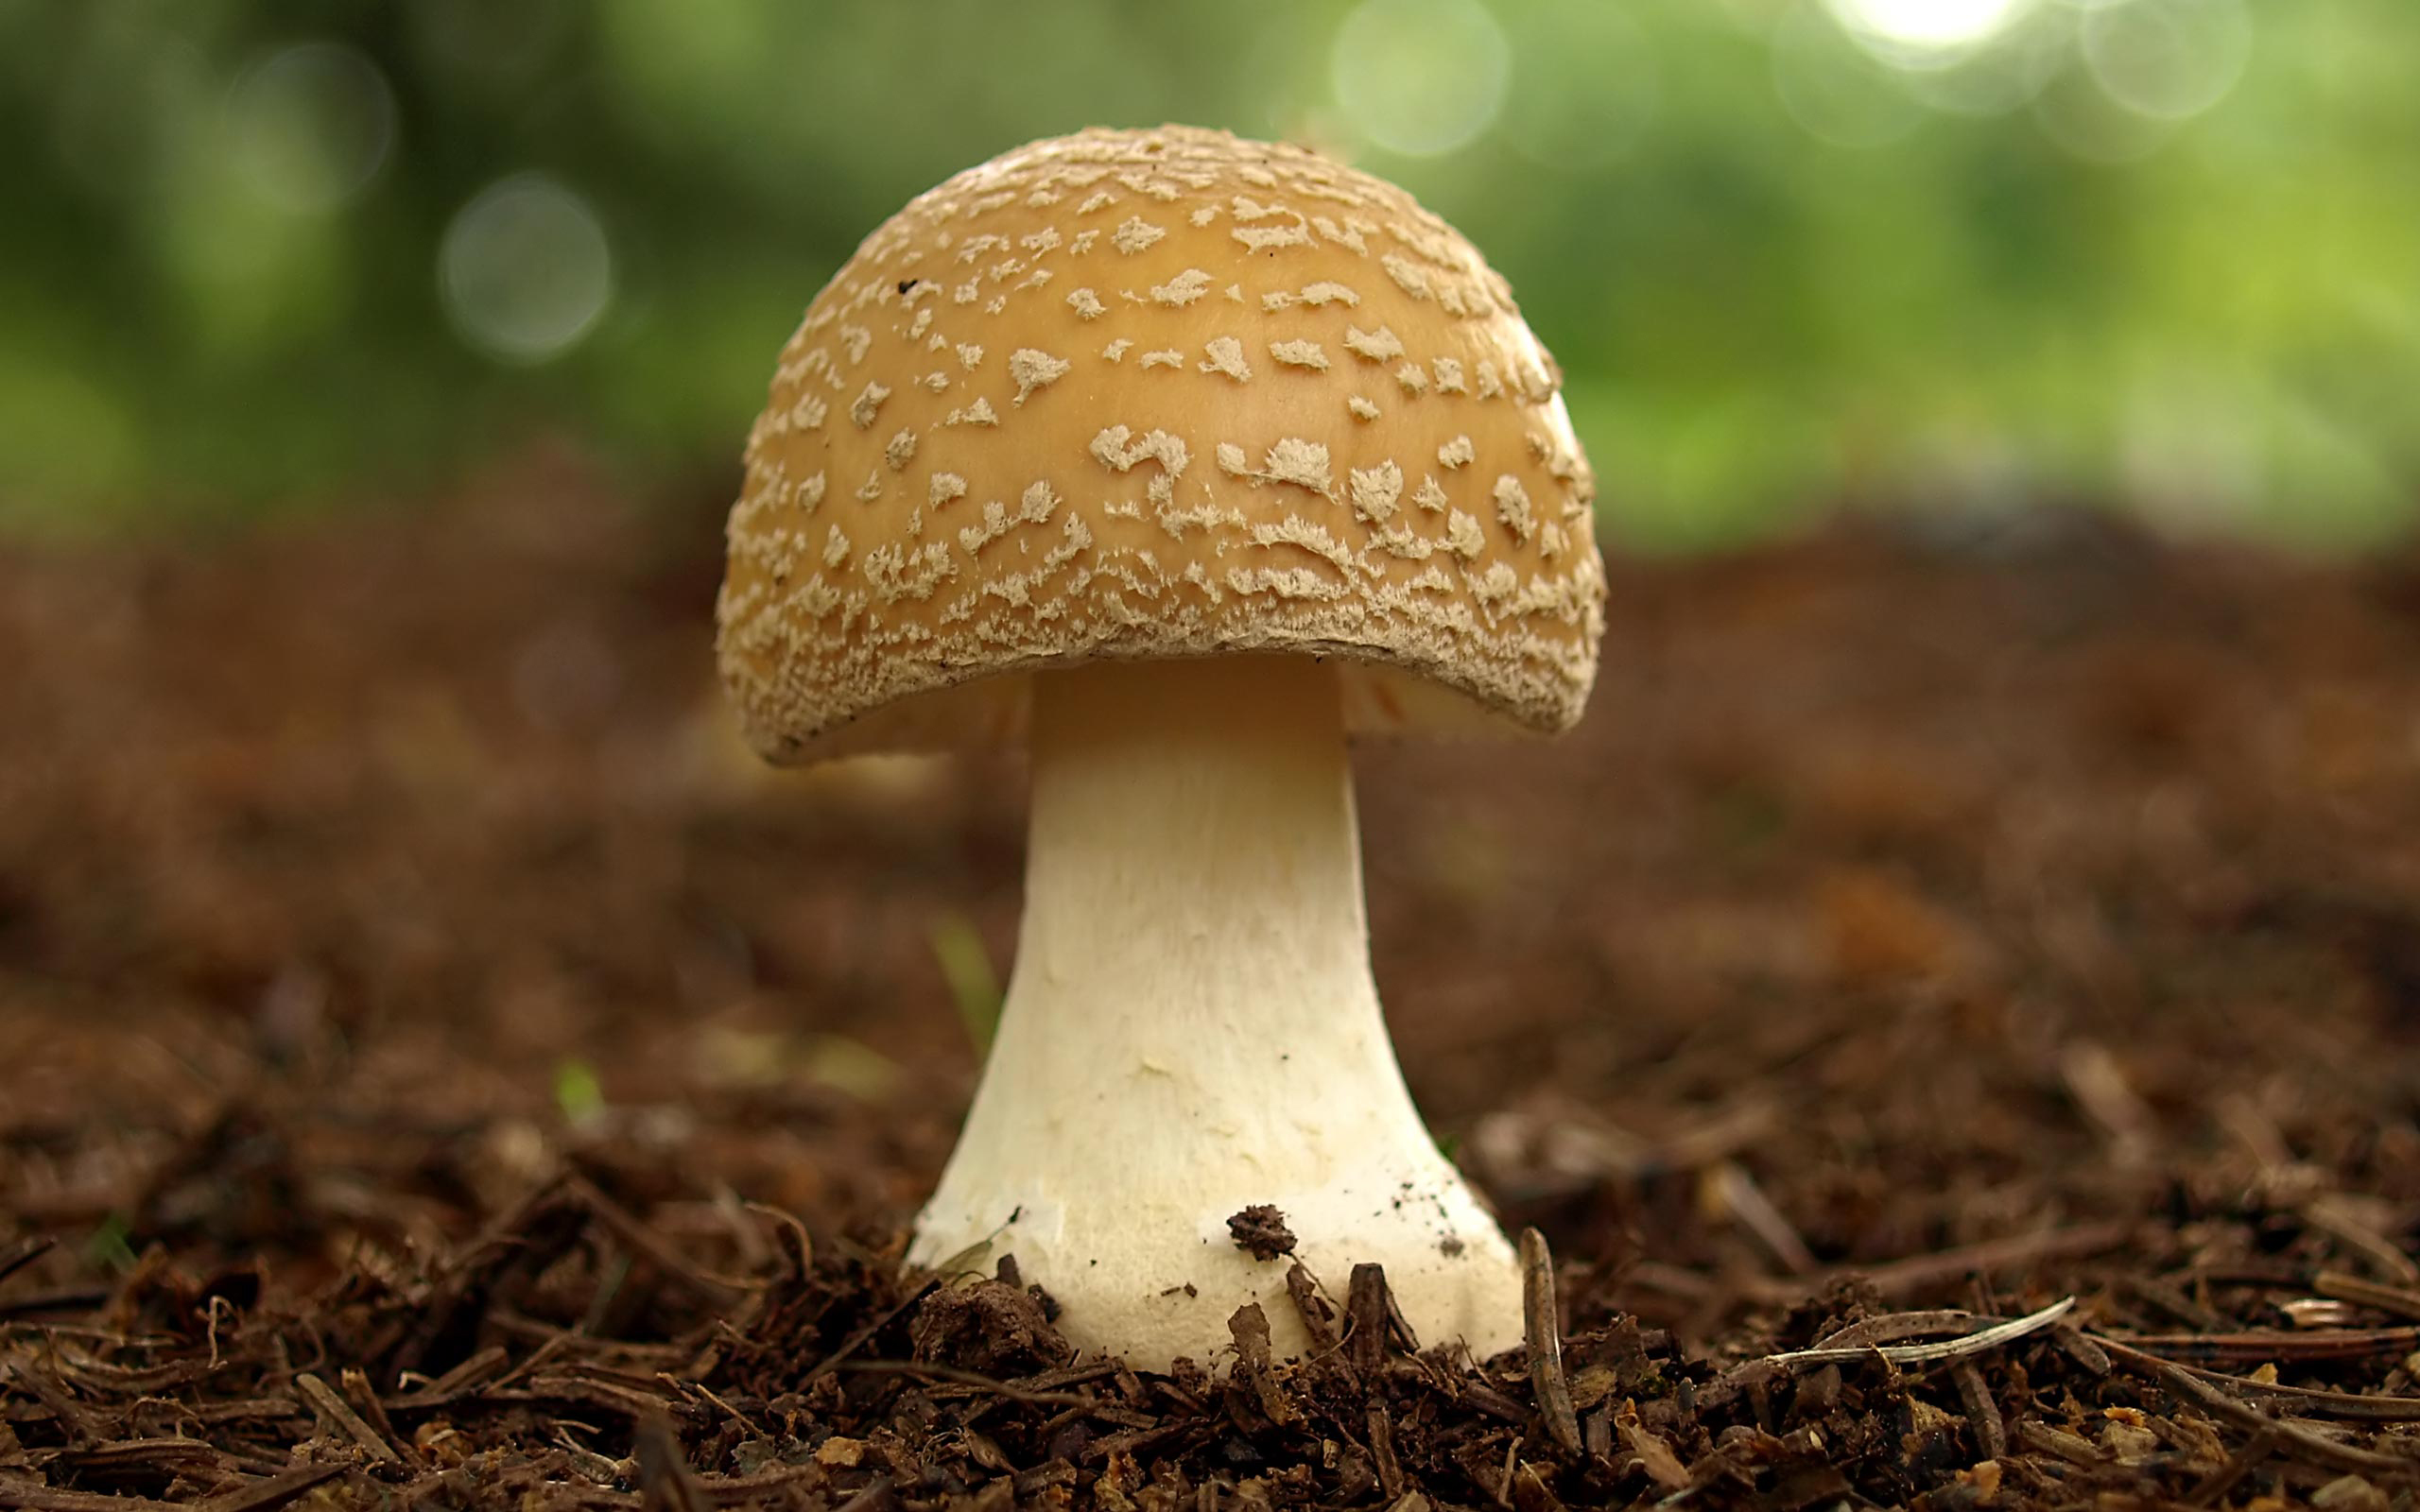
- Mushroom in its Habitat: Depict a mushroom within its natural environment – perhaps nestled among moss, fallen leaves, or growing on a log.
- Fantasy Forest Scene: Create an imaginative scene where giant mushrooms serve as homes for tiny creatures, or glow with bioluminescent light.
- Mushroom Still Life: Arrange a few different types of mushrooms on a surface, perhaps with other natural elements like berries or leaves.
- Cross-Sectional View: For a more scientific approach, draw a mushroom cut in half to reveal its internal structures like gills and spores.
- Mushroom Characters: Design whimsical mushroom characters with unique personalities.
- Minimalist Mushroom: Focus on simple, clean lines to capture the essence of a mushroom without excessive detail.
- Mushroom Patterns: Use mushroom shapes to create repeating patterns for decorative purposes.
With 38,476+ free mushroom drawing illustrations available, finding inspiration for your project has never been easier. These resources can help you find the perfect illustration graphic for your project, offering a visual library of ideas and styles.
Step-by-Step Guide: Drawing a Simple Mushroom
For those just beginning their mushroom drawing journey, starting with a simple, classic mushroom shape is an excellent way to build confidence and understand basic forms. This easy mushroom drawing process will guide you through the fundamental steps.
You’ll follow these simple steps:
- Step 1: Outline the Cap. Begin by outlining the cap of the mushroom. A good starting point is to draw two rounded triangles that meet at the top, forming a basic dome shape. Don't press too hard, as these are just your initial guidelines.
- Step 2: Draw the Stalk. Below the cap, draw two parallel lines for the stalk (or stem). You can make it straight or slightly curved to add character. Ensure the stalk is proportionate to the cap.
- Step 3: Add the Gills (Optional but Recommended). Underneath the cap, draw a series of radiating lines from the center outwards to represent the gills. These don't need to be perfectly detailed; a suggestion of their presence is often enough for a simple drawing.
- Step 4: Refine and Erase. Go over your initial lines, making them darker and smoother. Erase any unnecessary guidelines. You can also add a subtle curve to the bottom of the cap where it meets the stalk to give it a more organic feel.
- Step 5: Basic Shading. Choose a light source. Add light shading to the underside of the cap and one side of the stalk to give your mushroom drawing a sense of volume. A simple gradient from dark to light will suffice.
- Step 6: Grounding the Mushroom. Draw a simple line or a small patch of grass/soil beneath the stalk to show that the mushroom is rooted. This helps to anchor your drawing.
This basic framework can be adapted and expanded upon as your skills grow, allowing you to move from simple forms to more complex and detailed mushroom illustrations.
Drawing Challenging Mushrooms: The Destroying Angel
While starting with simple forms is beneficial, challenging yourself with more complex subjects can significantly advance your mushroom drawing skills. One such subject is the Destroying Angel mushroom (Amanita virosa or Amanita bisporigera), renowned for its deadly beauty. Its pure white, elegant appearance, though deceptively innocent, presents unique artistic challenges in capturing its subtle nuances.
To draw the Destroying Angel, you’ll follow these simple steps, focusing on its distinctive features:
- The Pure White Cap: Unlike colorful mushrooms, the Destroying Angel's cap requires careful attention to subtle shading and highlights to convey its pristine white texture without making it look flat. Use very light pencil pressure and focus on the soft transitions of light and shadow to suggest its rounded form.
- The Elegant Stalk and Ring: Its stalk is typically slender and tall, often with a delicate, skirt-like ring (annulus) just below the cap. Pay attention to the way the ring drapes and folds, adding a sense of fragility.
- The Volva: A key identifying feature of the Destroying Angel is the cup-like volva at the base of its stalk, which often remains partially buried. This structure is crucial for accurate representation and adds to the mushroom's overall elegance.
- Subtle Gills: The gills are typically white and free (not attached to the stalk). Drawing these requires precision, ensuring they appear delicate and numerous without overwhelming the pure white aesthetic.
- Environmental Context: To emphasize its solitary and often eerie beauty, consider placing it in a sparse, natural setting, perhaps with minimal ground cover, allowing its stark white form to stand out.
Drawing the Destroying Angel is an excellent exercise in rendering white objects, focusing on form through subtle tonal variations rather than strong contrasts. It pushes artists to observe closely and capture the delicate beauty of a truly iconic, albeit dangerous, mushroom.
The Broader Art Community and Mushroom Enthusiasts
The journey of artistic creation, especially in a niche like mushroom drawing, is rarely a solitary one. The internet has fostered vibrant communities where artists of all levels can connect, share, and grow. As highlighted in the "Data Kalimat," the sheer volume of subscribers in drawing communities (4.6 million and 5 million respectively) demonstrates the global passion for art. Within these broader spaces, and more specifically in dedicated groups like the mushrooms community with its 201k subscribers, you'll find a supportive environment where "discussion, technique, gear, and all kinds of artwork are welcome."
These communities are invaluable resources for mushroom drawing enthusiasts. They offer:
- Inspiration: Seeing the diverse range of mushroom illustrations from others can spark new ideas and push your creative boundaries.
- Feedback: Sharing your mushroom drawing allows you to receive constructive criticism, helping you identify areas for improvement.
- Learning: Many artists share tutorials, tips, and insights into their processes, from basic "mushroom drawing (easy) step 1" guides to advanced techniques.
- Motivation: We all have days where we just forget or don't have the motivation to draw even though we know we probably should. Being part of a community can provide the encouragement needed to pick up your pencil again.
- Resources: You can discover new tools, art supplies, and reference materials.
Whether you are a beginner, intermediate, or even a professional, engaging with these communities can enrich your artistic journey. It’s a space where you can celebrate the act of making marks on a substrate by moving something across it, and find camaraderie in your shared love for both art and the fascinating world of fungi.
Conclusion
The art of mushroom drawing offers a captivating blend of natural beauty, intricate detail, and boundless creative freedom. From understanding the foundational anatomy of the cap and stalk to mastering perspective and depth, we've explored the essential techniques that transform simple lines into vibrant, three-dimensional fungal forms. We've also delved into diverse drawing ideas, from easy step-by-step guides for beginners to the challenging elegance of the Destroying Angel, ensuring there's inspiration for every skill level.
Remember, the journey of artistic mastery is continuous. Embrace the process, learn from every stroke, and don't be afraid to experiment with both realistic and whimsical approaches. The vast and supportive online communities dedicated to drawing and mushrooms stand ready to welcome your contributions, offering a space for discussion, technique sharing, and endless inspiration. So, pick up your pencil, find your favorite mushroom reference, and start creating. What fungal masterpiece will you bring to life next? Share your creations in the comments below, or explore our other articles for more artistic guidance!
- Barron Trump Illness The Facts Speculations And Everything You Need To Know
- Terrel Williams
- Major Harris Ti Son Died
- Sophie Rain Only Fans Leak
- Sophie Rain
.JPG)
Mushroom - wikidoc
Types Of UK Mushrooms: Identification Guide - Woodland Trust
Mushrooms nutrition facts and health benefits |HB times
