Unlocking The Secrets Of Realistic Forest Drawing
Have you ever gazed upon a majestic forest, its trees reaching for the sky, sunlight dappling through the leaves, and felt an irresistible urge to capture that beauty on paper? Many aspiring artists find the prospect of a detailed forest drawing intimidating, believing it to be an insurmountable challenge. The sheer number of trees, the intricate foliage, and the play of light and shadow can indeed seem overwhelming at first glance. However, as we will explore in this comprehensive guide, drawing a forest is far easier than you think, breaking down the complexity into manageable, enjoyable steps.
This article is designed to demystify the art of creating a stunning forest scene, transforming what seems like a daunting task into a rewarding artistic journey. Whether you're a complete beginner or looking to refine your skills, we'll guide you through the essential techniques, from selecting the right tools to mastering depth, texture, and light. Our aim is to provide you with practical, actionable advice, ensuring that by the end, you'll be confident in creating your own lush, vibrant woodland scenes that truly come alive on paper.
Table of Contents
- Why Draw Forests? The Allure of the Woodland Scene
- Essential Tools for Your Forest Drawing Journey
- Laying the Foundation: Sketching Your Forest Scene Step by Step
- Adding Life: Details and Textures for an Immersive Forest Drawing
- Exploring Different Forest Scenes: Beyond the Green Canopy
- Finding Inspiration for Your Next Forest Drawing
- Beyond the Canvas: Monetizing Your Forest Drawing Skills
- Conclusion
Why Draw Forests? The Allure of the Woodland Scene
Forests hold a unique place in our collective imagination. They are places of mystery, tranquility, and boundless natural beauty. For artists, they offer an incredible array of textures, shapes, and lighting conditions, making them a fascinating subject. As the data suggests, "So many people find drawing a forest intimidating but as we will see it’s far easier than you think." This intimidation often stems from the perceived complexity, but the truth is, once you understand the foundational principles, the process becomes incredibly rewarding.
- Paige Vanzant Leaked Nudes
- Discovering The Legacy Of Desi Arnaz Jr
- Is Jasmine Crockett Married With Children
- Miaz Onlyfans Leak
- Riley Green The Country Star Who Proudly Stands As A Trump Supporter
Drawing a forest allows you to connect with nature on a deeper level, observing the nuances of tree bark, the delicate dance of leaves, and the way light filters through the canopy. It’s an exercise in patience and observation, culminating in a piece of art that evokes peace, wildness, or even a sense of enchantment. Whether you aim for hyper-realism or a more stylized approach, the journey of creating a forest drawing is as enriching as the final artwork itself.
Essential Tools for Your Forest Drawing Journey
You don't need an arsenal of expensive art supplies to begin your forest drawing adventure. In fact, some of the most compelling forest scenes can be created with surprisingly simple tools. To "create a realistic forest drawing," you can start with just a few key items:
- Pencil: Your primary tool for sketching and shading. A range of hardness (e.g., HB, 2B, 4B, 6B) will allow for varied line weights and tonal values.
- Blue Pencil: Excellent for initial light sketches, as blue lines are often easier to erase or become less visible under darker layers of graphite or color.
- Ballpoint Pen: For adding sharp details, defining outlines, or creating cross-hatching for texture, especially useful for intricate tree bark or foliage.
- Marker: Can be used for laying down broad areas of dark tone, creating strong contrasts, or for adding vibrant color if you're working in a mixed-media style.
- Color Pencils: If you're looking to add color, "How to draw pine forest with color pencils for beginners" tutorials often highlight their versatility. They allow for layering, blending, and creating rich, nuanced hues.
- Eraser: Both kneaded and rubber erasers are essential for corrections and for lifting highlights.
- Paper: Choose a paper with a bit of tooth (texture) to hold graphite or color pencil layers effectively.
Remember, the tools are merely extensions of your hand and vision. Mastery comes from understanding how to use them to achieve the desired effects, not from owning the most expensive brands.
- Ola Alphy The Rising Star You Need To Know About
- Marie Temara
- Debate Can Mexicans Say The Nword Context
- Jayshree Gaikwad Web Series
- Lisa Bessette
Laying the Foundation: Sketching Your Forest Scene Step by Step
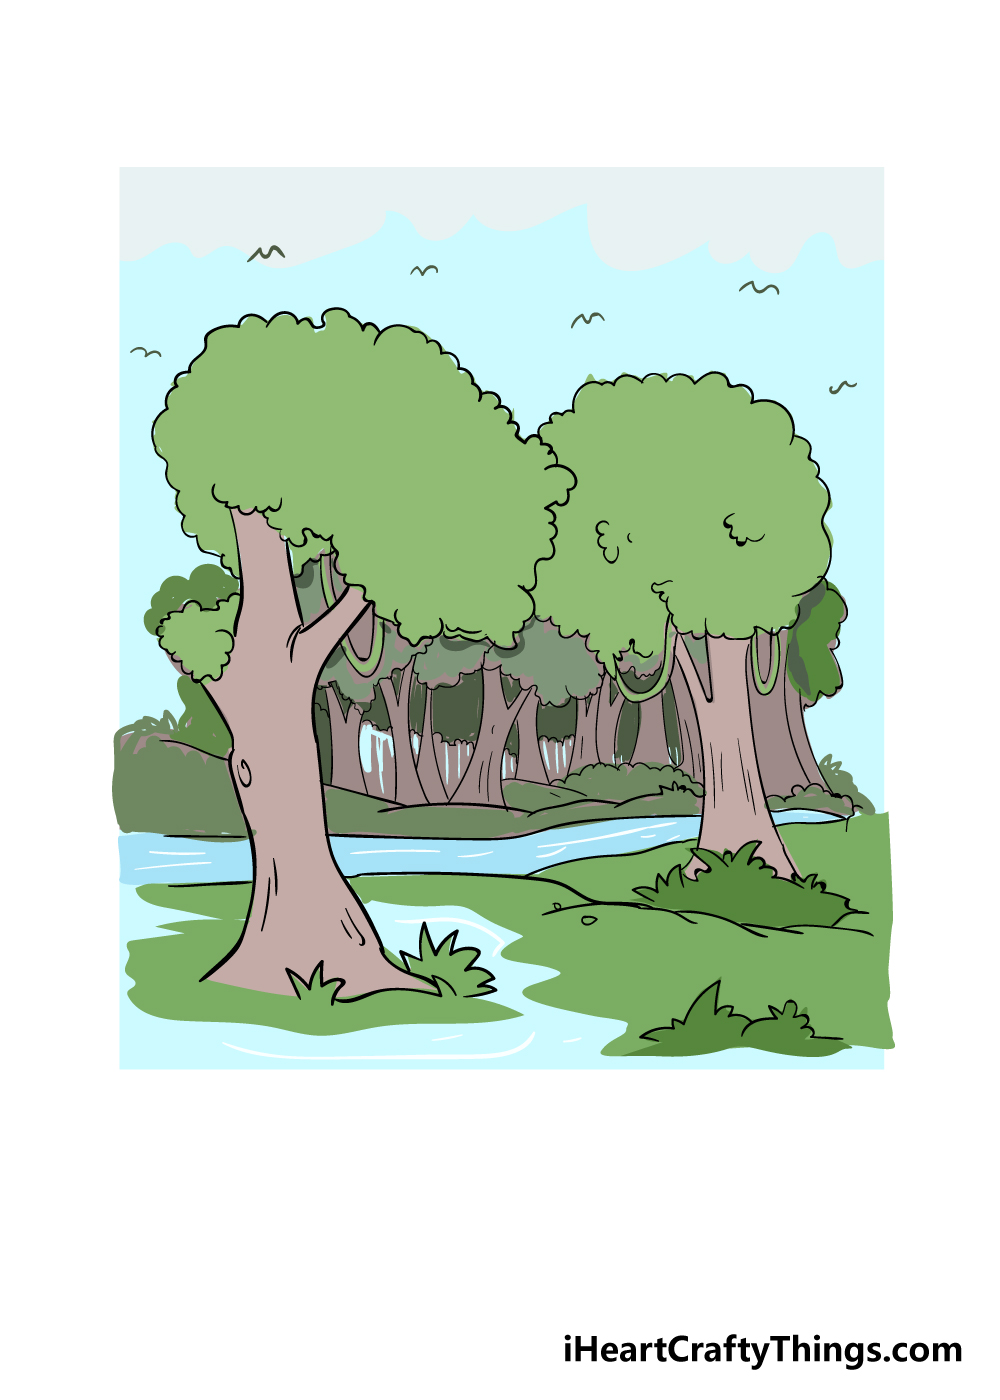
Every impressive forest drawing begins with a solid foundation. The key is to "follow the easy steps to sketch, shade, and add details to the trees, water, and foliage." Don't rush this initial phase; a well-planned sketch will make the rest of the process much smoother. Start by lightly outlining the major elements of your scene: the horizon line, the general shape of the forest mass, and the placement of any prominent trees or features like a stream.
Think of your forest drawing as a composition, not just a collection of individual trees. Consider the rule of thirds or other compositional guidelines to create a balanced and visually appealing scene. Once the basic layout is established, you can begin to build up the layers, adding depth and detail.
Building Layers for Depth and Realism
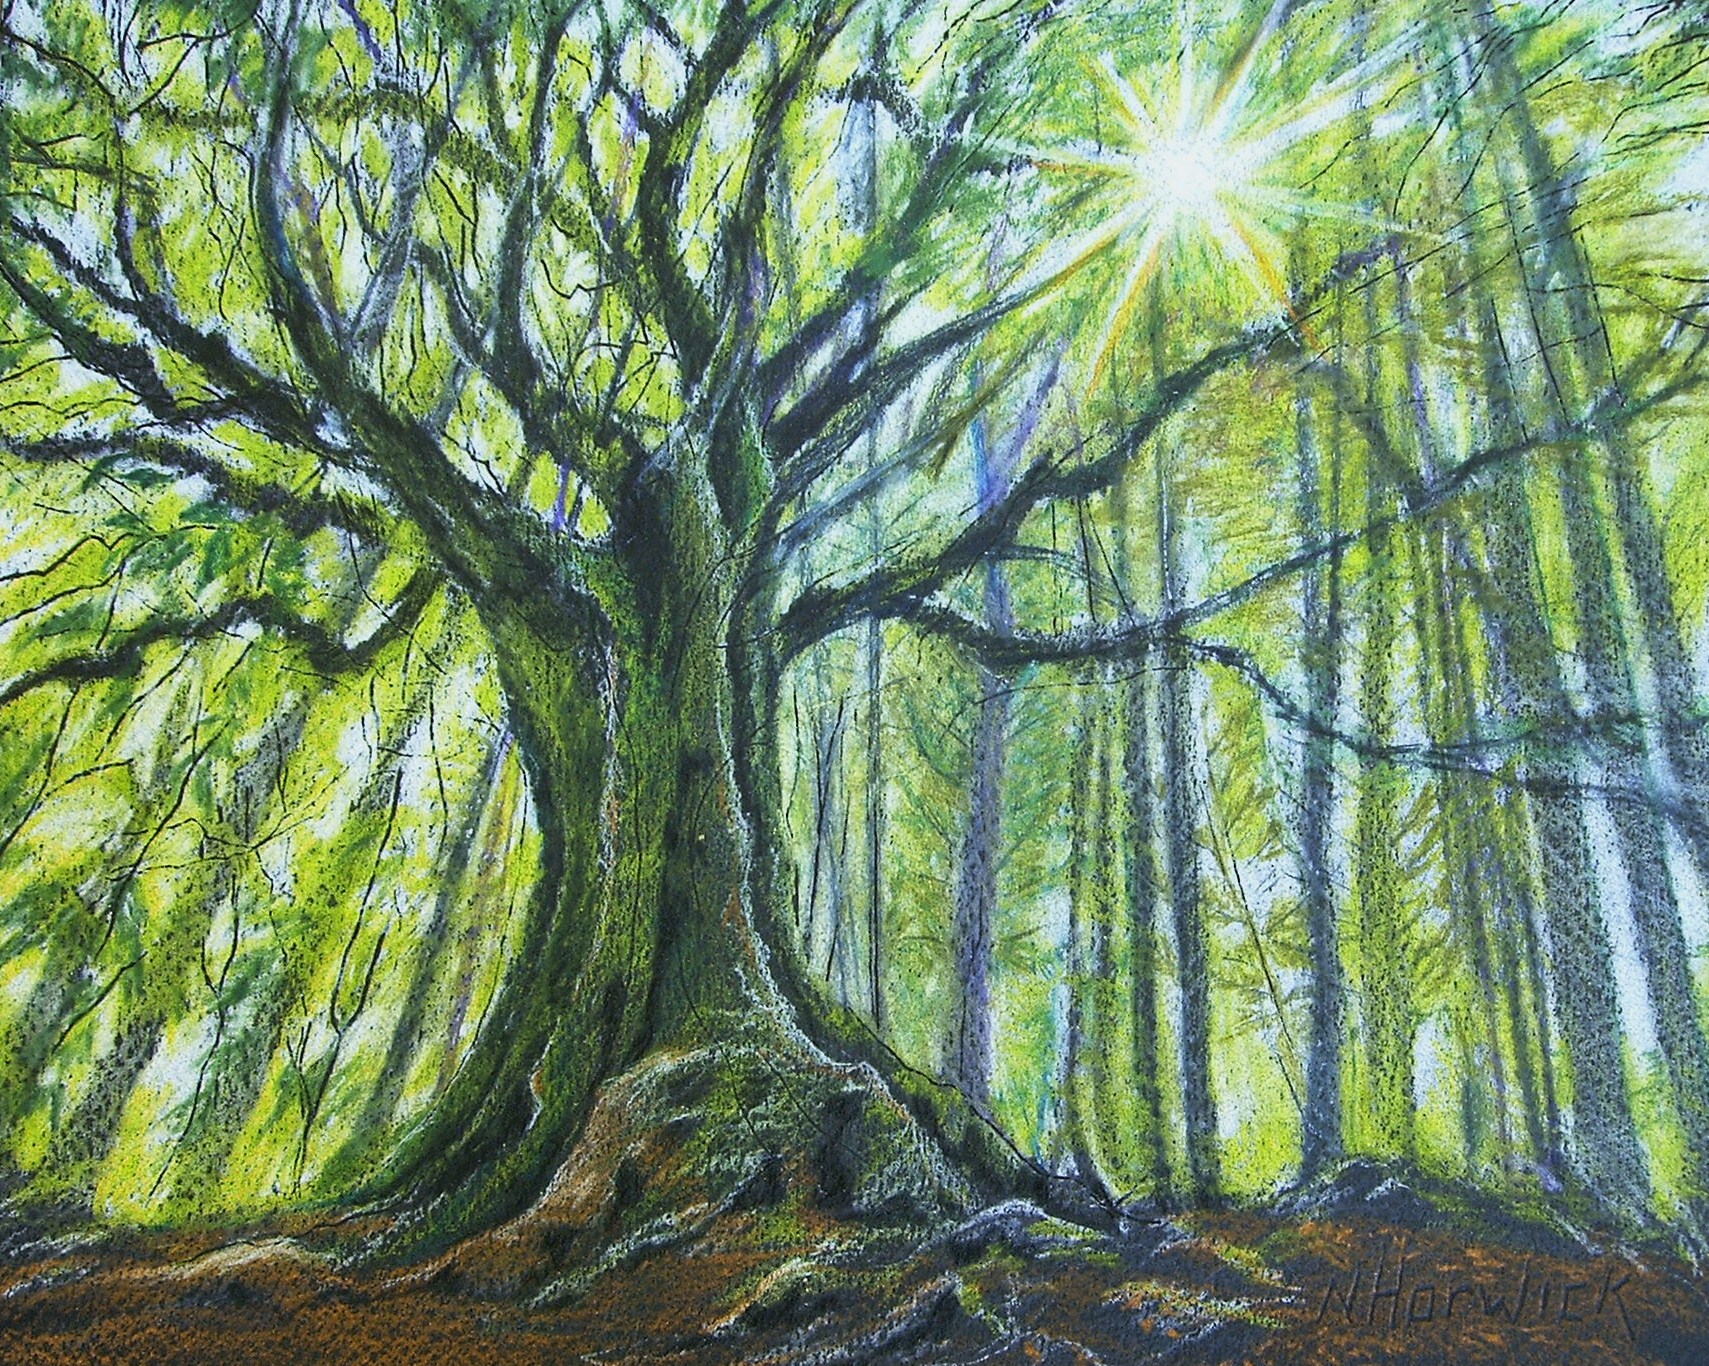
One of the most crucial aspects of a realistic forest drawing is creating a sense of depth. A true forest isn't just a flat wall of trees; it's a dynamic space with elements receding into the distance. "Your forest drawing needs a lot more trees in it to be a true forest, so let’s add some now." This is where layering comes into play.
- Foreground Trees: These are your main subjects, drawn with the most detail and darkest values.
- Midground Trees: "You can draw some tree trunks in the background between the two main trees to do this." These trees should be slightly less detailed and lighter in value than your foreground elements, indicating they are further away.
- Background Trees: "They will look similar to the trunks of the main two trees, but as you may imagine they will be much smaller as they are further away." These should be the lightest in value, often appearing as soft, indistinct shapes. This atmospheric perspective is vital for creating the illusion of distance.
By building your forest drawing up gradually, adding layers of trees and foliage, you can achieve a profound sense of depth. This technique allows you to "draw a forest with layers of trees that look like they’re whispering secrets to each other," creating a rich, immersive scene that draws the viewer in.
Mastering Tree Variety: Evergreen and Deciduous
A vibrant forest is rarely monocultural. Incorporating a variety of tree types adds realism and visual interest. "Learn how to draw a forest with evergreen and deciduous trees," as well as other elements like "a stream, and grass."
Evergreen trees, like pines and firs, have distinct conical or columnar shapes and needle-like foliage. Deciduous trees, on the other hand, have broader leaves and change dramatically with the seasons, offering a wider range of shapes and textures for their canopies and branches. To "master the art of drawing realistic forests," remember these "5 practical tips on textures, tree bark, depth, tree variety, and light/shadow effects." Focusing on tree variety means:
- Varying Shapes: Some trees are tall and slender, others wide and sprawling.
- Different Bark Textures: From the smooth bark of a birch to the deeply furrowed bark of an oak.
- Distinct Foliage: The way light catches the needles of a pine is different from how it interacts with the broad leaves of a maple.
Don't forget to include other elements like "a stream, and grass" to complete your "forest sketch." These elements help ground your trees and add to the overall narrative of your woodland scene.
Adding Life: Details and Textures for an Immersive Forest Drawing
Once the basic structure and layers of your forest drawing are in place, it's time to bring it to life with details and textures. This is where your drawing truly transforms into a "lush woodland scene." "Follow the simple steps, color the drawing, and add more details" to make your artwork pop. Details are not just about adding more lines; they're about creating visual interest and guiding the viewer's eye.
Foreground Details for Immersion
"Adding foreground details helps make your forest scene more immersive." These are the elements closest to the viewer, and they play a crucial role in creating depth and realism. They provide an anchor for the eye and draw the viewer into the scene. Think about what you would see immediately in front of you if you were standing in a forest:
- "Sketch bushes, shrubs, and grasses in front of the trees." These add immediate texture and break up the ground plane.
- "Draw fallen logs, vines, or rocks to give the forest floor more character." These elements tell a story, suggesting age, decay, and the natural cycle of the forest.
- "First, add another bush at the base of the previous tree." This technique of layering foreground elements helps to push the main trees further back, enhancing the sense of space.
These small details, often overlooked, are what elevate a good forest drawing to a great one. They create a sense of presence and invite the viewer to imagine themselves within the scene.
Light, Shadow, and Mood
Perhaps the most transformative element in any forest drawing is the careful application of light and shadow. Light defines forms, creates mood, and adds drama. As part of the "5 practical tips on textures, tree bark, depth, tree variety, and light/shadow effects," mastering light and shadow is paramount.
Consider the direction of your light source. Is it a bright, midday sun casting sharp shadows, or a soft, diffused light filtering through a misty morning? The way light interacts with the foliage, tree trunks, and forest floor will dramatically alter the atmosphere of your drawing. Use shading to create volume and form for each tree, distinguishing it from its neighbors. Shadows, especially cast shadows, help to ground your trees and connect them to the forest floor.
By carefully rendering light and shadow, you can evoke a specific mood—be it mysterious, serene, or vibrant—making your forest drawing not just a representation, but an emotional experience.
Exploring Different Forest Scenes: Beyond the Green Canopy
The beauty of forest drawing lies in its versatility. Forests aren't just green canopies; they come in countless forms, each offering unique artistic challenges and opportunities. Don't limit yourself to just one type of woodland scene. Consider exploring:
- Snowy Forests: "Learn how to make a snowy forest drawing, With 9 easy steps to follow, kids will enjoy making their own snowy forest on paper." This offers a chance to focus on stark contrasts, bare branches, and the reflective quality of snow. A "downloadable version of this snowy forest drawing tutorial" can provide a great starting point for this specific scene.
- Riverside Forests: Incorporating water elements, as seen in "Hand drawn landscape river forest vintage vector" or "Hand drawn landscape with river and fir forest, vintage vector illustration," adds dynamic reflections and a sense of movement. The interplay between land and water offers unique compositional possibilities.
- Misty or Foggy Forests: These scenes emphasize atmospheric perspective, with distant trees almost fading into obscurity, creating a mystical and ethereal mood.
- Autumn Forests: A riot of colors, from fiery reds to golden yellows, provides a fantastic opportunity to experiment with a vibrant palette.
Each type of forest scene allows you to practice different techniques and expand your artistic repertoire, ensuring your forest drawing skills are always growing.
Finding Inspiration for Your Next Forest Drawing
Sometimes, the biggest hurdle isn't the technique, but finding the initial spark of inspiration. Fortunately, the digital age offers an abundance of resources to ignite your creativity:
- Pinterest: "Find and save ideas about forest drawing on pinterest." This platform is a goldmine for visual inspiration, from realistic photographs to stylized illustrations. Create a board dedicated to forest scenes that resonate with you.
- Stock Photo Websites: Sites like Pixabay offer "200,159 free images of forest drawing" and "Free forest drawing images to use in your next project." You can "browse amazing images uploaded by the Pixabay community" for reference photos, compositional ideas, or specific tree types.
- Art Tutorials and Videos: Watching others create can be incredibly motivating. "How to draw forest scene step by step (very easy) || art video i use two brand of color pencil 1" or "easy mountain and forest scenery drawing by watching this easy scenery drawing" can provide visual guidance and new techniques.
- Nature Itself: The best inspiration often comes from direct observation. Take a walk in a local park or forest. Observe the light, the textures, the shapes. Even a quick sketch in a notebook can capture the essence of a scene.
"This list of the 25 best forest scenery drawing ideas is perfect for you" is a testament to the endless possibilities. Don't be afraid to combine elements from different sources to create a unique and personal forest drawing.
Beyond the Canvas: Monetizing Your Forest Drawing Skills
Once you've honed your forest drawing abilities, you might wonder if there's a way to turn your passion into profit. The answer is a resounding yes! As the data suggests, you can "Find tips on how to get paid to draw in the forest," which can be interpreted as creating and selling your forest-themed artwork. Here are a few avenues to explore:
- Selling Prints and Original Art: Online marketplaces like Etsy, Shopify, or even your own website are excellent platforms to sell prints of your favorite forest drawings. You can also offer original pieces to collectors.
- Commissions: Many people are looking for custom artwork for their homes or as gifts. Offer your services for personalized forest scenes, perhaps depicting a beloved local woodland or a stylized fantasy forest.
- Teaching Workshops: If you enjoy sharing your knowledge, consider leading local drawing workshops. Many community centers or art studios are looking for instructors, and your expertise in forest drawing would be a valuable asset.
- Online Tutorials and Content Creation: Just like the art videos mentioned in our data, you can create your own step-by-step tutorials, time-lapse videos, or even full online courses on drawing forests. Platforms like YouTube, Skillshare, or Patreon can help you reach a global audience.
- Licensing Your Artwork: Your forest drawings could be licensed for use on products like greeting cards, textiles, book covers, or even digital assets for games and animations.
Building a reputation as a "professional wildlife artist, author, and traveler" (or simply a skilled forest artist) takes time and dedication, but the opportunities to monetize your artistic talent are abundant for those willing to explore them.
Conclusion
From the initial sketch to the final details, creating a compelling forest drawing is a deeply satisfying artistic endeavor. We've journeyed through the essential tools, demystified the process of building depth through layers, explored the importance of tree variety, and highlighted how crucial foreground details and the play of light and shadow are to an immersive scene. Remember, the journey of artistic mastery is continuous, and every line you draw contributes to your growing skill.
Don't let the complexity of nature intimidate you. Instead, embrace it as an exciting challenge. Start simple, "follow the simple steps and illustrations to create your own forest sketch," and gradually build your confidence. The world of forest drawing is vast and full of creative possibilities. We encourage you to pick up your pencil, find inspiration in the world around you, and begin creating your own captivating woodland scenes. What kind of forest will you draw first? Share your thoughts and experiences in the comments below, and don't hesitate to share this guide with fellow aspiring artists!
- Riley Green The Country Star Who Proudly Stands As A Trump Supporter
- Delicious And Personalized The Art Of Custom Udon Creations
- Paige Vanzant Leaked Nudes
- How Old Is Chino Alex
- Exploring The World Of Roblox Condo Games A Thrilling Playground For Creativity
Forest Pencil Drawing at GetDrawings | Free download

3 Ways to Draw a Forest - wikiHow
Forest Drawing - How To Draw A Forest Step By Step
